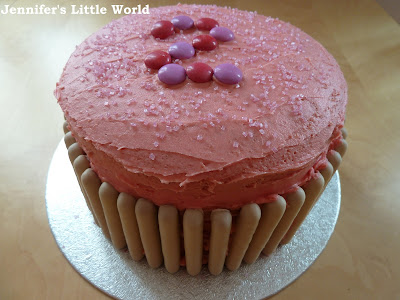
I used my tried and tested Victoria sandwich cake recipe, passed down from my Mum which is why it is in imperial measurements. I used double quantities.
Victoria Sandwich cake (double quantities - this will make four layers)
12 oz margarine
12 oz caster sugar
6 eggs
12 oz self-raising flour
Gel food colouring (I used two small tubes, with hindsight I could have done with some more)
Cream the margarine and sugar together, beat in the eggs one at a time then fold in the flour. Divide the mixture into four bowls and add food colouring to each mixture. Add a very small amount for the first layer, then increase each time until you have four bowls of batter in distinct shades. Bake in the oven for about 15-20 minutes at 180C.
It really helps if you can have a separate baking tin for each layer so that you can cook them all at once, I picked up a couple of sandwich cake tins in Asda for 89p each.
Remove the cakes from the tins and leave to cool. Then stack them up in order with a very small amount of icing in between the layers to stick them together.
To decorate the cake I used butter icing. I slightly increased the amounts from the recipe on the back of the packet and used 100g butter and 235g icing sugar creamed together, a splash of milk to thin it out and a little bit of red food colouring (a little goes a long way here!). This made the perfect amount to cover the top, insides and sides.
You don't need to worry too much about how the icing looks down the sides as it will be covered up. Two boxes of chocolate fingers was just about enough to go around the edges, and I finished with some pink glittery decorations and some Smarties.
Make sure to cut the cake with a nice sharp knife, and wait for the gasps of amazement as the inside is revealed!


That is so pretty! Sausage and I lobe to bake together, I might have to make this our next project.
ReplyDeleteThank you! It's a really good one to make with little ones, because you can let them choose the colours and they are fascinated with how it turns out!
DeleteOh my! Its cakes like that rhat make me wish Ted was a girl :) blue cakes are so difficult! :(
ReplyDeleteI made a rainbow cake for my son's birthday which he really liked (he's quite easily pleased though!)
DeleteLovely, I bet it tasted it too! Hope Mia had a good birthday x
ReplyDeleteIt was delicious, it didn't last long!
DeleteThat's really lovely. Looks so effective x
ReplyDeleteThat's so pretty, and I'm impressed with your skills at matching up the chocolate fingers; I always seem to end up with a half finger gap left at the end!
ReplyDeleteWell I could have done with another couple to be honest, next time I wouldn't squash them up together quite so much at the beginning!
DeleteI was so impressed with this! We tried it today. Unfortunately the oven broke...! Well, we'll definitely be trying it again.
ReplyDeleteThis cake sounds amazingly delicious. nice post. thanks
ReplyDelete