Pages

Tuesday 30 December 2014

My year 2014

As 2014 draws to a close it's natural to want to reflect on the year that has passed, and we've been lucky to have a lovely year. The children are growing up so fast and yet they are still so little. Christmas in particular this year was a magical time. We've had some wonderful holidays this year, we spent a week in Ibiza, a week in Snowdonia and finally had an amazing trip to Florida followed by a Caribbean cruise. Travel is really important to us as a family, and I know that we are very lucky to be able to have these experiences. We've also enjoyed lots of family days out, many of them using discount vouchers or in exchange for a review on my blog.

Highlights of my year 2014

Harry started in Year 1 in September and he's coming along so well. In particular he is well ahead with his reading and in just a few months I've noticed a massive improvement in his writing. He's a sensitive little thing and dwells on things that worry and upset him, and he loves cuddles. Mia will start school in September 2015, although she doesn't feel as ready as Harry did at this point. I still think of her as the baby! She's tempestuous and demanding and she never sits still, but she's caring, affectionate and her imaginary play has really developed this year which is a delight to watch.

I've done well with my crafting this year, finishing my long term cross stitch project which was a great achievement for me. I've also carried on having fun with Hama beads, and more recently we've entered the world of stop animation.

Highlights of my year 2014

It's also been a great year for my blog. I was so thrilled to find myself a Craft finalist in the MAD Blog Awards and I had a fantastic night out at the awards ceremony. I was also delighted to be once again shortlisted in the BiB Awards in the Craft category. I had a great time at Britmums Live 2014 and I'll be returning for Britmums Live 2015. I've also enjoyed some great blogger days out, with crafting events for DryNites and Hillary's and a lovely day at Butlins.

Highlights of my year 2014

I spend a lot more time planning and writing blog posts than I do promoting them so I don't really spend a great deal of time on social media, but one social media channel that I've done really well with this year is Pinterest. I'm currently a featured pinner which has been amazing and has seen my follower count increase by an incredible amount. At the time of writing I have over 240,000 followers and it goes up by thousands each day. I've still to work out how best to use it to promote my blog though, I have far too much fun just using it to gather my own ideas and inspiration!

My most popular blog posts from 2014 are all ones that were written ages ago, and they are all based around seasonal crafts and activities. My most popular post this year by a long way has been How to make a Nativity Play Shepherd's costume from a pillowcase. If I'd known two years ago how popular it would be I would have taken more photographs of the outfit in progress!

Here's to a great 2015!

Monday 29 December 2014

Book review - Travelling to Infinity by Jane Hawking

To coincide with the release of the biographical film The Theory of Everything, I've been reading Travelling to Infinity: The True Story Behind the Theory of Everything (affiliate link), the memoir written by Jane Hawking, Stephen Hawking's first wife, who was married to him for 25 years. The book goes into depth about their lives together as they raised three children and how Jane coped with their young family and a severely disabled husband, amid Stephen's growing fame.

When Jane and Stephen met he had only recently been diagnosed with motor neuron disease, and when they married he was expected to live for just a few more years. Jane writes a very honest account of their marriage and the struggles that they faced as his condition deteriorated.

It's important to realise that it's not a book about Stephen Hawking. It is written from Jane's perspective - her experiences, her feelings, her impressions of other people. Stephen himself is not depicted in a particularly good light. He is portrayed as stubborn, in denial about his health needs, and refusing to accept any kind of external help, despite Jane's struggles, until it became clear that there was no other alternative. 

It's surprising to learn just how little help from the state the family received. Much of Stephen's care and the equipment that made the family's life easier was privately funded. It wasn't until the release of his book, A Brief History of Time, published in 1988, that the family found themselves financially secure. Jane gives plenty of credit to those friends and family members that were there for her in difficult times, freely admitting that she would have been unable to cope without them.

I've not seen the film yet, but from the trailer it seems to be promoted as a love story, which I didn't really pick up from the book, I didn't feel that there was a great deal of detail about the romance between the two. It was clearly a supportive and loving relationship, but Jane did sacrifice a lot so that Stephen could go on to succeed, despite often feeling sidelined by his intellect and fame.

It's a long book, but I found it a pleasure to read with a flowing, honest and conversational tone. 
Although the book ends with the couple's eventual divorce after many years of strain, the book has been updated with several post scripts that bring it right up to date, and reflect the current, happier relationship between Jane, Stephen and their children. 

I received a copy of this book to review.

Saturday 27 December 2014

Christmas 2014

I hope that all my readers had a lovely Christmas? We have had a really nice few days, with lots of time spent together as a family. I would like to say it's been relaxing but the truth is that Mia especially never sits still very very long so it's been pretty busy even though we've not been out the house much!

We managed a family photograph this year, showing that this has definitely been the year of the Christmas jumper!

Family Christmas 2014

The children open their stockings first thing, and then we wait until everyone is dressed and has had breakfast before moving on to family presents. Most of their presents are smaller ones in their stockings, as we only buy them one main gift each from us. Ram bought me some lovely gifts this year that showed he had been listening to me - some washi tape and some Christmas jigsaws!

Harry's main present from us both was the Lego Cargo Train set. He absolutely loves it and he spent most of the day building parts of it. There is loads in the set, it's going to keep him busy for days. We spent a lovely hour or so in the afternoon sitting quietly at the dining table with him doing Lego and me doing one of my jigsaws. 

Family Christmas 2014

Ram was delighted with his Christmas present too, the Lego Millennium Falcon. It wasn't exactly a surprise as he bought it himself when he found it on offer a couple of weeks ago, but I wrapped it up! He hasn't started building it yet as the train set is going to be finished first, luckily he has a bit more time off work to get on with it.

Family Christmas 2014

Mia's main present was a Baby Annabell doll. She babbles, and you can feed her water from a bottle which makes her cry wet tears (she doesn't wet her nappy fortunately). Mia loves her. I find her a bit freaky though, I keep hearing her crying in the next room and thinking it's Mia, or catching sight of her on the floor in the corner of the room and having baby flashbacks, thinking it's a real baby lying there!

Family Christmas 2014

We don't do a traditional Christmas dinner, as I'm the only one that would eat it. We do some roasted vegetables (bought ready to go in the oven!) and we do various snack food for us and the children, with a pizza for Harry. As you can perhaps see from her plate, Mia's Christmas dinner consisted mainly of blueberries.

Family Christmas 2014

Another present from Ram was a cool GorillaPod tripod stand for my phone, which will come in very handy. I used it to make this time lapse video of our Christmas dinner. It's going to be a lovely memory to look back on in years to come, you can see the fidgety children jumping up and down and then Mia unfortunately being sick because she'd eaten too quickly! This is our first Christmas dinner where both children sat down for a reasonable amount of time and actually ate something without any screaming so that's a nice milestone!


Late afternoon we went over to my parent's house along with my brother and his wife, a sanctuary of soft music and mulled wine quickly turned upside down by our two excited children running about. Fortunately they each received some lovely gifts that kept them quite for a short while so that we could enjoy our tea!

Then we popped them in their pyjamas and came back home to put them to bed before a quiet evening in front of the television!

Wednesday 24 December 2014

Christmas 2014 at Cadbury World

Earlier in the year I ran a giveaway on my blog for tickets to Cadbury World. In return I received a family ticket myself, and last weekend we finally managed to fit in our trip! We didn't realise when we booked just how much would be going on at Cadbury World for Christmas, so I thought I'd share some of the fun that we had! We also visited Cadbury World at the end of last year, and you can read my review here.

This year at Cadbury World, the Christmas Celebration Weekends run from the end of November until Christmas, and all extra activities are included in the ticket price.

Christmas at Cadbury World

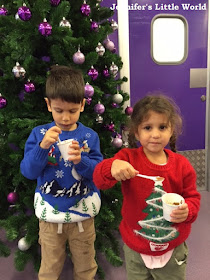
Our tour was booked for 2pm, but we arrived a little early to fit in some of the other attractions. We started our afternoon with a visit to Father Christmas. We had to wait for about twenty minutes in a small waiting area outside a cottage with reindeers, then we were given chocolate and led in to meet him. He was lovely, he had a long chat with the children and reminded them to go to bed nice and early on Christmas Eve and stay in their beds all night - very welcome advice! He also gave them each a nice teddy.

Then we headed for the pantomime - Snow White and the Chuckle Beans. It was pretty busy but there were still spaces just before it began. You can go to any of the shows and they take place every hour throughout the afternoon. It was a typical pantomime with plenty of cheesy jokes and audience participation, and the children loved it.

Christmas at Cadbury World

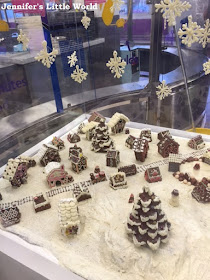
Then it was time for us to start the tour which takes you through the history of chocolate, the beginnings and development of Cadbury chocolate, an insight into the chocolate making process and plenty of nostalgia with a look at Cadbury advertising throughout the years. There were a few seasonal touches - all the staff were dressed in festive costumes and there were plenty of Christmas decorations, many of them made out of chocolate like the amazing Christmas tree at the top of this post! I find that some parts of the tour are more suited to older children but there was still plenty to entertain ours, and they particularly liked the Cadabra ride through a chocolaty land.

Although Cadbury World is not a tour of the chocolate factory itself, a section of the tour does take you through the Packaging zone where you can see chocolate being wrapped and packed. Unfortunately, as on our previous visit, the machinery wasn't running and so there was nothing to see. I've heard from others that this is often the case, which is a bit of a shame as the machines look really interesting and I'd love to see them in action!

Christmas at Cadbury World

Our favourite part of the tour is the Demonstration Area, where you are given a pot of melted Cadbury chocolate with your own choice of treat to add. While you eat it you can watch real chocolatiers at work and admire some fantastic chocolate creations like this beautiful chocolate Christmas village.

Christmas at Cadbury World

A new attraction has opened at Cadbury World since our last visit - the 4D Chocolate Adventure show - which is separate to the tour. Unfortunately on the day we visited the queues were just too long for the children to wait (upwards of an hour) so hopefully we'll be able to visit another time.

Christmas at Cadbury World

We easily filled our afternoon at Cadbury World and had a great time. If you are planning a visit it's definitely worth seeing if there are any special activities on.

I received our family ticket in exchange for my previous blog post, although with no obligation to blog about this visit.

Monday 22 December 2014

Sponsored post - Sharing some tips for family budgeting

I like to think that we are pretty good at handing our finances, and we are fairly good about making sure that we have some extra money to put by each month. Of course since having the children there are quite a few expenses that we need to consider, and so here are a few of my money saving and budgeting tips for families:


  • Make a list of all recurring expenses. These include regular monthly payments (for example gym membership, subscriptions, children's activities), regular yearly payments (for example house, car and travel insurance, car and boiler services) and regular payments that change from month to month (for example utility bills, holiday deposits, birthday presents). Remember to add in Christmas and birthday expenses too. If you don't know how much a payment will be each month, always over estimate.
  • Keep a close eye on special offers, particularly for expensive yet non-perishable items that you can buy in bulk, for example nappies, toilet rolls and washing powder. There are several comparison websites around that you can use to compare prices. Also look out for special offers on small toys like Lego or craft sets that you can stock up and have on hand for when your children are invited to birthday parties. We also usually buy birthday and Christmas presents for our own children in sales throughout the year.
  • When you receive a renewal quote for any kind of insurance, always shop around before renewing. It's almost always possible to find a cheaper quote, sometimes significantly so and often even with the same provider. Similarly, shop around for utility providers as switching can also save you a lot of money.
  • Make the most of loyalty cards and cash back sites. We go on lots of family days out, and many of them are completely free thanks to the points that we collect when we do our supermarket shopping.
  • You can save a huge amount on things for babies and children by shopping second hand. Harry still plays with the roomful of wooden train track that we bought him for Christmas three years ago - three huge boxes cost us just £10. Then when your children grow out of toys and clothes, if you have kept them in good condition with all the pieces together you can make some money back by selling them back on.
  • Check bank and credit card statements regularly to keep on top of your finances. It's also a good way to remind yourself of those recurring payments that you might be making and not seeing any benefit from, for example an unused gym membership or unread magazine subscription.
  • When it comes to savings, we've always found it a good idea to set a regular amount each month to save, and budget for it in the same way as other regular expenses. If you set up a standing order to your savings account then the money will be taken out automatically and you won't forget about it or be tempted to give it a miss one month.
  • It's important to save to make sure that you have an emergency fund with a decent amount of money in it. If possible, make this an account which is harder to access, so that you aren't tempted to dip into it. This money should be kept for high and unexpected expenses, for example a new boiler or repairs to the car or house. We use our ISAs for this. Then keep a smaller amount of savings easily accessible for those surprise expenses that crop up from time to time, for example a school trip or replacement household appliance. 

If you are saving money for a house deposit, you can check how far your savings will go using a mortgage calculator. You can use the calculator to play around with the figures, for example by changing the amount that you have available for a deposit and adjusting the term of the mortgage, so you can see how far your savings will take you.

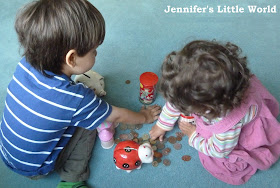
Children putting money in money boxes

This is a sponsored post.

Sunday 21 December 2014

Review - Hue Animation Studio kit

Over the last couple of weeks we've been having a lot of fun learning to use a stop animation kit from Hue Animation to make our own stop motion videos.

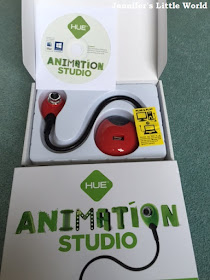
The Hue Animation Studio kit contains a USB camera with microphone (available in several different colours), the software that you need to install it, and a 60 page book packed with ideas and projects to start you off. Online you can find further resources to help you, including tutorials and a gallery of films created using the equipment, including all those that are featured in the book.

Review - Hue stop animation kit for children


Harry is almost six years old, and I was amazed at how quickly he picked it all up. He watches a lot of stop animation videos online, and for some time he has been keen to try making some of his own. The kit was very easy to set up and install, and we found it super intuitive to use. We browsed the book for some ideas, although Harry had plenty of his own! 

Harry's first video - Treasure Food


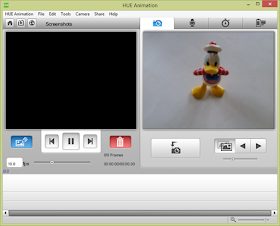
Harry decided that his first video would feature Donald Duck looking for treasure. When you open the software, this is what you see, with two main windows. The window on the left shows the video that you've made so far and the window on the right shows what the camera can see. 

Review - Hue stop animation kit for children

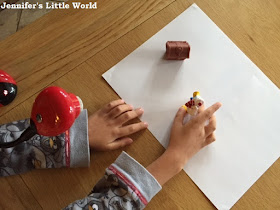
This is how Harry set up for his first video. It's taken on the dining room table, with a sheet of white paper for a background. The camera head is really flexible and sturdy so you can take videos from all angles.

Review - Hue stop animation kit for children

When you have set up your first shot you click the camera button on the screen, and the picture that you have taken will then appear on the left. You move your item very slightly then take another picture, and so on. Your previous image remains as a ghost image in the right hand window (you can see an example of this in my screenshot later in this post) which is really helpful as you can see how much you need to move the item. It also means that if something terrible happens and you knock the camera or your set up, you can recreate the shot easily. As you go along you can use the Play button to watch your video, and you can easily delete single or multiple shots if you make a mistake.

Review - Hue stop animation kit for children

It's really quick and easy to do and Harry managed with ease! Once you have made your video you can add sound which is also really easy. To record your own sound you just click the red button and record your audio while the video plays, so you can easily time it. You can also add in a separate audio file, for example a song from your collection or music that you have downloaded. The audio track appears underneath the video track and because it is displayed graphically you can adjust it to match the video. 

Review - Hue stop animation kit for children

For his video, Harry chose to record himself speaking in a suitable Donald Duck voice and I think it works really well! Bearing in mind that he did it almost entirely by himself I think it's fantastic. Here is his finished video:


We connected the kit up initially to our desktop PC but I'm planning to put it on our laptop as it is a bit restricted. Harry is desperate to make a video where it looks as though he is flying (by taking a series of shots while he is mid jump) but that really needs to be done outside, so having it connected to a laptop will make it much more flexible.

Harry has been really creative with the kit so far, and he literally spent an entire morning playing with it. He moved it as far away from the PC as he could to make videos in the living room of his toys moving around, Duplo building itself, making a stuffed duck waddle across the floor and so on. He even ate all his lunch for once so that he could film it being eaten 'by itself'. He's had a brilliant time and I've loved watching all his videos!

Stop animation Hama bead heart


When the children were out of the way I had a go on my own, turning to my favourite Hama beads! I had an idea in mind before I started, and this was my setup:

Review - Hue stop animation kit for children

The paper is stuck firmly to the table with BluTak and the pegboard is also stuck down in position. Next time I need to pay more attention to the lighting, I was working on a day with intervals of sunshine and cloud and I need to adjust the setup somehow to make it more consistent. I placed the beads on the pegboard, then I removed the heart to iron it before making it float away out of shot.

Review - Hue stop animation kit for children

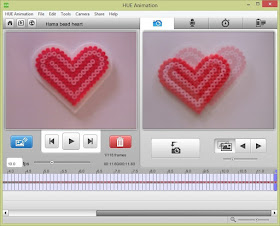
This screenshot was taken just after I ironed the heart. The picture on the left shows the last picture that was taken, with all the beads in position on the board. The picture on the right shows what the camera can currently see, my ironed heart. You can see the ghost image of the previous picture, enabling you to line up the object and make sure that it is in the exact same place.

Then I decided to add some music. I have just discovered the YouTube Audio Library, with a reasonable selection of free music that you can download and add to your video projects. The track that I used for the Hama bead heart video is called Rustled Feathers. The whole video took me about half an hour to make, including choosing the music, and I'm very proud!


We are looking forward to lots more fun experimenting with the software. I think it's great value for money, and I've loved watching Harry see how creative he can be.

We were sent the Hue Animation software in exchange for a review. The Hue Animation Studio kit currently costs £49.95.

Saturday 20 December 2014

The Orlando Science Center, Florida

Most flights from Orlando back to the UK depart in the early evening, so once you've checked out of your accommodation in the morning you have a whole day to fill before you need to head to the airport. We've always found it a struggle to know what to do, but this time Ram found us a fantastic place to visit - the Orlando Science Center.

The Orlando Science Center is located close to I4, about a half hour drive from the International Drive and main theme park areas, but it's not difficult to find. There is a large multi storey car park next door with a bridge to the museum, and it cost us just $5 to park. The museum is spread over four levels, and we started at the top and worked down.

Digging for dinosaur bones at the Orlando Science Center

Our first stop was the dinosaur dig area Jurassic Ridge, which was brilliant. The 'mud' was tiny rubber chips, and there were plenty of buckets and paintbrushes for the children to excavate with while the adults had a sit down. Younger ones can dig about happily, while older children can identify the fossil skeletons using the field guide provided, and use tape measures and cones to map out the area. There were also plenty of real dinosaur skeletons to see.

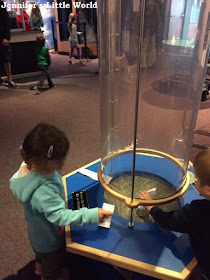
Child learning experiments at the Orlando Science Center

We made our way through the different rooms, and there was so much to explore in each room. We are quite used to visiting science museums with the children, but there were lots of exhibits and experiments here that we'd not seen before.

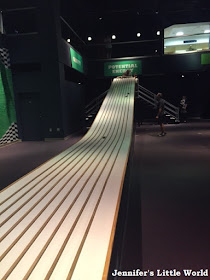
We spent a lot of time making paper planes and helicopters to fly in a wind tube and moving a jet of air over a sandy landscape to see how it changed. We also enjoyed learning about building in earthquake areas, with an earthquake simulator and shaking tables to try out different building methods with blocks. We raced cars down a massive slope...

Long ramp for racing cars at the Orlando Science Center

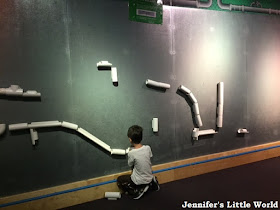
...and built tracks with pipes along the wall to send balls down.

Child playing with pipes along the wall

At the very bottom of the museum there is a fantastic Kids Town area. The highlight was an orange farm and factory - plastic oranges could be harvested from trees, transported to the factory by tractor power, boxed up in the factory and then sent back to the trees via tubes - it was so much fun! There is also a nature area with alligators and turtles, and a room all about bats with real live bats as well as interactive educational exhibits.

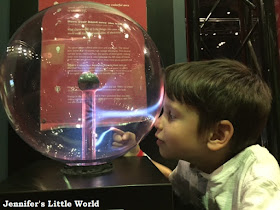
Child learning about electricity

There was a lovely gift shop there too. Mum bought some cool things for the children and we bought some kinetic sand which the children had enjoyed playing with elsewhere in the museum. It did cause our suitcase to be opened by security somewhere in the airport, but luckily it made it back!

Our only regret is that even though we spent most of the day here we could have stayed for so much longer. If we are lucky enough to find ourselves in Orlando again we will definitely be coming back!

Admission to the Orlando Science Center is $19 for adults and $13 for children, with children aged 2 and under free. The entry price also includes one Hollywood Movie if you have longer to spend there.

Friday 19 December 2014

Simple Christmas crafts using ribbon

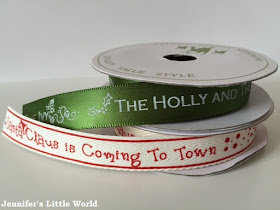
A little while back I received some gorgeous ribbon from Fantastic Ribbons to use for some Christmas crafting. You can see my Hama bead and ribbon tree ornaments here using the dark green ribbon, and this week I've been crafting with the second ribbon that I received - 15mm Twill Ribbon "Santa Claus is Coming to Town" priced at £2.50 for a 4m roll. It's a lovely ribbon, nice and thick, and I wanted to come up with ways of using it that showed off the festive text.

Christmas crafts using ribbon

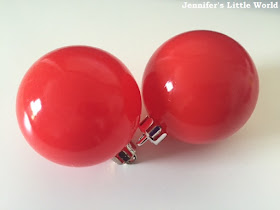
I started with some simple baubles. I bought these plain baubles in Ikea a few years ago in the sales after Christmas. They were very cheap, and they aren't particularly nice as standalone baubles, but I knew that they would be easy to upcycle.

Christmas crafts using ribbon

I used fabric glue to stick a length of ribbon around the bauble and used some thinner contrasting green ribbon to make the hanging loop.

Christmas crafts using ribbon

Then I used some of the ribbon to decorate some little gift boxes. They are made from an old cardboard tube, covered in coloured Duck Tape (or you could cover with festive paper or paint them) and then the ribbon is used to decorate the ends, glued down with fabric glue. Once filled with small treats they can be stapled shut and handed out.

Christmas crafts using ribbon


Finally I used the ribbon to tie the ends of our home made Christmas crackers. The ribbon looks lovely (and of course it can be removed and reused again for years to come!)

This particular ribbon would also be a great choice for wrapping any little gifts from Father Christmas, in particular I think it would be perfect for tying the top of a small fabric gift bag. If the children hadn't already seen it, I'd also be using it to wrap any little gifts that our Elf on the Shelf brings for them!

I received two rolls of Christmas ribbon to review.

Wednesday 17 December 2014

Making Gingerbread houses with the children

This is the third year in a row that I've been making gingerbread houses. I remember how much I worried about making my first gingerbread house, and how proud I was of it! This year and last year instead of one I have made two smaller houses, so that the children can decorate one each.

I use a fantastic recipe from Tesco - How to Build a Gingerbread House. On the website you can find a video which is really helpful to watch first, and some templates that you can use for the pieces. To make two smaller houses I print the template at 75% of the size and the recipe makes enough gingerbread for the two houses along with extra for about eight gingerbread men or other decorations like little trees for the house.

The recipe is pretty straightforward. I never have any treacle so I just substitute golden syrup which seems to work fine. I also find that I don't need to add quite all of the melted butter and sugar to the dry ingredients, so I add it gradually and mix as I go. I make the gingerbread house pieces the day before and then store them overnight in a cake tin, separated by pieces of baking paper. This way they are nice and firm for when you come to assemble the house.

Making gingerbread houses with children

A trick that I learned from the video is to roll out the gingerbread directly onto the baking paper and cut the pieces out, then move the whole thing onto a baking tray. This means that the pieces don't become misshapen. You need plenty of baking paper!

I do find that the larger pieces that make up the roof need a little longer to cook than the window pieces. You need to remove the pieces from the oven as soon as they have started to brown slightly and then leave them to cool. They will still be quite soft when they first come out the oven, but they do harden up.

The windows are made using crushed boiled sweets, I find that I need about six large sweets for all the windows in the two houses. For a larger house you need one boiled sweet which you can place whole in the centre of each window before putting the pieces in the oven.

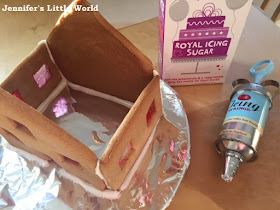
The next day it's time to assemble the house. The smaller houses each fit nicely onto a dinner plate, covered with tin foil. I use Royal Icing which you can buy in powder form and just add water. I don't follow the instructions exactly as I find it makes the icing too runny. I find about 300g of icing sugar and 40ml of water makes a nice thick icing, but just add the water gradually and keep mixing, it's best if you can use an electric mixer. This makes loads of icing, enough to assemble the houses and with plenty left over for decorating.

Making gingerbread houses with children

I use an icing syringe to pipe the icing onto the pieces, making sure to stick it to the plate at the bottom. Assemble the walls first and leave to set before adding the roof (it takes about 10-15 minutes to set firmly enough). I start with the back piece, icing a line along the plate and propping it up using a glass. Then I add the sides, again icing along the bottom to hold it in place. Then finally add on the front piece. I fill in any gaps with plenty of icing and if necessary I ice along the bottom sides again so it's nice and sturdy. Adding the roof is a little more tricky and you may need to hold it in place for a few minutes so that it doesn't slide off!

Making gingerbread houses with children

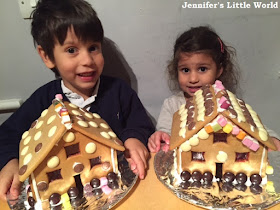
I make the gingerbread houses myself up to this point, as you do need a little bit of concentration! Then I let the children loose to decorate them. I find that chocolate buttons are good for decorating as they are light and stick down easily. Dolly mixtures add a bit of colour, and as I'm personally not a big fan of jelly sweets I always choose something that's nice and chocolatey too!

I helped the children decorate by piping them lines of icing that they could stick the sweets onto. They were so pleased with their finished houses!

Making gingerbread houses with children

The tradition continued! Here are our 2015 Gingerbread Houses.

Monday 15 December 2014

Playing miniature golf at Disney World Resort, Florida

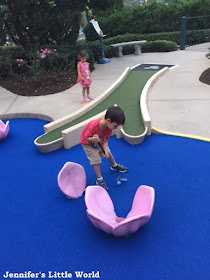
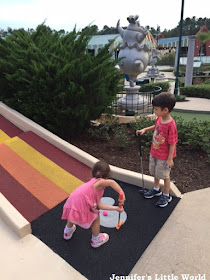
There are four different miniature golf courses at Disney World Resort in Florida, and on our most recent holiday we managed to play on three of them! I thought I'd share a little bit about the different courses and the fun that we had. Entry to the miniature golf courses was included in the park passes that we bought for our holiday so it's worth checking your tickets, otherwise you can pay separately when you arrive. At time of writing each course costs $12 for a child and $14 for an adult.

Playing miniature golf at Walt Disney World Resort

On arrival you are given a time slot. We played early evening or first thing and never had to wait more than five minutes or so to play, but it might be worth checking the wait time in advance if you are visiting in peak season or at a busy time of day.

Fantasia Gardens Miniature Golf


Fantasia Gardens Miniature Golf is located at the Walt Disney World Swan Hotel, but has its own entrance and car park. Here you can also find the Fantasia Fairways Miniature Golf Course which we've not yet tried, as it looks a little more difficult for our young family. These two golf courses are based around Disney's classic Fantasia film and each course has 18 holes.

Fantasia Gardens Miniature Golf is situated a little apart from the main Disney parks, so it feels pretty quiet and relaxed. It's close to Hollywood Studios though, so you can see the Tower of Terror in the background and if you are there in the evening at the right time you can even see the Fantasmic fireworks in the distance.

The course is a little deceptive. Some of the holes look very difficult but there are often hidden routes which the ball will fall through if you aim it in the right general direction. Sometimes sending the ball along the correct ramp or tunnel will send it directly into the final hole! There is also sometimes a bit of helpful sloping going on to direct the ball where it needs to be, so it's great for little ones.

Fantasia Gardens miniature golf

There is often both an easy and a difficult way to complete the course. For example the hole in the picture below has a steep ramp to shoot the ball up, but if you don't have enough power to get it all the way to the top it will fall through a lower hole in the ramp and still come out near where you need it to be.

Fantasia Gardens mini golf, Disney World Orlando

Often, sending your ball the correct way through an obstacle will cause something to happen, for example music plays or there is a quick spray of water. Many of the obstacles are also moving which makes them more interesting and fun. There is one hole which is located in a dark cave, and when you send the ball through it triggers a dragon's roar and a scary shadow is projected onto the wall. This one was a little bit scary for the children - we had to run them through it with their eyes closed!

Playing mini golf at Disney World

Winter Summerland Miniature Golf


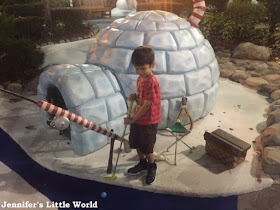
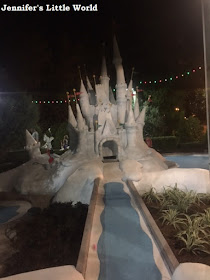
The Winter Summerland Miniature Golf course is located at Disney's Blizzard Beach Water Park, but it is completely separate and opening times are different to the water park. There are two courses here - the Winter Course and the Summer Course - and each is a different 18 hole experience with plenty of fun obstacles. They are both pretty similar in terms of difficulty, and some of the theming is mirrored, for example there is an ice castle in winter and a matching sandcastle in summer.

The story behind the courses is that Father Christmas built a vacation destination for his elves, divided into two parts. One part is for those that wanted to enjoy the sunshine, and the other for those that preferred the chilly North Pole. Both areas have a Christmassy theme to them, finishing in a beautifully decorated Christmas area.

If you only have time to do one of the courses then there isn't much to choose between them, so I would choose the quietest one. Both courses are fairly compact so I would imagine that it might feel a little busier than that Fantasia course when there are more people around, but that also makes it a a little more suitable for younger children as it's not too overwhelming.

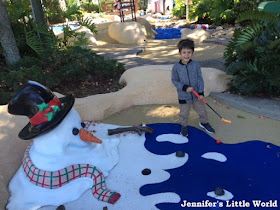
The Winter Course

The Winter Course features ice and snow. There are a few things to watch out for, in particular a cheeky snowman that seemed to squirt water completely randomly and was difficult to dodge!

Blizzard Beach winter mini golf course

The children loved trying to hit the ball through the ice castle, which has a moving drawbridge so you need to time your shot. It's not too difficult though!

Blizzard Beach winter mini golf course

The Summer Course

We visited the Summer Course on a sunny day, but there is plenty of shade around the course from the Florida sun, and also a few places to sit while you wait for your turn.

Blizzard Beach mini golf summer course

Above you can see the sand castle above that is the same as the ice castle, and on the hole below the cheeky snowman has melted! Again, we found here that the courses often felt strategically ramped to send your balls the way that they are supposed to go, which is really good for little ones. This doesn't mean that it's not challenging for adults though.

Blizzard Beach summer mini golf course

The final section of the course is beautifully themed with Christmas decorations and a festive fireplace, and at the very end you send your ball through a computer screen to receive a special message from Santa. 

Playing miniature golf at Disney World Resort, Florida

After finishing playing each of these courses, both children were given a souvenir Mickey golf ball to take home which was a lovely touch!

Harry (5) and Mia (3) managed really well with all of these miniature golf courses. Although some of the holes are a little more challenging, they didn't mind accepting a bit of help and they loved it when sending the ball a particular way caused something to happen. Even if you think that your children are too young to play miniature golf I'd still recommend giving it a go as it's a lot of fun even if they don't manage it all by themselves! With younger children I'd probably recommend starting with the Winter Summerland courses as they did feel a little easier and the theming felt more geared towards little ones. And definitely choose this one if you are visiting around Christmas time!

Sunday 14 December 2014

Christmas crafts using festive Duck Tape

Recently I've been crafting with Duck Tape. Duck Tape has been around for years, and it's a tough, very strong tape that can be easily torn and yet sticks firmly to almost anything. The film is combined with cotton, meaning that it's flexible, and can also be stuck together to produce a fabric type material.

Christmas crafts using Festive Duck tape


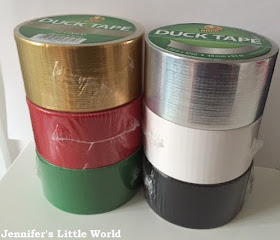
Duck Tape is available in a range of colours and patterns, and this Christmas I was sent some festive rolls to use for some Christmas crafting. I received gold, silver, red, green, black and white rolls.

Christmas crafts using Festive Duck tape

Here are some of the ways that I used the Duck Tape this Christmas:

Christmas card holder and display


This Christmas card holder is so easy to make from Duck tape. It can be stuck across a mantlepiece, a door frame, bookshelves, the wall - anywhere! You just need two long strips of Duck tape. Place one strip sticky side up across a long table and then stick a second piece the same length down on it, leaving about a centimetre of the sticky side showing. Fold the bottom of the tape down under the back so it is only sticky on one side. Then attach it to your chosen surface using some more Duck tape.
Christmas crafts using Festive Duck tape

As you receive a card you can attach it to the tape from one corner where it will be held securely. The Christmas cards will easily peel away when you take them down, so that you can keep or recycle them.

Christmas crafts using Festive Duck tape

A mat for Santa's treats on Christmas Eve


This mat for Father Christmas is made from a piece of cereal box covered in white Duck Tape. Then I made some stripes across the bottom left with the coloured tape. One of the strips is folded over to make a small pocket where the children can tuck a letter for Santa. I cut out a green circle from two pieces of tape stuck together for a mince pie. I must admit that it wasn't as easy as I had hoped to cut out the circle but I think that it looks okay. Then there is a rectangle for the carrot. This will go by the fireplace on Christmas Eve!

Christmas crafts using Festive Duck tape

Duck Tape and ribbon gift boxes


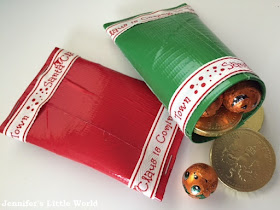
These small, colourful gift boxes are made from old toilet roll tubes. The tube is covered in Duck tape, decorated with some festive ribbon and then stapled together at one end. Small treats are placed inside, then it is stapled shut ready to give to the recipient.

Christmas crafts using Festive Duck tape

Ribbon for decorations and wrapping


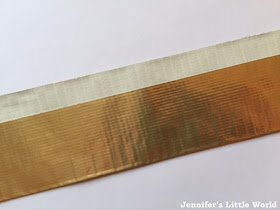
The gold and silver Duck Tape in particular can be used to make some lovely stiff ribbon. You just need two long strips. Place one strip sticky side up on a table then place another strip down. It can be quite tricky to line up the strips, so I placed one slightly higher up and then folded over both sides. The Duck tape is much easier to cut when it is covered on both sides, so you can cut a nice triangle into the ends. I used the Duck tape ribbon to make some bows for the Christmas tree, you could also use it to wrap presents, to decorate around the sides of you Christmas cake, to use on a wreath, or on all sorts of other festive decorations.

Christmas crafts using Festive Duck tape

You can also buy Duck Tape in a huge range of colours and patterns. You can see some of the cool patterned tape that I bought on holiday recently. It also has loads of practical uses around the home. I used some to mend our cardboard play house and Harry's book bag!

I was sent a selection of Duck Tape to use for these crafts. A roll costs around £5.