This set lets you make a checkerboard cake using either two or three colours or flavours of cake batter. I must admit that when I received the pans it wasn't quite what I was expecting. The set contains three large cake tins and one plastic divider. The divider does not go in the oven. Instead you need to place it inside each cake tin in turn, fill it with the different coloured batter, then remove it, wash it, and use it for the next pan. This means that quite a lot of the batter is wasted, and also means that the layers of cake don't turn out very neatly.
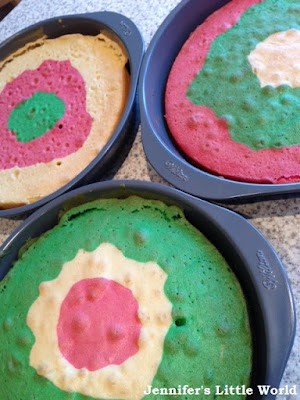
The cake tins are quite large, and the instructions only gave a vague indication of how much batter would be needed to make the cake. I doubled up my usual Victoria sponge recipe and that made enough, although a bit more wouldn't have hurt. I was sent some Stork margarine to use in my baking, which I am happy to recommend as I always use Stork for my cakes. This is how they went into the oven:
And this is how they came out. As I expected, the batter spread out quite a lot while they were cooking.
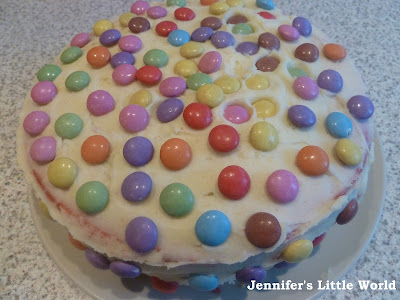
I carried on though, stacked them up, and the children helped me to slather the cake in butter icing and Smarties.
Looking good! But of course we really need to see what the cake looks like inside! Fortunately, it actually didn't turn out as badly as I was expecting. It doesn't look as good as the one on the box, but then I didn't expect it to. There is a definite checkerboard effect in there, and most importantly the cake tasted delicious.
I'm not sure that this was ever going to be the best way to create a tidy checkerboard cake. Next time I'm going to do it a little differently. I'm still going to use the three cake pans, because they are the perfect size for this cake. Instead of using the dividing ring, I'm going to bake each layer in one colour, then use a cutter or template to cut the three cakes into rings and layer them together that way. You can find some instructions for that here - Checkerboard cake tutorial - although mine will just have three layers. I'm hoping that this will make the finished cake a lot neater.
So not bad for a first try, I'm glad that I practised first, and I'll let you know how I get on with my next attempt!
I received some Stork margarine to try in my baking, with no obligation to blog about it, although I am very happy to recommend it as I always use Stork margarine for baking! The cake tin set was a gift, Amazon links are affiliate.


Wow, Jennifer, that looks AMAZING!!
ReplyDeleteThank you!
Deletethat is very cool!!! not seen that effect before
ReplyDeleteYou did a fantastic job and I always wondered how people did it when I saw the pictures.
ReplyDeleteOMG that looks amazing! need to try this! x
ReplyDeleteThank you, good luck!
Delete