Thursday 23 June 2022

Working through my fabric stash

Recently I wrote about my fabric stash, and I've also shared some of the projects that I have been working on. I thought I'd do a little round up of some of the things that I've made so far!

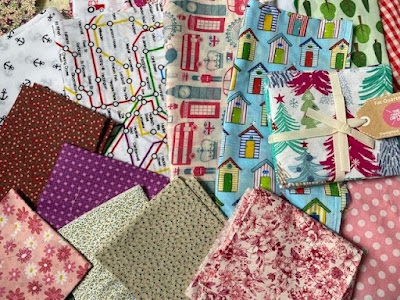
My fabric stash

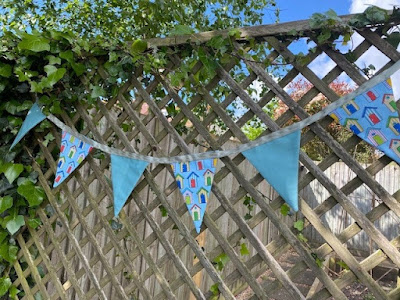
The garden bunting was my first project. It hangs at the entrance to my vegetable patch and I love seeing it when I go in to do the watering. I know that it won't last forever but I'm hoping it will make it through a few seasons.
 
Beach hut bunting for the garden

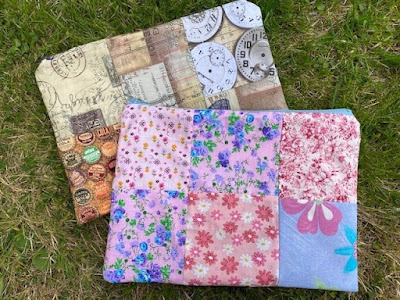
These were my first large zipped pouches and I'm very pleased with them. They make great project bags, and use up scraps of fabric which I really like to look at. The flowery one is for Mia, she uses it to take her iPad and notebooks round with her if we are going visiting. I am using the other one for my current long term cross stitch project.

Patchwork fabric large zipped pouches

I've already shared these next projects - the first is a small fabric storage bin. I'd like to make more of these although I will need to buy some more interfacing. Interfacing isn't too expensive, but I want to work with what I have already first! These are a pretty way to store things, and I might also use some of my less loved fabric to make storage bins for inside drawers.

Small fabric storage bin

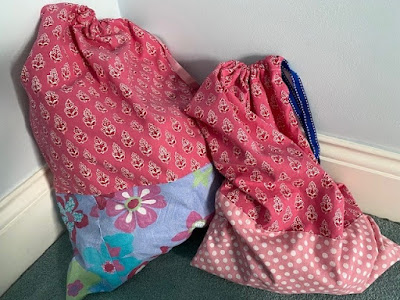
Secondly, these laundry bags were a great way to use some of my larger pieces of fabric. They look a bit mismatched but they are very practical, I've been using the smaller one to store the dirty clothes for my weekly white wash instead of having a heap inside the wardrobe. They are very sturdy and will be great for travelling as they can be washed when we get home.

Large fabric laundry bags for travel

Then I made a third patchwork zipped pouch which you can see in the picture below. I'm using to store my current craft project. It's made using smaller strips of fabric, I sewed a selection of long strips together to make each side, then cut each piece in half and swapped them over (I think it's called strip piecing if that description doesn't make sense!). It makes it look more complicated than it really is!

Two large zipped fabric pouches

I really love my beach hut fabric and I wanted to use it for something for the home, so I decided to attempt a fabric bowl. I used this tutorial Charmed Fabric Bowl and it's very simple, basically you just cut out a circle of outer fabric, interfacing and lining fabric, sew them together then gather the edges to pull it up into a bowl shape. You finish the bowl by sewing around a long strip of fabric to hide the gathers at the top. I didn't manage to get the neatest finish on this bowl, but it looks fine from most angles!

Simple fabric bowl attempt

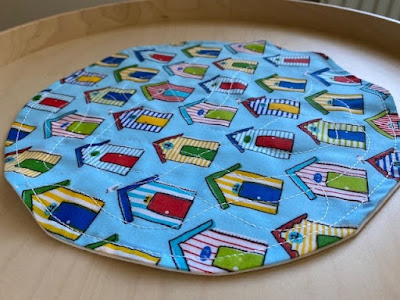
While making the bowl I really liked how the fabric looked when it was sewn together in a circle before it was gathered up. So I decided to make a small circular mat for my round table. There's no interfacing in this one, it's just two circles of fabric sewn together. But then I decided to try stitching some random loops across the top to practice using the sewing machine for curves. I was really pleased with how well it worked!

Small round fabric placemat with beach hut fabric

I'm rather impressed with how well I've managed with these projects. I've learned some new techniques - how to use a zipper foot, sewing curves, simple patchworking. I've also become a lot more confident with using my sewing machine, for example how to thread the machine and how to wind bobbins.

I still have an unopened Christmas print fat quarter bundle which I bought with a voucher last year. I have a few ideas but I'm a bit nervous because I really like the fabric! I'm wondering about a patchwork table runner or place mats, or perhaps some way of incorporating a display for the gorgeous Christmas cross stitch kits that I need to get on and finish. 

I also now have a bag of fabric scraps which need using up, so I can see some more patchwork projects in my future!

Monday 20 June 2022

Some of my favourite Instagram accounts for beachcombers

I've been trying to stay away from social media a little bit lately, but I love a quick Instagram binge every few days. I've had a good sort through the accounts that I follow and I'm very happy with my current Instagram feed. I follow lots of crafters, and people that post pretty things like fabric creations, nice views and lovely cakes. 

Recently on my own Instagram account I've been posting lots of pictures of the things that I've found while beachcombing, and when choosing some hashtags I came across some accounts which were posting pictures that I loved, so I thought I'd share a few accounts I've been following recently in case you are also a beach and sea enthusiast!

I discovered smartie_lids_on_the_beach when I was sharing some beach plastic that I had found, and it inspired me to make my own beach plastic collage. Michelle is an artist from Cornwall and she makes beautiful art using the discarded beach worn plastic that she finds on local beaches. I love looking at the pictures of her colourful collages.


tidelinetrashandtreasures is another account sharing colourful beach plastic art, and this one is particularly relevant to me because Carmen is local and visits the same area of beach that I do. I also just saw that they sell their gorgeous work at the farmer's market that I visit from time to time, so I will look out for them the next time I am there!


lorileethomasart also shares beach art, but also using natural objects and lots and lots of sea glass. I always hunt for sea glass and I have a modest collection but nothing like this! I would also love to find some sea pottery one day.


Finally I wanted to share lightkeepersdaughter709. This account also shares some gorgeous sea glass and sea pottery.


I love seeing wonderful beachcombing pictures popping up in my Instagram feed. It makes me want to get back down the beach and start hunting!

Thursday 16 June 2022

A summer morning walk along the beach

This morning I had to make an annoyingly unscheduled trip into town to return a speedily broken piece of plastic tat to Claire's Accessories. I dropped the children to school at 8.15am, and with the shop not opening until 9am I decided to spend my wait having a wander along the beach. Worthing is handily arranged with one of the main shopping streets parallel to the seafront, so it's easy to pop over to the sea. Even though it was early it was already really warm.

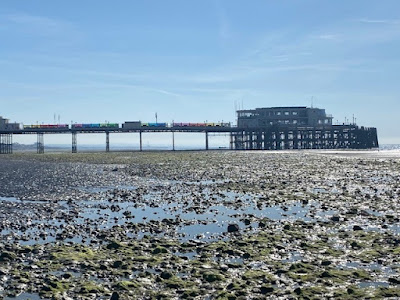
Worthing West Sussex pier at low tide

The tide was a long way out but coming in. At low tide in Worthing the sea is so far away that you can't even walk to it, due to the slippery green rocks and large pools of water. In fact you can barely even see it in the distance. The incoming tide creeps in quietly but quickly. You can head out across the rocks to a nice sandy patch, and turn round a few minutes later to find your route back underwater. It's not too dangerous as it's so shallow, but you might end up with wet feet!

Worthing West Sussex beach at low tide

The town centre was so noisy this morning with building works and cars, but as soon as you get down on the beach it all fades away into the background.

I can spend ages wandering along the beach. I love looking down for interesting shells and pebbles and any other things I might find. I'm always really excited to find rare sea glass, and I try to collect any rubbish that I find, although luckily I don't usually spot any. The only thing I picked up this morning was a large metal fishing fly, the metal part is about 7cm long. I found it a bit icky to pick up as I don't like fishing and I don't want to think about the fish it might have hurt, hopefully I've prevented it from causing harm to other marine life.

Old fishing fly found on the beach

While I'm walking along I get completely lost in my thoughts. I think sometimes I even enter the flow state that I'm always reading about in my wellbeing book collection. Time just flies by, and I have to make sure that I look up every now and then, as I'm so busy staring down and not noticing how far I've travelled!

So the time passed very quickly and I was able to return my item without any trouble. I even had time for a quick visit to the charity shop next door for some bargain paperbacks!

Thursday 9 June 2022

I've been crafting away

I didn't realise that when I recently pulled out my fabric stash it would lead to a sudden influx of ideas for craft projects that I wanted to make! Over the last couple of weeks I've been crafting away like mad, and I wanted to share some of the things that I've been working on.

I've already shared my beach hut bunting for the garden and my zipped pouches. I have some zippers left and I'm planning to make some more pouches which I can use as project bags for my crafts in progress.

Beach hut bunting for the garden

Once I had the sewing machine out I was inspired to try some new things. I started with a small fabric storage bin using this tutorial - DIY Storage Bin. I was really pleased with how well it turned out, especially because it taught me how to box the corners of a bag, a technique which I'm intending to use when I make some smaller zipped pouches.

Small fabric storage bin craft

Then I was looking for a project to use up some of the larger pieces of fabric in my stash, and I decided to make some fabric laundry bags. I usually take old plastic bags to store dirty washing while we are on holiday but I thought that fabric ones would look tidier in a hotel room, be more durable, and are also washable. I used some strong ribbon from my stash for the drawstring. 

The dark pink fabric is some vintage Laura Ashley fabric which I was given a few years ago when my mother-in-law was having a clear out. The bags are a little mis-matched and they are very rough and ready, but I'm glad to be able to put the fabric to a good use! I may also make some smaller sized drawstring bags to hold shoes or smaller items in the suitcase.

Drawstring fabric laundry bags

Then I moved on to my felt drawer. I started by using up some of the scraps to make some simple felt heart bunting, then I started thinking ahead to some Christmas crafting. These crafts will be shared in full on my blog later in the year, but in the meantime here's a sneak peek! I used a cross stitch snowflake pattern that I've been working on to make some felt wreath style designs which I will turn into Christmas bunting.

Felt and cross stitch Christmas ornaments

I've also made some sweet little felt Christmas tree ornaments which are decorated with gold ric rac and buttons. The design of the trees was inspired by this craft - DIY Felt Christmas Tree Ornaments - but instead of ornaments I'm planning to use them for bunting. I'm working on some baubles in a contrasting colour which will all be hung together on ribbon.

Felt Christmas tree craft

I'm still bursting with ideas, and I'm starting to feel overwhelmed by how much I want to get done! It's a really nice feeling to have :) Although I must admit that I don't feel as though I'm making much progress working through my various stashes, there is still plenty left to work with!

Tuesday 7 June 2022

Using up scraps of felt to make simple felt heart bunting

Recently I wrote about my fabric stash and my plans for fabric based crafting to work my way through some of it. What I didn't mention is that I also have a huge stash of felt. In 2014 I collaborated with Viking and I received 100 sheets of felt in a variety of colours, and although I gave some away to friends and family I still have loads. I also have felt which I've purchased for various projects over the years, and a large amount was made up of small leftover scraps which I couldn't bear to throw away.

Pieces of leftover felt scraps for crafting

So I decided to use some of these gorgeous colourful pieces of felt to make some simple felt heart bunting. I found several different tutorials online, but my favourite was this Easy DIY Felt Heart Garland. That garland uses a Cricut to cut out the felt hearts which would make the project much easier! I cut out my hearts by hand using a paper template.

Selection of colourful hearts cut from leftover felt

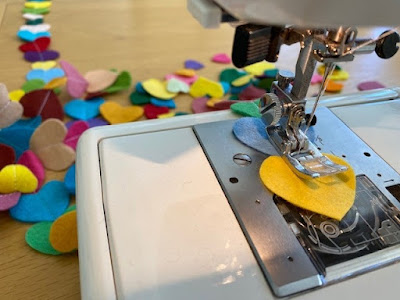
The hearts are sewn together using a sewing machine. It's best to work from the dip at the top of the heart rather than the pointy end, and my hearts are placed very close together. Before starting this project it's a good idea to make sure that your sewing machine is well loaded up with thread - it looks much neater if you don't run out of thread halfway through. It's a bit fiddly at first but I soon got into the swing of it, and it didn't take long at all to sew the bunting together. I used mainly larger hearts with a few smaller ones mixed in.

Using a sewing machine to make simple felt heart bunting

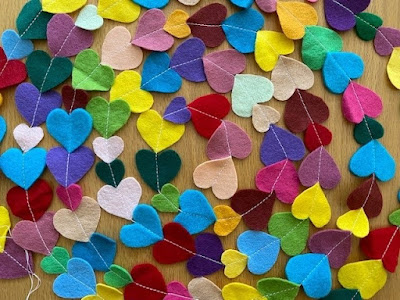
I love that I had so much felt in such a beautiful selection of colours, I think it looks gorgeous!

Simple felt heart bunting tutorial

I've hung the bunting across my mantlepiece for a beautiful summer decoration. I made enough to loop it across twice, and it mixes in well with the fairy lights that I string there year round.

Simple felt heart bunting DIY craft

This project didn't make much of a dent in my overall felt stash, but it did feel good to use up some of the smaller pieces, and it inspired me to come up with some other felt crafts.

Wednesday 1 June 2022

Learning to make simple fabric zipped pouches

Recently I wrote about my fabric stash and how I was hoping to find some simple sewing projects to help work my way through it. I did some searching online for beginner sewing projects, and as I also found some passed down zips in my stash I decided to start with simple fabric pouches.

I was a bit nervous as I had assumed that zips would be complicated to work with, but actually it wasn't too bad. I didn't find it too difficult, even though I had to work out how to change to a zipper foot on the sewing machine!

I found this brilliant tutorial to follow which is really thorough and explains the whole process really well.

My first attempt wasn't the best, although it still does the job! This small pouch uses a 7" zip. I managed to sew the zip in wrong at the top so it doesn't lie flat on one side, and I also intended the two fabrics to be the other way around with the pattern at the bottom. I'm not quite sure how it ended up backwards! You can see the spotted lining fabric showing through, and it's a bit wonky. 

Small zipped pouch first attempt

My second attempt was much better. Because I didn't want to buy anything new for the project I was limited by the sizes of my zips which are either large or small. For this pouch I used a 12" zip to make a zipped case which is about A4 size. It's a good size for a sketchbook and paints, or else a book, my phone and a notebook. I sorted out my previous mistake with the zip and I used a lighter fabric for the liner. (This gorgeous fabric was received for a blog collaboration back in 2015, when I used it to make a drawstring backpack.) I'm really pleased with it, I love the patchwork of different fabrics.

Large zipped fabric patchwork pouch

My third project was made for Mia. She went through my fabric stash and picked out the patterns and colours that she liked. I had a pale blue 12" zip which went well with several of the pieces, so I made her a zipped pouch the same size as mine. It's the perfect size for her iPad and a book or two.

Two large zipped fabric patchwork pouches

I'm so pleased with myself for learning a new skill and making some useful finished products. My seams are still a little wonky and I'm not very good at cutting the fabric in straight lines, but I'm definitely improving! I'm also feeling a lot more confident when it comes to using the sewing machine.

My fabric stash doesn't seem to be reducing, but most of the pieces that I do have are quite small so my next projects are either going to be little ones or using more patchwork. I love the idea of using my very small scraps to do some crazy patchwork and I'm building up a list of little projects to try out.