Friday 31 May 2019

Different crafts for different situations

I always have lots of crafts and hobbies on the go. At the moment my kitchen counters are crowded with at least three different projects in progress, and my study has boxes and bags piled up with things that are being worked on. It does bother me a little bit, as I don't like having unfinished things around me, but I've gradually come to realise that it's necessary, because I find that specific situations require a different type of project.

For example...

While watching television - it needs to be something mindless. I like a crochet blanket that doesn't require much counting or a simple area of my cross stitch.

When I'm away from home - I take along my cross stitch. It's portable, can be quickly packed away, and doesn't take up much space while I'm working on it. 

When I only have a short amount of time - I like to pick up a book. This keeps me occupied while waiting for children to come out the bath, or while stirring the dinner.

When the children are around - I usually turn to the Hama beads. It usually inspires them to join in, and as long as they aren't after the same boards and beads as me we can work together happily without them disturbing me.

When I have a longer period of uninterrupted time - then I can turn to something that requires a bit more concentration, like my Persian Tiles crochet blanket. I'm not a competent crocheter, especially when it comes to following a pattern, so I need to think about what I'm doing. I also save the more intricate areas of my cross stitch for a time that I know I won't be interrupted.

When I don't have much space - like when I'm travelling, then I like to brainstorm potential future craft ideas and designs, or come up with ideas for blog posts. I just need a notebook, a pen, and a distance to gaze out in to.

When I have the space to leave something out for several days - then I can do something that needs to be left out to dry. This usually involves paint, for example painting rocks. It's also a good time to do a longer mini Hama bead project as that's something that can't be disturbed while I'm working on it.

When I'm tired and don't feel like concentrating - it needs to be something mindless. That could be re-reading a favourite book, some colouring, or even just browsing Pinterest for even more future craft inspiration.

Craft projects in progress
Photo credit Giulia Bertelli via Unsplash

Do you match your in-progress-projects to different situations?

Wednesday 29 May 2019

Attempting a more minimalistic approach to blogging

I write quite a lot about my minimalist aspirations on this blog, and so I thought I'd share how I attempt to carry that over into my blogging - both my blogging process and the way that I approach what I publish on my blog and social media.

Tips for minimalist blogging

Not many gadgets

I don't own much blogging equipment. I have an iPhone which I use for both photos and videos. I take photos outdoors or using my homemade light box, which is a large cardboard box painted white with tissue paper sides and top - I don't own any special lighting or backdrops. Most of my work is done at my desk using a desktop PC. The only blogging thing that I pay for is Tailwind, alongside my domain name. I don't buy props for my photos or special outfits for the children, and I don't pay for a theme or any special apps.

Turning down review products

I don't do nearly as many reviews on my blog as I used to. Not only did I start to value my blog and my time more, I also became uncomfortable about promoting products that I wouldn't buy just to put a smile on child's face for a few minutes.

I'm offered a lot of toys, plastic collectables and so on. While I know that the children would love them, I also know from experience that they would become clutter very quickly and it feels like such a waste of resources. I try to avoid buying these types of toys myself, and it feels wrong to promote them on the blog.

I'm reluctant to accept products for review that duplicate something I already own. It feels a waste to accept something just for the sake of it just because it's 'free'. Although I confess I do have difficulty turning down books and craft materials!

Social media

I struggle with my relationship with social media. On the one hand I want and need to be active across several channels - particularly Twitter, Facebook, Instagram and Pinterest - but on the other hand I know how easy it is to get sucked in, and I'm frequently berating myself for losing minutes and hours to mindless scrolling.

I would love to be able to log in to each social media account once during the day, post an update or two and spend a little time interacting. But when you post an update it can take a while before people see and interact with it, so it's difficult to avoid the urge to check back in shortly after to see if anyone has replied to a tweet or commented on a photo.

Once logged in, I find it very easy to get distracted, and it's definitely not something that I've mastered. One thing that helps is to get up and do something else when I feel the pull towards Facebook or Twitter - even just getting up to fetch a drink or put something away can be enough to break the urge. But there's definitely more work to do here!

Aiming for quality not quantity

I used to publish a new blog post almost every day. Some of my early posts are very short, just a picture and a short paragraph. While I enjoy looking back on them, I now much prefer to write more meaty posts. I aim to publish a new post three times a week, and attempt to post fewer 'filler' posts - I prefer to publish nothing that something for the sake of it. I would like all my posts to add some kind of benefit to the reader - whether that's a craft inspiration, some helpful information about a destination, or just something to enjoy reading. I do hope that I usually succeed!

Minimalistic approach to blogging
Photo credit - Goran Ivos via Unsplash

Using a feed reader for other blogs rather than subscribing by e-mail

I don't subscribe to any blogs by e-mail. Instead I follow them through a feed reader, currently Feedly. I scroll down the list and remove the posts that don't interest me, then set aside some time to open up the ones that I want to read. I follow quite a few blogs this way, and I find that by checking in a couple of times a day I can keep it under control.

That's why I've never set up a personal blog mailing list for my own blog (although the option is there to subscribe by e-mail via Blogger). I don't think I have many e-mail subscribers, but I like to think that at least I'm not sending unwanted content to many people's inboxes.

Scheduling and planning

I have an editorial calendar system for my blog which works very well for me. It means that I can space out my content to publish a variety of different posts, and it means that I can work on posts well in advance when I have the time. I feel a lot more creative when coming up with new ideas if I'm not scrabbling about at the last minute. I've recently been working on some Halloween content for later this year, and it feels good to know that when the time comes I'll relevant posts all ready to go. Of course I do leave gaps for spur of the moment posts, and sometimes those are both the quickest to write up and the most popular!

Blog design

I've never been very good at blog design I must admit, and this is probably something that I could work on. My sidebar is a little cluttered. I do hope that it reflects a little of my personality though - I may be an aspiring minimalist, but I'm never going to be perfect!

Main photo credit Harry Cunningham via Unsplash

Monday 27 May 2019

Sunflower crafts for the garden

Sunflower crafts for the garden

I've always loved sunflowers, they are so bright and colourful! They are definitely one of my favourite flowers. A few years ago I made this Sunflower mosaic stepping stone for the garden, and I decided that it was time to brighten up our rather boring garden with a couple more cheerful sunflower crafts.

Sunflower stepping stone mosaic

To add sunflower cheer to the dull corners I painted some sunflower rocks. I used green acrylic paint to coat the entire rock, then painted on the sunflowers using a combination of Posca marker pens and more acrylic paint. When the rocks were dry I sealed them using spray varnish. For the time being they are brightening up some of my pots, then as the flowers start to grow I'll be using them to decorate our gravel borders, or to place around the base of some larger plant pots.

Painted sunflower rocks

Then I made a sunflower tin can lantern to light up our evenings by the fire pit. I'll be sharing how I make these lanterns in a separate blog post shortly, but it's very easy. You just need to freeze some water in the can to make it sturdier, then punch holes through using a hammer and nail. If you want to create a pattern it's easiest to draw it out on paper first and tape it to the can, so that you can see where to put the holes. I've decorated this lantern with a ring of beads in sunflower colours around the top. The lanterns look so beautiful at night time when the candlelight flickers through the holes, and it's a great way to re-purpose old tin cans.

Sunflower tin can lantern

 I love making things to brighten up the dull corners of my garden!

Sunflower mosaic between pots in the garden

Friday 24 May 2019

Some hobby ideas for minimalists

Minimalist hobby ideas for minimalists

If you want to live in a minimalist home but also enjoy lots of hobbies, there are certain criteria for hobbies which suit a minimalist lifestyle. You need to be able to enjoy them without too much extra or specialist equipment, and preferably use things which you already have. They need to only take up a small amount of space while you are working on them, and it's nice if the finished product has a purpose, whether it's something that you can use yourself or something that you can give as a gift.

I've made a list of hobbies which I think work well if you consider yourself to be a minimalist - enjoy!

Reading - you don't need to keep every book that you read, and they take up hardly any space if you have a e-book reader. You don't need to buy books if you visit the library, and there are lots of places that you can swap books with others - with friends or on shared bookshelves at the gym, stations or supermarkets.

Gardening - whether that's in your own garden or growing herbs and pots on a windowsill.

Exercise - you can go for a walk or a run, do exercises using things that you already have around the home for weights, and find free fitness exercise and relaxation routine videos on YouTube.

Writing - either journalling in a physical book or writing a blog online, write articles, poems or stories.

Drawing - whether sketching with a pen and paper, painting or working with digital images.

Colouring - in an adult colouring book, or you can find lots of free pages to print and colour online.

Cooking and baking - you can share the results with family and friends.

Games - some board games take up very little space, or you can play hundreds of different games with a simple pack of cards.

Knitting or crochet - you can make lots of useful things like clothes and blankets for yourself and others.

Visiting a museum, zoo or other tourist attraction both where you live and further afield.

If you live near a larger town or city you may be able to find a treasure hunt or scavenger hunt, for example hunting down different themed statues or benches and trying to find them all. There are also treasure hunts that you can buy - we have used Treasure Trails successfully in the past.

Photography - you don't need expensive equipment, you can just use a smart phone. You can extend this into making videos - you don't need to blog to camera you can put together little videos of places that you've visited and enjoyed.

Puzzles - logic puzzles, crosswords, Sudoku and so on. You can buy puzzle books or there are plenty online to complete electronically.

Writing letters, postcards or e-mails to friends and family.

Geocaching - a fun way to explore your surroundings and discover new places. All you need is a smart phone and the Geocaching app. Find out more here - Geocaching.

Jigsaws - the do take up a bit of space while you are working on them, although they can be slid under a sofa or bed if you have a board for them. They are easy and cheap to find in charity shops, or there's a good chance that family and friends have some you can borrow!

Playing a musical instrument - small instruments like the recorder, ukelele or flute don't take up much space and you can find videos and tutorials online to get you started.

Learning about the world around you - learning to identify flowers and trees or using a map to navigate to different interesting spots. You can also learn constellations and look out for different astronomical events.

There are also lots of hobbies which product lovely things that you can use as gifts. For example soap and candle making, making bath bombs, confectionery making like fudge or peppermint creams, or making your own greetings cards and wrapping paper.

I hope that you find some inspiration!

Photo credit Daria Tumanova via Unsplash.

Wednesday 22 May 2019

Hama bead frames for your summer photos

How to make Hama bead photo frames

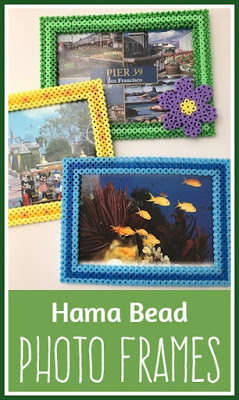
It feels like ages since I last shared a Hama beads craft on my page! The truth is that I've not had the Hama beads out for a while. But I was recently inspired to pull them out again, and it reminded me how much I love crafting with them! So here is my most recent Hama beads craft, some cheerful photo frames which you can use to display your holiday photographs or some favourite postcards.

Hama bead photo frames on book shelf

I make my Hama bead photo frames using two square Hama bead pegboards. The boards are designed to clip together so that the position of the pegs remains consistent across the join. You could easily make them using just one square board, but you'd probably have to crop your photo or postcard to fit. I find that for a standard photo print or postcard you want a frame with an inner height of 18 beads and an inner width of 26 beads. This allows some overlap on the back so that you can secure your image to the back of the frame.

Making a Hama bead photo frame

You just need to arrange your beads on the peg board in the usual way. You can adapt the size to match the photograph that you want to frame, and choose colours which complement it. When it comes to ironing I iron my creations on both sides - you can find some ironing tips for Hama beads here. As the design is on the large size I find it a good idea to press the design flat while it is still warm, you can sandwich it between two large books to do this. Here are the three different frames that I came up with:

Hama bead photo frame collection

The third design features a flower embellishment. This was created using beads placed on to a small flower peg board which were ironed separately and then glued to the outside of the frame. Hama beads can be tricky to glue, I find that a super glue type adhesive works best as other glue can sometimes peel away from the beads.

Three Hama bead photo frame designs

You can use Blu Tack or tape to stick your picture to the back of the frame to keep it firmly in place. Make sure when designing your frame that you leave enough of a border to do this. Then the finished frames are light enough that you can 'hang' them by sticking with Blu Tack or you can attach a magnet to the back so that they can be displayed on a fridge or other magnetic surface. I like to prop mine on my bookshelf for a splash of colour!

Hama bead photo frame with flower

If you liked these Hama bead frames you might also like the frames that I've made in the past:

Hama bead photo frames
Hama bead heart frames

Hama bead photo frame designs

You can find all my Hama bead crafts on my Hama bead crafts page.

Monday 20 May 2019

What my fantasy garden looks like

It's the time of year when I start to make plans for the garden. Our garden isn't very exciting. It's a really good size which is great, but being a new build it's rather overlooked, and it's been kept very simple - mainly grass which is full of daisies, and one small border. However we are lucky enough to have a separate area where we have a raised vegetable patch which has just been replaced, and we also have a summer house, which although showing signs of age is a nice feature.

We do love spending time in the garden, although admittedly perhaps not as much time as we should. Last summer we bought a fire pit which we used a great deal, and this year we've bought an outdoor pizza oven which we are hoping to get plenty of use out of - fingers crossed for nice weather!

I'm often looking out into the garden from the kitchen and wishing that I had the magic touch that could make it a little more attractive. So I thought I'd pull together some ideas for what my fantasy garden would look like, and perhaps it will give me a bit of inspiration when it comes to thinking about what I could do out there!

I'd love to have a bright and colourful garden with an eclectic mix of plants and flowers, ideally planted in a mixture of different and re-purposed containers. I've already put lots of pots out the front of the summer house which I've planted up with some bedding plants, I'm hoping that they thrive!

Selection of different flowers in planters
Photo credits Micheile HendersonJakub JacobskyAnnie SprattChris Barbalis

I also want to make the most of spending time out in the garden during the evening with some lanterns and maybe even some outdoor fairy lights, if we can organise getting an outdoor socket installed. I'm always a fan of using what I already have instead of buying new, I might start collecting jam jars and tins and seeing what I can come up with!

Selection of glass lanterns
Photo credit Vladimir Mokry via Unsplash

I'd love some nice comfortable seating too, maybe something like these amazing swinging seats that we enjoyed sitting in on our holiday to Dubai earlier this year. If I had one of these I don't think I'd ever leave it!

Girl in large swinging seat

I was also inspired on holiday by this wall of bird boxes at Center Parcs, Erperheide. I love how they are all so different, yet still look good together. I have just finished painting one bird box for my garden and I have another one to work on, so this is something that I might actually be able to manage!

Bird boxes hung on the wall in a display

I even have a Garden Style Pinterest board for gathering ideas! I started a Garden Style Pinterest board years ago and I'm always pinning to it.

Maybe this will be the year that I actually get on and do something about it!

Friday 17 May 2019

Life right now

The other day I was making dinner again, thinking about how every day with the children seems to follow the same routine - the school run, homework, dinner time, bath time and bed time, and I was suddenly reminded that although these are the things fill my life at the moment, in the end it's just another phase that won't last forever.

I never really thought about how life goes in phases until Harry was born. Those early weeks were so difficult and they really felt as if they were going to go on forever. I couldn't see forward to a time when he would sleep through the night or to when I'd be able to communicate with him properly. Of course looking back it seems like it was over so quickly, and those mornings spent trying to keep my eyes open at baby groups, making up purees and trying to encourage a nap seem like so long ago

So I thought I'd make a little list to remind me of what life looks like at the moment:

Lego everywhere
Homework
Friendships
Packed lunches
Swimming lessons
Preparing food
Minecraft
Playgrounds
Teddies
School bags
Piano practice
Pushing swings
Emotions
Dress up days

I must admit I'm desperately clinging on to this phase, it's my favourite yet. I love seeing my children playing together with their toys and always happy to come over to me for a cuddle and a chat. Even though they are growing more independent, they still need me very much. I'm not sure that I'm ready to deal with the changes that are waiting just out of sight around the corner!

Children playing in a playground

Wednesday 15 May 2019

Why I always like to have a book on the go

There's always a book in my house somewhere containing a bookmark, in fact there are usually two or three. Here's why I always like to be reading something:

I always have something to talk about with others, whether it's discussing my latest book with the children, my friends or online.

It helps to fill in those odd moments that I find throughout the day - while stirring something on the cooker, while the kids are in the bath or while I'm waiting in the car.

Having a book close by encourages me to reach for it rather than my phone.

It's something I can do by myself while everyone else is occupied.

My latest book plot gives me something to think about when I have some time to think, for example while I'm running or swimming.

I like to model reading to the children (not that they need it really, they read a lot more than I do!)

It keeps my mind busy.

It's handy to have a book ready to pick up if I'm heading somewhere that I know I'll be waiting around, like a doctor's waiting room or long journey.

It's something to look forward to when I have to do other things, knowing that I have a good book waiting for me to get on with.

Do you always have a book on the go?
Books waiting to be read with glasses
Photo credit Jade Stephens via Unsplash

Monday 13 May 2019

Do you follow me on Instagram?

Being a blogger I try to keep on top of various different social media channels, and Instagram is always the one that I struggle with. Instagram is very competitive, and it's one that it's easy to game by buying followers or using a bot to automatically follow and unfollow other users to grow quickly.  There is also a lot of pressure lately to publish only carefully edited photos which co-ordinate with your perfectly curated feed. 

But I've recently decided that I want to get back into using Instagram again. I love scrolling through and seeing the photos that catch my eye. I'm especially drawn to anything colourful and crafty, and that's the kind of photos that I want to share on my own account. I also love putting together Instagram stories and sharing little snaps from my day, especially if we are out and about or doing something fun and interesting. I'm discovering that there are some lovely communities over there if you take the time to spend a few minutes interacting.

So if you don't follow me on Instagram I'd love you to pop over and give my feed a visit, and if you like my photos it would be wonderful if you would subscribe!

You can find me here - Jennifer Jain on Instagram - and if you drop me a comment, either here or over there, I'll be more than happy to follow you back!

Screenshot of my latest Instagram photos

Friday 10 May 2019

Festive ornament felt kits

I received these kits in exchange for a review.

I love crafting for Christmas, and although it might seem a bit early yet I find that the Christmas period can be busy that I don't want to be putting pressure on myself to get projects finished. I'd rather have them completed in plenty of time so that I can enjoy the results of my crafting during the build up! So I was pleased to be sent some sweet little felt Christmas ornament kits to review, with plenty of time to work on them before the rest of the decorations come out.

Felt Christmas crafting kits selection

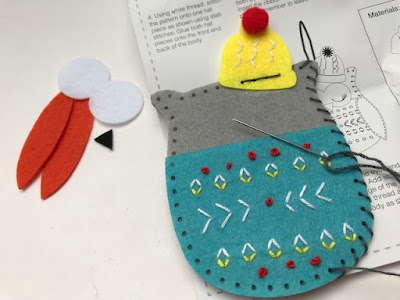
The kits contain almost everything that you need along with with full instructions - you just need a pair of scissors and some fabric glue. I decided to start with a little felt owl.

Felt owl crafting kit

The felt pieces were pre-cut with the holes already punched. It's not a basic sewing kit though, you do need to be able to do some basic embroidery stitches and work out the positioning of the embellishing stitches yourself. There is plenty of scope to adapt the design to your own preferences, and I think it would be lovely to work on these alongside a child or younger family member that could help with the more simple sewing.

Felt owl in progress

I really enjoyed working on this kit, it was challenging enough to keep me interested but didn't take too long to finish and was a really satisfying make.

Festive felt owl crafting kit

Here's my finished little owl, isn't he sweet! I'm not actually sure that he's going to make it to the Christmas tree - Mia has already claimed him as her own and spirited him away to hang in her bedroom somewhere!

Festive felt owl made using a craft kit

I love that the kits all co-ordination beautifully together, and although they are simple they can be easily customised. I'm looking forward to working on the other pieces!

These kits are Trimits craft kits which are available through various craft retailers.

Wednesday 8 May 2019

How to make a decorated fabric pen tray for your desk

Tutorial for fabric pencil trays to organise the desk

Today I'm sharing a really simple craft - how to make some fabric trays to keep pens, pencils and other stationery organised on your desk.

You need:

Two pieces of fabric, one for the inside of the tray and one for the outside
Fusible interfacing, I used White Lightweight Fusible Iron On Interfacing Fabric (affiliate link)
Fabric glue
Embellishments - for example ribbon, sequins, buttons

Fabric pen trays with Bostik glue

Instructions:

First you need to make a template for your tray. I wanted to make a tray to hold pencils, so I laid out some pencils on white paper and drew around them to decide on the size of the base of the tray. I added a border of 4cm for the sides and seam allowance. My final template measured 30cm by 14cm.

Making a template for a fabric tray

Choose your fabric and cut a rectangle from each of your chosen fabrics. Then cut two from the fusible interfacing (you may only need one if you are using thicker interfacing). Pin the template to the fabric to make it easier to cut accurately.

Materials required to make a fabric tray tutorial

Lay the two pieces of fabric with their right sides facing and sandwich with a piece of the interfacing on both the top and on the bottom. The interfacing fabric makes the fabric a little stiffer so that the tray will stand up better. Sew the four pieces together, leaving an opening of a few centimetres. Trim the corners from your fabric sandwich and turn right side out, using a knitting needle or similar to make sure that the corners are pushed out fully. Press on both sides with an iron.

Sewing fabric pieces together to make a fabric tray

Fold in a corner of the rectangle and measure 3cm from the tip. Use a needle and thread to make some stitches to hold the corner together firmly. Repeat for each corner of the tray.

Tutorial to make a fabric pencil tray for the desk

To make sure that the tray will keep its shape, use an iron to press down the sides and make a firm crease along the bottom edge of the tray.

Using an iron to press the sides of a fabric tray together

Your tray is now finished and ready to decorate! To stick the embellishments to the tray I used fabric glue, depending on your glue you may need to use a generous amount of glue. I used the glue to stick star sequins to the corners of the tray and to add a scrap of ribbon along the front.

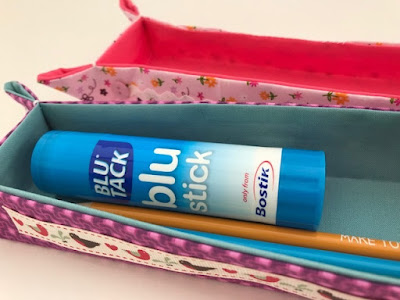
Using Bostik glue to decorate a fabric tray

Once you've added the glue to the ribbon you just need to press it firmly into place and leave to dry, which doesn't take too long.

Decorated fabric tray with Bostik tutorial

I made a second tray using some different fabrics, and this time I decorated it with buttons and ric rac. 

How to make some simple fabric pen trays tutorial

It's a great and pretty way to keep everything organised on your desk, and you can make them in all different sizes to suit the things that you want to store!

Fabric pen trays made with Bostik products

This post uses products which I received as a Bostik blogger, but I've received no additional compensation for this post.

Monday 6 May 2019

#ad Blu Tack hacks for crafters

This is a collaborative post in association with Bostik

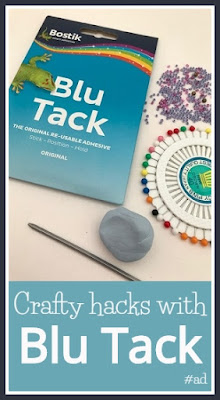
Today I'm sharing some hacks for using Blu Tack in your crafting! I've put together some ways that  Blu Tack can be used to make working on craft projects easier, as a craft material in its own right, and to display your finished projects.

Crafty hacks using Blu Tack

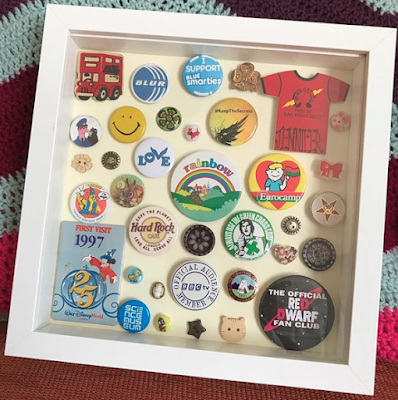
If you are working on a project where you need to lay items out before securing them into place, you can use Blu Tack to test out different configurations. For example when I made this box frame to display some of my favourite badges, I spent some time coming up with different arrangements before I found one that I was happy with. The Blu Tack will keep small items firmly in place yet can be removed without causing any damage when you are ready to use a more permanent adhesive.

Display frame for badges and pins

If you are working on a spray painted project you can use Blu Tack as a masking material to keep paint from ending up in the wrong place. This is brilliant for around fiddly or ornate areas. You can also use the Blu Tack to mask off decorative patterns that you want to create.

Blu Tack can be used to make a simple stamp, for example to create dots of paint on an object.

If you need to add paint or glue to a small or fiddly item, you can use a piece of Blu Tack to hold it firmly in place, both while applying the paint or glue and while it dries.

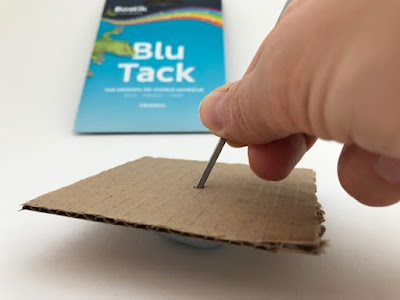
If you need to make a hole in a piece of thick paper or card, use a lump of Blu Tack underneath and push through with a skewer. The Blu Tack will protect the work surface underneath.

Blu Tack being used to help make a hole in cardboard

Blu Tack is great for picking up tiny items like seed beads or mini Hama beads if you spill them. It works best on a hard surface but is also great for fabric or carpet if you are careful not to press too firmly.

Blu Tack for picking up small beads

When preparing a surface for painting you can use a lump of Blu Tack to remove any dust or debris from the surface. You can also use Blu Tack to plug small holes, such as screw holes, to create a smoother surface.

If you are working on a project that requires using lots of small pins or needles you can use a lump of Blu Tack to secure them firmly to your work surface. This will prevent them from rolling away and also draws attention to them so that they won't cause an accident.

Blu Tack holding pins together

Blu Tack is a great resource if you are putting together a mood or inspiration board. You can use it to stick up pictures and photos that you like, scraps of paper of fabric and small embellishments, then move them around to see what will work well together.

Finally, Blu Tack is a brilliant way to display your finished art work, both temporarily and more permanently. It's fantastic for sticking up your child's drawings or your own works of art, to walls, cupboards and other surfaces.

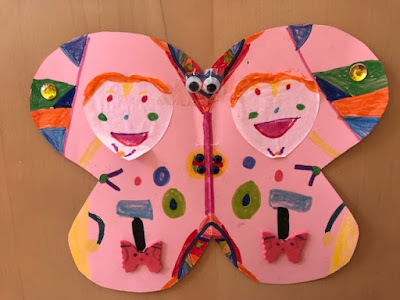
Child's drawing displayed with Blu Tack

This is a collaborative post in association with Bostik

Friday 3 May 2019

Things that have made me happy this week

Here are some of the things that have made me happy this week!

Last weekend we did some shopping and I bought some new clothes for the summer, including these pink shoes. Every year I buy myself a similar pair which I wear until they fall apart, and the current ones are definitely ready for the bin. I usually go for blue but I thought I'd brighten it up a bit this year!

Pink trainers on the grass

I was feeling much more confident buying clothes as I've lost a little bit of weight, and even though I shouldn't think that anyone else would notice it makes me feel more confident. I'd like to lose another couple of pounds ready for the summer, but I'm nearly ready for the shorts!

Our latest purchase won't help though, my husband has just bought an Ooni pizza oven for the garden. It's a gas powered oven that heats up in ten minutes and can cook a pizza to perfection in just a couple of minutes. We've only used it once so far but were very impressed with the pizzas - I'll probably share a review at some point because if you like your pizzas like we do then I'd definitely recommend one!

Pizza from a Ooni pizza oven

I'm hoping that the weather will be good enough this summer to spend plenty of time in the garden eating pizza and doing a bit of gardening. The wood in our raised vegetable bed had gone completely rotten so we've had it replaced and I love my new vegetable patch, I've been busy planning my planting!

Wooden raised bed vegetable patch

I've also been enjoying doing some reading now that the children are back at school and I have some quiet time. After a conversation on Twitter (which you can read about here) I purchased a book that I loved as a child and hadn't read since - Charlotte Sometimes (affiliate link). I must have read it over and over, because the story came flooding back to me. It's a lovely story and brought a tear to my eye when I finished it. I'll be keeping my copy this time!

Finally we were recently given a huge box of Lego by a kind colleague and the children have had so much fun playing with it. I love watching them playing and being completely absorbed in their games, especially Harry who is fast moving into tween territory but is not yet too old to lose himself in an imaginary world.

What has made you happy lately?