 |
| Photo credit Wicked Monday via Unsplash |
Wednesday, 29 November 2023
How I use Amazon wishlists to plan my Christmas shopping
Monday, 27 November 2023
My currently incomplete cross stitch projects
I've recently picked up some cross stitch again after a generous gift from a friend (see below!) and I'm really enjoying stitching away. Unfortunately it's not the only long term cross stitch project on my hoops, I also have a few others on the go. I thought I'd share the cross stitch projects that I'm currently working on, in the hope that it might inspire me to get a couple finished!
My cross stitch travel map will probably never be finished, as I won't even want to think that I won't be doing any more travelling! In fact I've just realised that I need to update it after visiting Sweden over the summer, and there is plenty of work that I can do to fill in all those white gaps.
Another map that I'm working on is the Olde World Map from Janlynn. This is a very large piece, and as I've discovered it is very challenging. There are lots of similar colours to work with, and it can be very difficult to distinguish between them when stitching busy areas. So I've not worked on it for a while, which is a shame because it's a lovely kit. I need to come up with some kind of system to help me, possibly making a copy of the pattern and using a highlighter to mark off areas as I complete them.
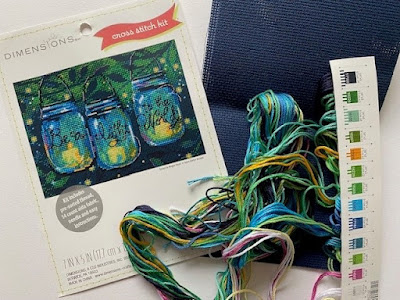
A couple of weeks ago I unpacked this Christmas Be a Light kit from Dimensions which I bought on our most recent trip to the US. It's a lovely design worked on navy blue Aida and I thought that it would be a nice Christmas project.
But then! I met a friend a couple of weeks ago and she very kindly passed on this cross stitch kit - The Christmas Nutcracker from Bothy Threads. I was going to put it aside for future Christmas crafting but I couldn't stop myself from making a start, and now I think this will be my Christmas project instead. It's a very easy kit, there are a limited number of colours and the Nutcracker at least is symmetrical and formed of large blocks of colour, so you don't need to follow the pattern too closely. It's a great design for working on in front of the television or when you only have a few minutes before you need to put it down.
I won't be finishing it by this Christmas, but there's a chance that it might be complete before the next one!
In my stash I also have one other cross stitch kit which I've not even taken out of the pack yet. It's quite a small one, a sort of cross stitch cat, which I'm saving to take away on the sort of holiday which will give me some stitching time.
I'm thinking that I need some kind of challenge to help me make some good progress on all these projects. Maybe I can incorporate something into my New Year's resolutions!
Thursday, 23 November 2023
Six savings tips for navigating the cost of living crisis
This is a collaborative post
With the cost of living continuing to rise, there is no wonder why people are struggling to make ends meet. Households are experiencing a rise in high energy bills and inflation of food and rent prices that are soaring.
Finding ways to save on expenses will relieve people in a financial bind. The cost of living crisis has led to people dipping into their savings far sooner than expected and using whatever money they have to cover the rising costs.
To save on utility expenses, you can find a better domestic energy deal by using this online comparison tool that allows you to compare prices of energy deals from their suppliers.
This article offers practical tips on how to strategically cut daily expenses, providing a roadmap for individuals to weather inflation and build a more secure financial future. From budgeting and selling unused items to debt management, savings strategies, and energy efficiency, these actionable suggestions empower readers to make informed financial decisions, ensuring their hard-earned money works for them even in uncertain times.
 |
| Photo credit Sasun Bughdaryan via Unsplash |
Rise in Cost of Living
The current economic climate has led to people paying the highest interest rates the UK has seen.
The majority of people have no safety nets and cannot afford to start one as they just aren't able to meet their daily expenses and save money for a later stage.
For UK consumers and parents, who are concerned over the financial implications of raising children, who at least see the worth of their money, they need to start looking for alternative ways they can save money and still afford to cover all their expenses.
Tips to Save on Daily Expenses
Having a concrete plan to cut expenses and use your money for the essentials while saving for an emergency is the only way you can beat inflation.
Here are some tips for you to start saving on your daily expenses and cut out unnecessary costs.
Have a budget
Creating a budget will help you with overspending or spending money on unnecessary items. A budget will show you exactly how much you are spending and how much you can save.
Using a budget can help you plan for things that are not needed immediately but could be saved for and added into the budget over several months until you have enough money or included in another budget where you can afford it without putting yourself in debt.
Sell items you no longer need or use
Look around your home for items you have that are no longer in use. If they are just taking up space, you can make money from them.
The money you make from selling these items can be included in your next monthly budget or be put away for a rainy day.
Spend wisely
It can be tempting to spend money when you have it. However, spending wisely will get you through those tough times should they arise.
Use the rewards from your credit cards or other programs to pay for the things that you would take money out for.
Cancel unused subscriptions to magazines, clubs or streaming services you are no longer using but still paying for.
You also need to be mindful of when you are out shopping. Spending out of habit can turn into regular purchases, such as getting a coffee or buying a pastry, which can add up to a lot of spending at the end of the month.
Clear debt
Owning different stores and paying large amounts of debt every month can cut your budget and give you less spending money for essential things such as food and utilities.
Try to clear your debt by getting a debt consolidation loan to pay off your debt, and then you only own the loan back, which will give you peace of mind and help you start saving for a rainy day.
Start a savings fund
Having money saved up in case there are emergencies is important. When tough times arise, it is good to know you have some money to fall back on.
You can automate your savings through your bank app or start investing money where you can get some returns to add to your emergency fund.
Become Energy Efficient
Being more energy efficient means you can save money on electricity. Turn off lights that are not needed and switch to energy-efficient products to help save.
Ensure all appliances are switched off when not in use, and plugs are switched off at the wall socket to prevent energy usage when the appliance is not in use.
Fix any leaks or cracks in your home to prevent heating and cooling systems from working over time.
Conclusion
Not being able to enjoy your money or afford the necessities can frustrate those working hard.
To summarise, having a budget, selling unused/unwanted items, spending wisely, clearing debt, starting a savings fund and becoming energy efficient can help save your money. These tips can help you cut expenses and start saving more.
This article highlighted practical strategies for consumers to safeguard their finances and find avenues for savings amid daily expenses. From the fundamental discipline of budgeting to the resourceful practice of selling unused items, prudent spending habits, and debt consolidation, each tip serves as a building block toward financial resilience. Encouraging the establishment of a savings fund and promoting energy efficiency further fortify one's ability to weather economic uncertainties. By implementing these tips, readers can not only survive but thrive in the face of rising costs, emerging more financially empowered and prepared for whatever challenges lie ahead.
Visit https://www.jenniferslittleworld.com/ to discover further useful tips to help you navigate the cost of living crisis.
Thursday, 16 November 2023
Windley Key Fossil Reef Geological State Park, Islamorada, Florida
Monday, 13 November 2023
The Turtle Hospital, Marathon Key, Florida
Recently I wrote about our trip to the Florida Keys, and our attempts to spot sea turtles from the Old Seven Mile Bridge. Unfortunately our efforts were unsuccessful, but luckily as an alternative we were also able to visit the wonderful Turtle Hospital just down the road!
We visited on the final day of our holiday before driving to Miami for our flight that evening. It's recommended to book tickets in advance, but there seemed to be plenty of availability. We booked the evening before, and lots of people were accommodated without booking. You must visit as part of a guided tour, which lasts around 90 minutes.
Our visit began with a short presentation in the education centre. We were shown pictures of the different species of marine turtle, and learned to identify them. We were also told about the problems that the turtles face in the ocean, both locally and worldwide, and all about the work of the Turtle Hospital in treatment and rehabilitation. It was really interesting!
Then we were able to watch a turtle having an operation, which was fascinating to see. Many turtles rescued suffer from FP (fibropapillomatosis), benign tumours that can cause problems with vision, feeding and movement. It can either be the reason for the initial rescue or discovered when they are admitted for something else, like a boat injury. It seems to be caused by toxins ingested by eating weeds in the sea and is very common. These tumours can be removed gradually using laser surgery leaving just a small scar, and that is what they are doing in the photograph below.
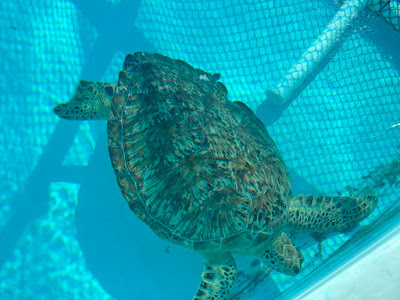
In total at the centre we saw forty-three turtles. The turtles which are being treated before release are kept in large tanks. This one has a flipper missing after an injury, but is still able to be released.
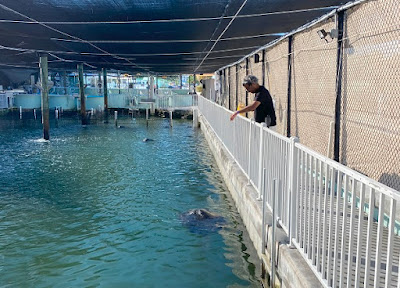
There are however some turtles which need to remain at the centre. For example there was a turtle at that is blind, and many of the turtles suffer from a condition called 'bubble butt'. This is caused when the turtle suffers an injury which traps gases inside the shell and causes it to float. Weights can be attached to help the turtle to swim, but as the turtle grows it's not a practical long term solution for a released turtle. So there is a large outdoor tank at the hospital which houses these turtles and is filled with sea water (and smaller fish that have made their way in through the pipes!)
At the end of the tour you have the opportunity to feed these turtles which was a lot of fun.
I was interested to learn that any turtles that you see in captivity, for example in an aquarium, are all turtles that can't be released back into the wild for whatever reason. The places hosting the turtle are usually proud, and happy to share more information. For example I looked up OD who now lives at Shark Reef Aquarium in Mandalay Bay, Las Vegas, who was rescued by the turtle hospital, and Miko at the Frost Museum in Miami that we saw in the museum the previous week.
As you can probably tell I learned a huge amount from our visit to the Turtle Hospital, and we were all really glad that we made the effort to visit. There was such a lot to see and it was so interesting. I would definitely recommend a visit if you are in the area!
Friday, 10 November 2023
Christmas diamond painting kits inspiration
This post contains Amazon affiliate links
I love diamond painting, I find it a relaxing and mindful craft and I enjoy admiring my finished pieces, like my Starry Night diamond painting which always gets a comment from visitors. Diamond painting is a brilliant craft for Christmas, it's a fun way to get in the festive mood in the run up to Christmas and produces some lovely sparkly Christmas decorations. A larger piece is also something that you can work on over the festive period ready for display next year.
I've hunted out some different Christmas diamond painting kits, both traditional and a some that are a bit different, for some festive diamond painting inspiration.
Smaller kits for beginners or groups
A set of small diamond painting kits (affiliate link) is a great way to get started with the craft. They work really well for a Christmas crafting party as they are easy to divide up, quick to complete, and everyone gets to go home with at least one finished project. If you are working as a group it's a good idea to buy some extra pens, wax and trays so that everyone can craft at the same time. As well as being turned into ornaments, they can also be used to decorate Christmas cards or you can also make diamond painted Christmas gift tags (affiliate link).
Large full drill Christmas diamond painting kits
These large diamond painting pieces (affiliate link) can be complicated and take a long time to complete, but they are very satisfying once finished as the entire piece is filled with the sparking diamonds. You need to be very organised when it comes to sorting out the different coloured pieces, I recommend a storage container with small, labelled compartments that you can decant the bags of drills into. It's also best to work on the piece in small sections so that you don't expose any more of sticky background than necessary to avoid it drying out.
Partial drill Christmas diamond painting kits
Partial drill kits are kits with a coloured background that are embellished by the diamond dots. They are often quicker and easier to complete and don't use such a large selection of colours. The background may be sparkly or shaped for extra interest, and allows for finer detail when printed rather than composed with the diamond drills. This partial drill Christmas diamond painting kit (affiliate link) has a painted background with diamond dots for extra sparkles.
Something a bit different
There are also some diamond painting kits that let you make something a bit different than the usual flat piece. For example this Santa diamond painting nightlight (affiliate link) which would make a brilliant Christmas decorations! There are also kits for diamond painting Christmas wreaths and other hanging decorations.
The best day trips from Turin
This is a collaborative post
Located in Italy's industrial heartland, Turin is a city synonymous with great food, culture, and design. While it may not be as well-known as other Italian cities like Rome or Florence, Turin is definitely worth a visit – especially if you're looking to escape the hustle and bustle of city life.
 |
| Photo credit Massimiliano Morosinotto via Unsplash |
Turin and the wider Piedmont region of which it is a part have long been the economic powerhouse of the Italian peninsula. And, okay, that may not exactly persuade you to visit unless you're a serious gearhead who wants to see the city where Alfa Romeo, Fiat, and Lancia were born. But like most Italian cities, Turin has a wealth of historical and cultural treasures that make the city worth a visit.
And because Turin is located in the wealthier northern part of Italy, and thanks in part to its industrial heritage, the city is blessed with some of the best public transport connections in the entire country. That makes it very easy to get out of the city and see more of what Piedmont offers.
So what are you waiting for? Drop off your bags at a luggage storage in Turin and get ready to explore this sometimes underrated city.
The Royal Palace of Venaria Reale
The Sacra di San Michele
 |
| Photo credit Fabio Montello via Unsplash |
The Lake District
 |
| Photo credit Lewis J Goetz via Unsplash |
The Town of Asti
Conclusion
Wednesday, 8 November 2023
The Old Seven Mile Bridge, Marathon Key, Florida
We recently spent a few days in Marathon, part of the Florida Keys. The Florida Keys are the string of small islands which stretch from the south eastern tip of mainland Florida to Key West. It takes about two hours to drive from Miami to Marathon Key, which is located in the Middle Keys. We stayed at the Isla Bella Beach Resort which is a fantastic resort in a beautiful location, and is situated just opposite the entrance to the Seven Mile Bridge.
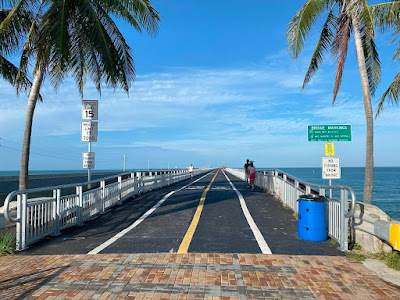
The Seven Mile Bridge connects Knight's Key, part of Marathon, to Little Duck Key. There are two bridges here, the modern road bridge and an older bridge. The older bridge was originally a railway bridge and was then converted to a road bridge before the new bridge was completed in 1982.
Although most of the older bridge is still standing, it has fallen into disrepair and only the 2 mile section which connects Marathon to Pigeon Key has been restored. Reserved for pedestrians and cyclists, it can be used to access Pigeon Key and is also a lovely walk with great views and the opportunity to look for sea life in the water below.
There is a good sized car park at the entrance to the bridge. There were always spaces when we visited (late October) and I would imagine that turnover is pretty quick as many people just hop out for a quick look. There are also some informational boards so that you can find out more about the history of the bridge.
The walk across the bridge to Pigeon Key is 2 miles, however entrance to Pigeon Key is only possible with paid admission (see details here - Pigeon Key. Paid admission to Pigeon Key also includes transport across the bridge via tram. If you just want to walk across the bridge like we did (or run, or cycle!) then be warned that it can be a hot walk with no shade (although there may be a breeze), and because it's just a bridge there are no toilets or other facilities along the way or in the car park.
There are distance markers painted along the bridge so you can see how far you have left to go if you are walking to Pigeon Key. Initially we set out to walk the entire distance, but we quickly realised that there was no benefit if you aren't planning to visit it! In fact you only really need to walk a few hundred metres across the bridge to really appreciate it.
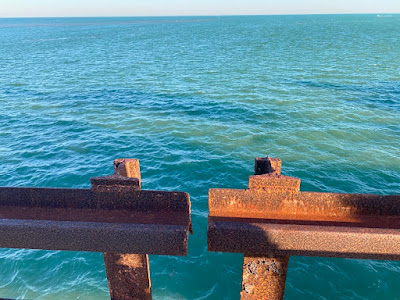
If you want to look for sea life in the water below, a good tip that we were given is to stand at the part of the bridge which is over a pillar. You can identify this by looking for where two parts of the outer railing have a smaller gap in them, like in the photo below (there is an inner railing in front of this one):
The water below here was often smoother and so it was easier to see underneath the surface. We were also told that this is where the larger sea creatures lie in wait for the smaller fish.
We spent quite a lot of time looking for sea life over the bridge! It took several visits, but we saw jellyfish, lots of really large rays just under the surface, some creatures that looked like huge sharks with their fins above the water, and lots of things jumping and splashing before we could see clearly what they were! We also saw lots of birds. People on the bridge at the same time saw turtles, but we kept missing them!
The Seven Mile Bridge is also a lovely place to watch the sunset, either from on the bridge itself or from just to the side. In the photo below you can see the new road bridge in the foreground, and the restored old bridge is the blue one just behind to the right.
Monday, 6 November 2023
How are Hama beads made?
The Hama bead factory is located in Nykøbing, Denmark and products are sold to more than 50 countries worldwide. You can watch a fascinating video tour of the factory here:
Friday, 3 November 2023
Hama bead Christmas crafts and projects
I love crafting for Christmas, and over the years I've shared many Christmas craft ideas on my blog. Today I thought I'd share some of my favourite Christmas crafts and projects using one of my most used craft materials - Hama beads. All of these craft ideas are perfect for keeping children busy in the run up to Christmas, can be used to create some individual and unique Christmas décor, and are perfect crafts for both children and adults.
Make sure to click the links for each project to find a more detailed tutorial and patterns.
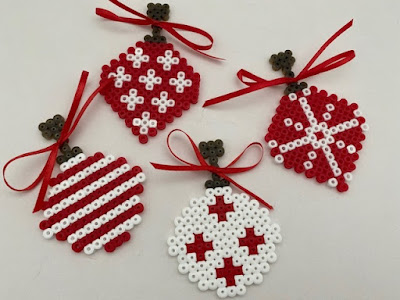
I love Scandi red and white theming and so I used just these colours to make some simple Scandi inspired Hama bead baubles, finished off with a narrow loop of red ribbon.
These Hama bead Christmas wreath ornaments are so easy to make, and perfect for using up any odds and ends of green beads that you might have leftover from previous projects or kits.
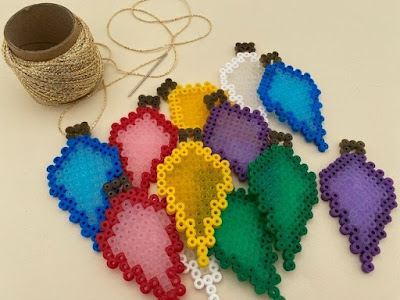
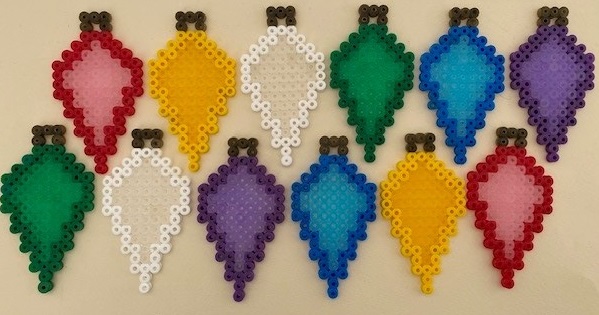
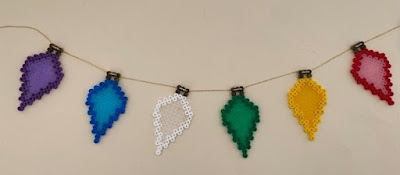
My Hama bead Christmas fairy light bunting uses transparent beads, although they could easily be made using solid colours for some cheerful, bright Christmas bunting.
These Hama bead and ribbon bauble ornaments use festive Christmas ribbon for some extra embellishment.
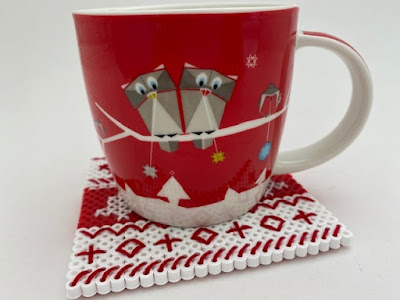
Some more Scandi inspired design with this Scandi style Hama bead Christmas mat which is a great place to put your Christmas cuppa.
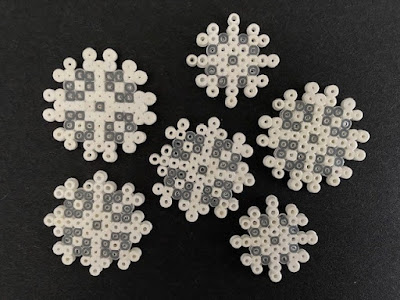
This Hama bead snowflake bunting was one of my very first Hama bead craft posts! I used the hexagonal and circular pegboards to make six different Hama bead snowflake designs which I strung up as bunting but which could also be used as festive coasters.
More recently I designed some more Hama bead snowflakes patterns which I used with mini Hama beads to make tiny Mini Hama bead snowflakes.
I used some to make mini Hama bead pin badges for some sweet little Christmas accessories!
Another red and white craft, these Scandi inspired Christmas battery tea light holders are perfect for some festive decoration when they are filled with a battery tea light.
Finally if you have a Minecraft fan in the house why not keep them busy making some Minecraft Hama bead Christmas baubles.
I hope that you enjoyed this roundup of some of my favourite Hama bead Christmas themed crafts! I've published many different Hama bead crafts over the years, and you can find them all here - Hama bead crafts and projects.
Wednesday, 1 November 2023
Hama bead Christmas fairy light bunting craft
I made twelve lights in total, in six different colours. The Hama beads need to be ironed to fuse the beads together. It's a simple process, but if you need some help with ironing the Hama beads then take a look here - Ironing tips for Hama beads.
