Thursday 29 November 2012

How to make a Nativity Play Shepherd's costume from a pillowcase


This post contains Amazon affiliate links

I was very relieved to find out that Harry had been cast as a Shepherd in his pre-school Nativity play. It is the very first costume that we've been asked to provide, and I think that we've been lucky. Because of this I was determined to put together my own costume. Asda sell a nice ready made Shepherd's costume for £8, so my personal challenge was to make a costume for cheaper that (in my opinion!) looks just as good.

Shepherd's costume from a pillowcase for Nativity play


At the time of making the costume I didn't have a sewing machine, and the costume probably won't last much longer than it's needed, but I think that it does the job!

Materials needed:

A brown pillowcase (£1.96 for two at Asda)
Brown ribbon (50p for a 3m remnant in our local craft shop)
Velcro (21p for 3 inches)
Cord (80p for 2m)

This gave me a total cost of £2.49 - well under budget!

You also need:

A suitable checked tea towel
Brown sandals or flip flops
A T-shirt to wear underneath
Stuffed sheep
Old curtain pole or similar for the crook

Instructions:

The pillowcase forms the base of the outfit. I cut a hole for his head in the top, and then a small slit down the back, sewing velcro along the slit so it can be fastened. Then I cut a hole on each side for his arms, about an inch below the top of the pillowcase. I also removed some of the flap from the bottom of the pillowcase to make it less bulky. It is quite long on Harry (he was 3 when he wore this) but I decided not to shorten it as I thought I'd only make it look messy. I think that he looks sweet in an oversized costume anyway!

I decided to make the costume a bit more individual by sewing two lengths of ribbon down the front. It did take a while, and my stitches are a bit wonky, but I think it looks okay. I'm sure that a Shepherd would have sewn his own clothes, and he wouldn't have had a sewing machine. Then I cut my 2m length piece of cord into two, one half to tie around the tea towel on the head and one half to tie around his middle. Harry is wearing a long sleeved t-shirt underneath, I found one that had plain sleeves that matched the fabric.

The crook is made from an old curtain pole, the slim type used to hang net curtains. I fashioned the hooked end from cardboard, then sellotaped it all together firmly. I covered it with strips of plain paper and gave it a couple of coats of brown paint. I'm fully expecting the teachers to take it off him for health and safety reasons, as he does have a tendency to brandish it wildly!

I was really pleased with the finished costume, and it really was so easy to make!

Shepherd's costume from a pillowcase for Nativity play

Here are some links to items which will help you put together this costume (all affiliate links):


Braided leather for the belt and head

Comments disabled due to spamming, please feel free to contact me via my other social media channels (see icons top right)

Friday 23 November 2012

Why do I blog?

This post has been inspired by a Blog Hop hosted by Dilly Tante, a thought-provoking blogger who I greatly admire. Dilly has posed some questions for us bloggers to think about, and I found them so interesting that I wanted to take part. Here are my answers:

Why do you blog?
I first started my blog as an on-line diary and a place to share photographs and anecdotes about my children with the rest of the family. I now also like sharing things that I've made, either myself or with the children, writing about places that we've visited, and adding my musings on parenting.

What do you get from it?
I like the validation that I'm not alone in feeling or acting a certain way. I like thinking that I've inspired someone to do something, even if all they have done is pinned a project! I've also discovered many wonderful blogs out there that inspire me, sometimes through words and sometimes through pictures. I have done many things with the children that I wouldn't have even thought of if I hadn't come across them on a blog somewhere. I've also discovered that there are so many people out there who are exactly like me and dealing with the same issues - sometimes people are much more honest online than in reality. For example, I know from my early morning Twitter feed that I'm not the only one that has had children up all through the night!

Is it trivial and is that ok sometimes?
Yes, it is trivial and to me that is absolutely fine. I'm not being paid to write, it's not my job, so it is up to people whether they want to read or not.

Why should people be interested in what you write?
People don't have to be interested in what I write. If they are then that's great, but the wonderful thing about people is that everyone is different and we all have different interests.

Do you care if they are not?
I hope that people are interested, but if they weren't then they wouldn't read my blog and so that's fine. I don't mind if reading my blog isn't for everyone.

If you blog just for you why do it publically?
I don't blog just for me, and I think that must be true for most bloggers. As an absolute minimum I hope that my close family read it! If I really wanted to write just for me then I would password protect it.

What value do you think you are adding to the world by blogging?
I think that I have some ideas that are worth sharing. I enjoy reading other blogs similar to mine, and so I hope that some people enjoy reading my blog and seeing a little window into my world.

Do you feel defensive about blogging?
Sometimes I do, and I don't often mention it to real-life friends. I'm not sure why, perhaps I worry that it seems a bit sad or a waste of time. But before I started blogging I was quite capable of wasting time on the internet, now at least I have something to show for it!

Make sure that you visit the Blog Hop post here and see what Dilly and other bloggers have to say, or you can view the linked up posts below. If you are a blogger, why not take part too, I'd love to read your answers! Or please do share your thoughts in the comments below.

Thursday 22 November 2012

Challenging myself as a SAHM and The Day Zero Project

It doesn't really kick in until January, but I am now officially a stay-at-home-Mum. I know that it's the right thing for me, and I'm incredibly lucky to be able to stay at home with the children. But that doesn't mean that I'm not going to find it difficult. I was browsing through StumbleUpon the other night (it's brilliant!) and I came across this website Suburban CEO (page no longer available). I read many things here that really struck a chord with me.

In particular, I was very taken with this chart showing how the life of a stay at home mother has changed (link no longer available unfortunately) over the last century or so, and why women staying at home with children can now find it very difficult. The website then goes on to talk about the five things that are missing in modern life, and how we can replace those missing pieces - community, goals, support, money and leadership. Even if you are a Mum that doesn't stay at home full-time with the children I'd really recommend visiting the site. It doesn't take long to read through and get the gist of it, and I think that it is relevant to everyone. I certainly experienced the same issues when I was working part-time.

One of the most important recommendations on the site is having projects, in particular short term projects - a goal that can be achieved within three months. I really like the idea of setting out some things that I would like to challenge myself to achieve, and being able to tick them off when they are done with a sense of accomplishment. This idea reminded me of something else that I had read about - The Day Zero Project. This is a self-created list of 101 challenges to be completed within 1001 days.

So I am combining ideas that I have picked up from both these websites, and I have set up my very own list of 101 Things in 1001 Days. Bearing in mind that overseas travel to exotic destinations is probably out for the next few years, all of my goals are very simple and should be easily achievable if I just get on with them. Some go back to interests that I had before children, and some are things that will help me to be more organised in the future. Some are things for myself, some are for me and the children, some are for me and my husband and some are for our whole family. Some will take a few minutes to complete and some will take a lot longer. There will certainly be no excuse for sitting around on an evening and thinking that I have nothing to do!

You can see my list here 101 Things in 1001 Days, and I'm going to create a page on the blog to track my progress. I'm really motivated to complete the list so I'll see how I go - I have until the 20th August 2015!

Have you started the Day Zero Project? I'd love to know what you think about the idea!

Tuesday 20 November 2012

How technology affects my son's behaviour

Like most children, Harry does come out with some funny things. Some of the things that he says are things that must be unique to his generation.

If we are running about outside and he starts to feel tired, he will stop suddenly and say that he is charging. If we ask him to sing a song, he'll tell us that he needs to load it first before he can sing it. When he is riding his scooter along I've heard him doing a little sat nav voice for it and saying "turn right" and "you have reached your destination".

After seeing my husband and I with our smartphones he has taken to pretending that his hand is his very own phone. If we are talking about something that we've done in the past, he'll say that he's going to show us a video of it, and he'll hold out his palm for us to see as though he is showing us on a phone. He'll also type pretend numbers with his finger into his hand and talk on it.

Do other children do this kind of thing?

Saturday 17 November 2012

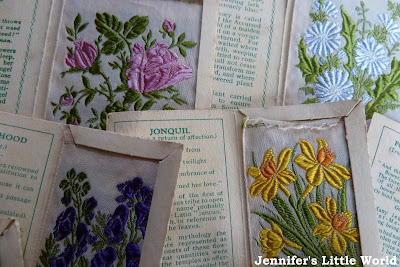
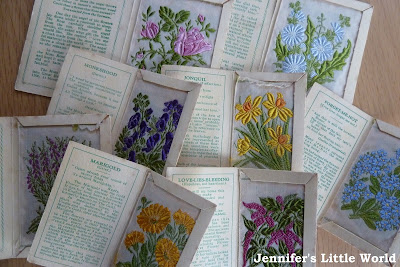
Vintage love - Embroidered silk flower cards from Kensitas cigarettes

I collect lots of things. I'm not really one for ornaments, I like to collect things which are small, flat and inexpensive. Some of the prettiest things that I have in my collection are these embroidered silk flower cards which were given away with Kensitas Cigarettes in the 1930's and were given to me by my Grandma. I've had them for a few years, and I often take them out to admire them. Thanks to the wonder of the internet I have found a whole website devoted to them - Kensitas Silk Flowers - and I've been happily browsing. I'm happy with the ones that I have, and I don't have any inclination to try and collect a whole set, but it's fascinating to learn all about them!

Vintage embroidered silk flower cards from Kensitas

Vintage embroidered silk flower cards from Kensitas

Thursday 15 November 2012

Felt Christmas stocking decorations

These little felt stockings are based on some that my Mum made when we were little. They are to be used instead of hanging chocolates on the tree - they are sized to fit a miniature sized chocolate bar, or they can hold several individually wrapped chocolates.

How to make felt stocking decorations for Christmas


First I made a template for the stockings on paper by drawing around a small chocolate bar to make sure that the sizing was correct. Then I cut out the two halves from red felt and sewed them together by hand. I cut out the trim from white felt and glued it along the top. The gold yarn has been sewn in for hanging, and the beads have been glued on for decoration.

There are lots of ways that you could decorate these simple stockings - perhaps with scraps of fabric or ribbon, embroidery, sequins or buttons. You could also make up some blank felt stockings and let your children decorate them by sticking things on.

How to make felt stocking decorations for Christmas

I think that they'd also make a great Advent calendar. You could make one for each day to count down to Christmas and hide a small sweet or Christmas message inside each one.

This Tree Decoration post is part of the Counting Down to Christmas Blog Hop which is being co-hosted by the following blogs. See below for links to lots of other fab Christmas tree decorations! 

Rainy Day Mum ~ Mummy Mummy Mum! ~ Life at the Zoo ~ The Fairy and The Frog ~ Jennifer’s Little World ~ Making Boys Men ~ The Boy and Me ~ Mama Pea Pod ~ Here Come the Girls

Tuesday 13 November 2012

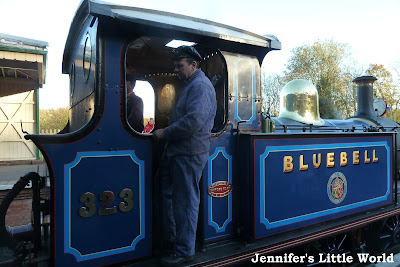
The Bluebell Railway in Sussex

I have fond memories of visiting The Bluebell Railway as a child. It's a heritage train line which runs an 18 mile return trip through the beautiful Sussex countryside. They have a huge collection of steam trains and restored carriages, and all the stations have also been preserved. We parked at Sheffield Park Station where there is a good sized car park, museum and shop. The train stops briefly at Horsted Keynes Station, then on to Kingscote Station where the engine moves around to the other end of the train to take the carriages back.

The Bluebell Railway steam trains in Sussex

It's not cheap - in 2012 we paid £13.50 per adult for a return fare, although at the time there was a special offer on where children (3+) travelled for £1 instead of £6.80 which is a great deal. You can check current tickets and fares here - Bluebell Railway Visitor Information. With hindsight I think that when we visited Mia was still a little young, she was at the stage where she couldn't sit still (although I'm not sure that ever ends!) and all she wanted to do was crawl about on the dusty floor with a toy car. That was a bit awkward in a cramped carriage which was divided into small compartments. It's worth knowing that alternate services are run with open carriages, which might have worked better for us.

The Bluebell Railway steam trains in Sussex

Harry was very excited about going on the steam train. He was full of questions about how the train worked and what was going on around him. We arrived a few minutes before the train was due to leave and it was quite busy, although we managed to find some seats. Because it was so full we opted to stay on the same train for the whole journey, rather than disembark at Kingscote Station at the end of the line and take a later train back. Also there's not a great deal to do at the station, and we didn't want to be hanging around with grumpy children. We did however get down from the train to watch them move the engine around, which everyone was fascinated by, all watching with cameras poised!

The Bluebell Railway steam trains in Sussex

Before leaving we stopped in the museum at Sheffield Park Station. It's a very new and beautifully presented museum with lots of fascinating information about train history and some models which Harry loved.

They also run a special Father Christmas service at Christmas which I remember going on when I was little. I would definitely like to take our little ones on it one year, although I think we'll wait until Mia is a bit older. We also pulled up alongside a very comfortable dining car where people were enjoying their Sunday lunch - I think that's definitely one to save for a child-free occasion!

Saturday 10 November 2012

Raised with Enid Blyton

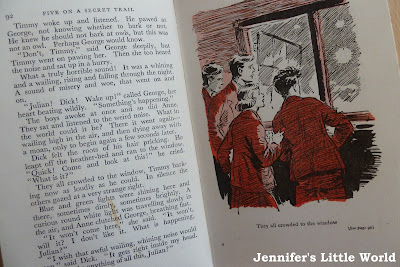
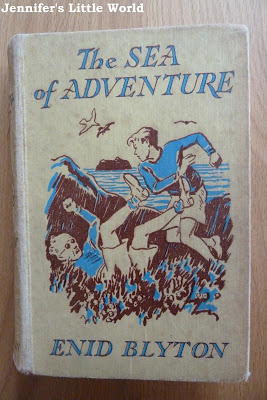
We always had lots of Enid Blyton books in the house when I was growing up. My Dad had a big collection of the original hardbacks, and I read them over and over. I didn't have a torch to read under the bedcovers but I remember begging to read one more page before the light was turned out. I still enjoyed them even though they were rather removed from my own experiences. The Famous Five books are the first proper books that I can remember reading on my own, and I devoured the books - buying them with Christmas money, borrowing from friends and the library.

Vintage Enid Blyton books

The books have held up pretty well considering how often they've been read by me and my siblings, and after dividing them up I still have plenty to pass down. Behind these is a whole shelf of paperbacks that I've bought since from charity shops, including the full set of Malory Towers books, another favourite series.

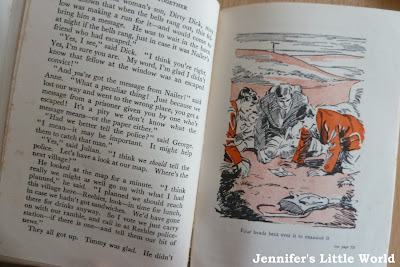
I loved the original illustrations:

Vintage Enid Blyton books

Vintage Enid Blyton books

Maybe the stories were quite repetitive, they certainly had many of the same themes, but I didn't mind. It's also a different experience when re-reading them as an adult, and you realise how politically incorrect some parts seem now! But although Enid Blyton may have had her critics, she certainly started me off on a love of reading!

Vintage Enid Blyton books

Did you read Enid Blyton as a child? Which were your favourite stories?

Friday 9 November 2012

An ending, and a beginning

Today marks the start of a new role in life - as a full-time, stay at home Mum. After being back at work for a whole month I was placed at risk of redundancy, and the whole long, drawn-out process, which could have seen me found another job at any time up until 5pm on my leaving day, has finally come to an end and I have now officially been made redundant.

I'm not really cross about it. I fully appreciate that my work had dried up, and the fact that I had taken a full year's maternity leave twice without any cover shows that I was hardly indispensible. Mainly I'm just a bit sad, it was my first proper job out of university, I'd been working in the same team for nine years, and I'd built up some strong friendships. I'm really going to miss the social aspect.

Fortunately we are in a position financially that means I can stay at home for a bit, and now that everything has finally been confirmed I'm able to concentrate on the positives. I had some wobbles about returning to work, and I am thrilled that I'm going to be able to spend more time with the little ones. Harry will move to a pre-school closer to home for a few sessions a week as we prepare for him to start school next September, and Mia will be at home with me all the time for now. I sometimes feel that Mia can be pushed to one side as Harry can be so demanding, so it will be lovely to have some time to spend just the two of us.

Here's to a new chapter!

Thursday 8 November 2012

Reindeer handprint Christmas cards


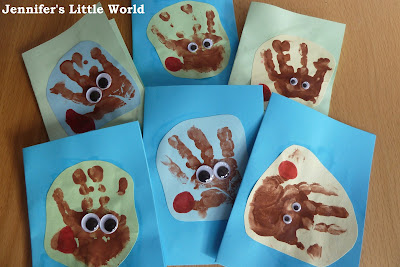
One of the first Christmas tasks that pops up on the calendar is sending out the Christmas cards, and it's a good idea to start thinking about them sooner rather than later. With young children, I like to involve them in the making of the cards, and they can easily make these lovely reindeer cards using their hand prints.

Simple reindeer handprint Christmas cards

I must admit that this handprint reindeer Christmas card is not an original idea. Harry brought one back from nursery last year and I fell in love with it, so much so that I kept in my drawer all year long to use as a bookmark. This year I decided to replicate it using Mia's hand for the reindeer and Harry's help to add the details.

Simple reindeer handprint Christmas cards

All you need to do is make some handprints with brown paint onto coloured paper or card. It's worth making far more than you need so that you can choose the best in case any end up smudged. Then just add two googly eyes and a red nose! If you are hand delivering the cards you could use a red pom pom, stuck on firmly.

I cut out the reindeer faces and Harry then helped me to glue them onto some contrasting coloured card, this way you don't need to worry too much if you end up with some mess around the edges of your prints. We used different sized googly eyes for some variety. They are so easy, and I think they look really sweet!

Simple reindeer handprint Christmas cards

Tuesday 6 November 2012

Pizza cookie with sweets

Pizza is a favourite meal in this household, and cookies are a favourite treat. This recipe for a giant pizza cookie combines the two!

How to make a pizza cookie treat

My original inspiration for the pizza cookie idea came from the A little bit of heaven on a plate blog, sorry no longer available. I wanted to make more of a biscuit base though, so I used the recipe from another pin - A Mothers Ramblings - As big as your head cookies, changing it slightly by keeping it plain as I was going to be adding plenty of sweets on top.

Ingredients:

Base:
125g brown sugar
75g caster sugar
125g butter (softened)
2tsp vanilla essence
1 egg
1tsp baking powder
150g plain flour

Topping:
Icing sugar
Red food colouring
Water
100g bar white chocolate, grated
Sweets

Method:

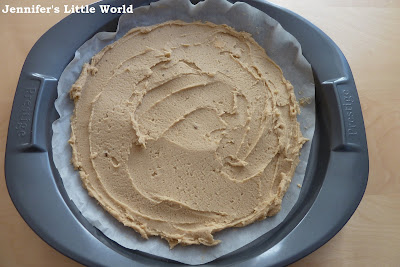
Start by making the base. Cream the sugar and butter together, it's a lot easier if the butter is softened first. Then add the vanilla essence and the egg, then finally the flour and baking powder. The mixture will have the texture of a thick paste. I lined a pizza tray with grease proof paper and then spread the dough out evenly on top with a knife. It will spread a little when cooking so leave a small gap around the edges. Mine spread out really nicely leaving a good, realistic looking crust.

How to make a pizza cookie treat

Bake in the oven at 180C (slightly lower for fan assisted ovens) for about twenty minutes. It is ready when it has started to brown on top, but it will still appear quite soft. It needs to cool for a little while, and then it will harden up. You can see how the crust has curled up slightly resembling pizza crust, perfect.

How to make a pizza cookie treat


Then for the fun part - the decorating! Originally I was going to use jam for the tomato sauce, but my son suggested using icing and I think that worked better. I just used icing sugar, with lots of red food colouring to make it nice and dark, and water. I'm afraid I can't give exact quantities as I always guess my icing! We spread it out over the base, and then sprinkled the grated white chocolate on top before scattering with sweets. I didn't choose particularly realistic ones as I just used what we had, but you could try and choose sweets that look like the different ingredients that you like on a pizza! 

How to make a pizza cookie treat

I think it looked pretty good when it was finished (and it tasted delicious too!). This would be a great alternative to a birthday cake for a pizza loving child (or adult!).

How to make a pizza cookie treat

Saturday 3 November 2012

Firework sensory tub


Since I created my first sensory tub, I can't stop thinking of ideas for new ones. I don't think that Harry would have had the patience for them as a toddler, but now that he is a bit older he has really enjoyed playing with the couple that I have made. Mia loves joining in too, although she does have a habit of splashing her hands up and down in the rice, then losing interest and wandering off, scattering rice about the house as she goes.

Firework toddler sensory tub for Diwali


This sensory tub has a firework theme, to tie in with Bonfire Night on the 5th November. Bonfire Night, also known in the UK as Guy Fawkes Night, is an annual event which commemmorates the arrest of Guy Fawkes in 1605 as he guarded explosives placed in the House of Lords by members of the Gunpowder Plot aiming to assassinate King James I of England and VI of Scotland. Most of the conspirators fled, some were killed, and eight of the survivors were hung, drawn and quartered. Today Bonfire Night is celebrated with bonfires, fireworks and parades.

Firework sensory tub

I didn't really fancy giving Harry matches and firewood in the sensory tub, nor did I really want to touch on the gruesome history associated with Guy Fawkes night just yet (you can read more about Guy Fawkes night here if you are interested), so I decided to concentrate on the firework aspect, as he will be going to several firework displays over the next few days.

The basis for the sensory tub is rice, which I dyed black. I just buy the cheapest value rice, tip a good amount into a bowl, add a fair bit of food colouring (at least half a teaspoonful) and mix it all about. If I have some, I add a squirt of anti-bacterial hand gel in, as this helps it to dry more quickly, although I do find that it dries quite quickly by itself if it's spread out on a tray for a few hours. I also had some sunflower seeds around from the garden so I added them in for some variety, I like how the stripes look like clouds in the sky.

Then I added some glitter, sequins and a few pom poms. Harry needs an activity to do with the rice, so I found some star shaped cake cases and star shaped chocolate moulds which I bought in the sales last January and he hadn't seen yet. Along with a couple of teaspoons, they were ready to make some firework cakes.

Children playing with a sensory tub

I put the sensory tub out on an old table cloth to try and contain some of the mess, then let them at it. Mia dug in and found a shiny star straightaway - bursting into a rendition of Twinkle Twinkle Little Star. Harry spent ages filling up the various cake cases and passing them to me. I was really surprised how long this sensory tub kept them busy for.

If you are looking for more sensory tub inspiration you might like some of my other ideas:

Halloween sensory tub
Easter sensory tub
Spring sensory tub
Beach sensory tub
Dinosaur Island sensory tub
Gardening sensory tub

Friday 2 November 2012

Review - Music for Kids Recorder Set

I like to think of myself as quite musical. It may have been a little while since I picked up my violin or sat in front of a piano, but I'm pretty good at coaxing a tune out of the musical toys that we have about the house. Like most people, the first instrument I learned to play at school was the recorder. I think it's really important for children to learn a musical instrument, so when I saw an opportunity to review a themed recorder pack aimed at young children, I thought that it would be a good way to start Harry off on a musical journey of his own.

We had the choice of Pirate or Princess, and so I chose Pirate. The pack contains a blue recorder and drawstring case, some stickers, a Starting to Play book, a CD and a fingering chart. The recorder is a good quality, three piece descant recorder, which is the size that is usually taught in schools.

Review - Music for Kids Recorder Set

As I expected, Harry loved it, and was instantly marching about blowing away. He also appeared suitably impressed when I belted out Amazing Graze for him, before performing my repertoire of children's favourites including Twinkle Twinkle Little Star and Jingle Bells.

The small book introduces the instrument, with tips on holding the recorder and playing the first notes. It only covers how to play two notes - B and A - so you will need to think about further instruction books or tuition in order to progress further. I think that a child completely new to music and the recorder would probably benefit from some adult help with getting started, preferably from someone that can read music. For a child that is already learning elsewhere though, perhaps at school, it would be easily picked up.

I really liked the CD that was included. The book teaches you to play just the note B in the rhythm of Twinkle Twinkle Little Star and Old MacDonald Had a Farm, then adds in the note A for both songs. It's not that tuneful of course, but if you play it along with the backing track on the CD it sounds really good (and there is applause at the end to keep you motivated!)

We received the recorder pack for the purpose of the review.

Thursday 1 November 2012

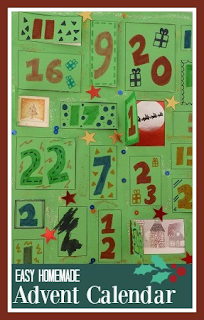
Easy homemade Advent Calendar to make with kids

It might seem early, but it won't be long until Christmas is upon us! Today I'm sharing how Harry and I made a really simple homemade Advent Calendar. This is a really good project to do with children, as they can do a lot of it themselves, and it's a great way to make a start on the Christmas crafting.

Making a simple homemade Advent calendar with children


The template for the Advent calendar is made using Microsoft Word or similar. Firstly set up the page so that the margins are much smaller than usual, then use the drawing tool to make 24 rectangles in various sizes. Try and leave a reasonable gap between the boxes. Then print out two copies - I printed out one copy onto white paper and one onto green paper. The white piece is the background, so it needs to be strengthened by glueing it onto a sheet of thick card. The green piece will be the front.

Making a simple homemade Advent calendar with children

Then you need to collect together some Christmas images. I mainly used my collection of cuttings from old Christmas cards, which I also use for gift tags. The cardboard meant that they made the Advent calendar a bit sturdier. You could also look for pictures on Christmas wrapping paper, Christmas catalogues and gift guides from shops, magazines with Christmas articles or just use Google images to search for Christmas pictures which you can print out.

Cut the pictures to the sizes of the different rectangles and stick them down on top. Try and let them overlap the sides of the boxes a little.

While they are drying, use a craft knife to cut out the windows on the top (green) sheet of paper. Make sure that you have both pieces of paper the same way up, and cut along the top, bottom and right hand side of each box.

Then glue the top piece of paper down onto the background. Only use a minimal amount of glue, you don't want the windows to end up glued down! Make sure that the windows are lined up with the pictures underneath.

When it's all dry, you can use felt pens to write on the numbers for the doors, and bling it up with some glitter glue and sequins. Harry loved helping with this bit, your child can really get involved with personalising their own Advent calendar. And it will still be a surprise when they open a door each day as they'll never remember all the pictures that they used!

Making a simple homemade Advent calendar with children

If you have a wooden Advent calendar with boxes, don't forget to have a look at my post with ideas for gifts to fill a wooden Advent calendar!