Showing posts with label recipe. Show all posts

Sunday, 20 March 2022

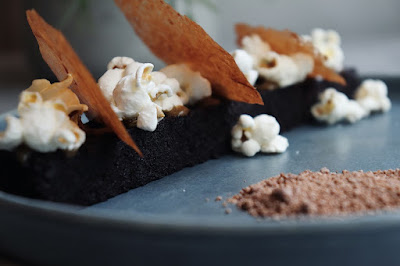
Recipe - Chocolate sponge with salted caramel sauce and popcorn

Today I have a delicious recipe to share for a chocolate sponge with salted caramel sauce and popcorn. This recipe was created by Chef Holly Taylor for Kindling Restaurant in Brighton. The dessert is dairy free, suitable for vegans and also has a gluten free option. It would make an amazing Mother's Day treat! 

This recipe was created by Chef Holly Taylor.

Recipe - Chocolate sponge with salted caramel sauce and popcorn
Photo credit Jo Hunt

To make the sponge cake:


Ingredients required

75g oil
35g good quality cocoa powder
220g dairy free yogurt e.g. soya yogurt
30g oat milk
2 tsp (10ml) distilled vinegar
150g soft dark brown sugar
140g self-raising flour (gluten-free self-raising flour will also work here)
¾ tsp bicarbonate of soda
½ tsp table salt

Method

Line an 8-inch square cake tin with baking paper. Preheat the oven to 170C.

Place the oil and cocoa powder in a small pan and heat gently for a few minutes to help bring out the flavour of the chocolate, then set aside to cool.

Put the dairy free yogurt, oat milk, vinegar and sugar together in a mixing bowl or mixer and whisk until smooth. Then stir in the chocolate and oil mixture.

Sift the flour, bicarbonate of soda and salt together in a clean bowl. Fold into the wet ingredients, mixing well to avoid any lumps.

Pour into the lined cake tin and gently level using a spatula, being careful to avoid removing too much air from the cake.

Bake in the preheated oven at 170C for 20 - 25 mins, until risen and springy to the touch.

To make the salted caramel sauce:


Ingredients required

200g vegan butter alternative
250g soft dark brown sugar
125g golden syrup
Large pinch of Maldon sea salt

Method

Place all the ingredients in a medium sized pan and heat gently over a low heat, whisking until combined.

Whisk the sauce occasionally as it cools to ensure a silky texture.

To make the popcorn:


Ingredients required

A small handful of popping corn kernels
2 tbsp of oil
Fine salt for seasoning

Method

Heat the oil in a large saucepan on medium high heat. 

Put 3 or 4 piece of popping corn into the oil and cover the pan.

When the test kernels pop, add the rest of the popcorn kernels in an even layer. Cover, remove from heat and wait 30 seconds.

Return the pan to the heat and gently shake it as the popcorn starts to pop. 

Try to keep the lid slightly ajar or use a lid with a vent hole in it to help release some of the steam.

Once the popping slows, remove the pan from the heat, remove the lid, and put the popcorn immediately into a wide bowl. Sprinkle with salt and toss to ensure it is evenly seasoned.

To serve: 

Cut slices of the cake into long fingers. Drizzle with the caramel sauce and top with salted popcorn. Serve with chocolate sorbet or dairy free ice cream. 

Chocolate sponge with salted caramel sauce and popcorn recipe
Photo credit Jo Hunt

Monday, 21 October 2019

Simple iced Halloween gingerbread biscuits and cookies

Simple Halloween gingerbread cookies and biscuits

I love gingerbread biscuits, and this Halloween I decided that I'd have a go at some Halloween themed iced gingerbread cookies. I must admit that I'm not very well practised when it comes to icing, so I was quite pleased with the results!

Below is the recipe that I used, it's the best one that I've tried so far. The dry and wet ingredients are in the correct proportions, and the biscuits keep their shape well while cooking.

Ingredients:

450g plain flour
2 tsp ground ginger
1 tsp bicarbonate of soda
115g unsalted butter
5 tbsp golden syrup
150g soft light brown sugar
1 large egg

Royal Icing sugar and water to decorate

Method:

Preheat the oven to 180C and grease baking sheets.

Sift the flour, ginger and bicarbonate of soda into a large mixing bowl.

Put the butter, golden syrup and brown sugar into a saucepan and heat until the butter has melted.

Stir the wet ingredients in to the dry ingredients, add the egg, then mix to a firm dough.

Roll out the dough and cut out your shapes. For these biscuits, I used a circular cutter (for the spider webs), a gingerbread man (for the skeletons and mummies), and and Easter Egg (for the skulls). Place onto the baking trays.

Bake for 10-15 minutes until golden brown. 

Gingerbread shapes recipe

When the biscuits are cool they can be iced. I used powdered Royal Icing and added enough water to make a thick icing, then I used a piping bag to ice. I came up with four different designs - the mummy and the skeleton use the gingerbread man base, and the spiders web is drawn on a circular biscuit. The sugar skull uses the Easter Egg cutter turned upside down, which I think works really well!

Iced Halloween themed gingerbread biscuits

As I'm a bit of a novice when it comes to icing, I kept the designs very simple. The mummies were definitely the easiest, and once I'd got the hang of the spiders webs they weren't too tricky either. The sugar skulls took a bit more practice but I was pleased with them once they were done - I'd like to have another go at them using some different colours of icing!

Halloween themed iced biscuits recipe

These would be great to share at a Halloween party or as party favours for guests. 

Iced biscuits for Halloween

A whole heap of Halloween themed iced biscuits!

 Halloween iced biscuits and cookies

Monday, 18 March 2019

Get Your Kids to Eat Anything by Emily Leary - book review

I received an advance copy of this book in exchange for a review on my blog.

Get Your Kids to Eat Anything book review

Fussy eating is a bit of a problem in our family, and I'm fully prepared to admit that it's my fault. Although I started out well with lots of different foods, when they started to show food preferences, over time I ended up sticking with the things that I knew they would eat. My husband and I don't eat a very varied diet ourselves, usually eating the same thing for breakfast and lunch and rotating through a small number of evening meals, so as long as I'm covering all the food groups I tend to stick to the things that I know and can cook easily.

But now that the children are older and I have a little more time to spend thinking about and preparing meals, I'd love to introduce a bit more variety into our diets. In particular, as frequent travellers, it can become a problem when we want to eat out somewhere, and the children would rather simply not eat than try something new.

So I was very keen to try the new book Get Your Kids to Eat Anything by Emily Leary. Emily has been blogging at A Mummy Too since 2011, and her blog is a fantastic resource for family recipes, with plenty of vegetarian choices - I've used several of her recipes in the past! Get Your Kids to Eat Anything is a 5-Phase programme that aims to change the way your family thinks about food.

Phase 1 puts the unfamiliar into the familiar, working with the food that your children already eat happily and introducing some new elements. In Phase 2 you experiment with texture, taste and smell as well as understanding where food comes from and growing your own. Phase 3 helps you to discover the fun in food with some creative and exciting dishes, and Phase 4 pushes the food boundaries with some unusual flavour combinations. Finally in Phase 5 you learn techniques to make sure that these new habits stick and keep your family mealtimes varied long-term.

Each of these phases includes a clear explanation of what you will learn and achieve along with two weeks of delicious recipes and activities to try with your family.

It's early days yet, but I can really see how this approach is going to work. For example, my children eat a lot of pasta. In fact, they eat pasta for dinner most nights, rotating through a variety of sauces, perhaps with some peas on the side. I always use the same type of pasta - macaroni pasta - and I just get in the habit of chucking a couple of bags in my trolley each week. In Phase 1 you are encouraged to take a look at the food that your child will happily eat and think about different ways that you could vary that dish. Even something as simple as thinking about making the food a different shape, making a food a different colour, or adding a little extra flavour.

It might sound basic, but it's honestly something that I'd never thought about before. So the very first thing that I did was to buy a bag of pasta in a different shape and serve it with the same sauce - and they ate it all up without a fuss!

Healthy chocolate cookies

I've also been enjoying going through the recipe section and picking out a few to try. I couldn't resist trying the simple recipe for Healthier Chocolate Cookies above - with just a few simple ingredients they make a great, healthy alternative to a chewy bar or biscuit and were very quick to make. There's a huge selection of dinner recipes too, and being vegetarian I was really pleased to see how many suitable recipes there are, using a wide range of ingredients.

I have a full recipe from the book to share with you. This recipe for Strawberries and Cream Pasta comes from Phase 4, so it's a little ahead of us yet, but the reason that I chose it is that it is based around a cheese sauce, which I can make easily and my children eagerly eat, but with a bit of a twist - roasted strawberries, again a fruit that my children love but served in a different way. Enjoy!

Strawberries and Cream Pasta 


Strawberries and Cream pasta recipe by Emily Leary
Photo credit - Tom Regester
SERVES 4 PREP TIME: 15 MINS • COOK TIME: 30 MINS

For the balsamic strawberries 

300g (10½oz) strawberries, hulled and quartered
1 tablespoon balsamic glaze

For the pasta

180g (6oz) butternut squash
300g (10½oz) macaroni
30g (1oz) plain flour
30g (1oz) slightly salted butter
450ml (16fl oz) whole milk
30g (1oz) Parmesan cheese, or vegetarian alternative,
Finely grated salt and pepper

Preheat the oven to 200C (400F), 180C fan, Gas Mark 6. Place the strawberries on a baking tray, season well with pepper, then drizzle with balsamic glaze. Stir, then place in the oven for about 15 minutes until the glaze bubbles. Set aside to cool.

Put the butternut squash into a pan of cold water. Bring to the boil and simmer for 10–15 minutes until tender, then drain and set aside to cool. Meanwhile, cook the macaroni according to the packet instructions, then drain.

Put the flour, butter and milk into a saucepan and place over a medium heat, whisking regularly for 5–10 minutes until thickened, then season. Tip the squash, Parmesan and white sauce into a food processor and whizz until smooth. Stir the hot, drained pasta into the sauce. Divide equally between 4 bowls, top with the strawberries and serve.

Get Your Kids to Eat Anything: The 5-phase programme to change the way your family thinks about food by Emily Leary, is published by Mitchell Beazley in March 2019, RRP £16.99
Wednesday, 20 December 2017

The 2017 Gingerbread Houses

This year the children broke up for the Christmas holidays well before Christmas - ten whole days in fact! It's been really nice, we've spent some time with family and had the chance for a bit of a tidy up and just general chilling out at home with Lego and Minecraft.

Yesterday we continued a tradition which is now in its sixth year and made our gingerbread houses. As always I used this recipe - How to make a gingerbread house - which I've adapted slightly to reduce the quantities of the melted ingredients. I also only use golden syrup instead of treacle, it seems to work out fine. That recipe also comes with a printable template, and if you reduce the size to 75% then there will be enough dough to make two smaller houses with a bit extra for some extra biscuits.

I always make the pieces the day before so that they have time to harden up a little bit before assembling the houses. This year I didn't bother with the boiled sweets for the windows as we never eat the ones that are left over. Here are the pieces all ready to go!

Gingerbread house pieces ready to assemble

I use Royal Icing to stick the pieces together and I just use the powder that you add water to, usually the Tate and Lyle one. I normally use an Icing Syringe set (affiliate link) which makes it really easy to get the icing where it needs to go and looking neat, it's also good for icing on some extra decorations if you have some spare icing. Unfortunately I was using up some Royal Icing from last year which had gone a bit lumpy and it kept clogging the syringe so I had to do my best with a knife! Then I just put out lots of different sweets and let the children loose.

Boy decorating a gingerbread house

Harry spent a lot of time planning the placement of his sweets and thinking about making it look like a real house.

Girl decorating a gingerbread house

Mia used her sweets to make a face on each side of the roof, and was most interested in making sure that there were some sweets left over that she could make a start on straightaway!

Here are the finished houses for this year!

Children holding their finished gingerbread houses

I'll leave them out for us to admire until tomorrow, then I'll break them up and put the pieces into cake tins for us to munch on. I shouldn't think that they will last very long - I'll be very surprised if there is any left for Christmas day!

I made our first gingerbread house back in 2012, and you can read about all of them here - Our yearly gingerbread houses.

Post contains an Amazon affiliate link.

Tuesday, 20 December 2016

Our yearly Gingerbread House

It's that time of year again - time to make the Gingerbread House! This is a tradition that I started back in 2012, and after the first year I used the same recipe to make two smaller gingerbread houses so that the children could decorate one each. I always use the Tesco Gingerbread House recipe which is fab, it comes with a template to print out (print it out at 75% if you want to make two houses) and a video demonstrating each step, perfect if you are attempting to make one for the first time.

Here is this year's effort!

Making yearly gingerbread houses for Christmas with children

Making the house takes a couple of days. I make the gingerbread pieces in advance and leave them to harden overnight, as if you try and put the house together straightaway the sides are too soft. I usually assemble the house myself, I'm quite good at it but I do need to concentrate. I find that if I make the icing nice and thick the pieces stick together well, and when the icing has set the house is nice and sturdy.

Then I lay out a variety of different sweets and let the children decorate.

Making yearly gingerbread houses for Christmas with children

For Mia I squeeze the icing where she would like it, but Harry can now use the icing nozzle himself. They are always so proud of their houses!

Making yearly gingerbread houses for Christmas with children

I captured our efforts on video as part of Vlogmas 2016, see below:


And here are our efforts from previous years!

Making yearly gingerbread houses for Christmas with children


Top left - Christmas 2012
Top right - Christmas 2015
Bottom left - Christmas 2014
Bottom right - Christmas 2013

Do you make a Gingerbread House at Christmas?

Making yearly gingerbread houses for Christmas with children

Monday, 29 June 2015

Making a Space Snack with Miles Kelly

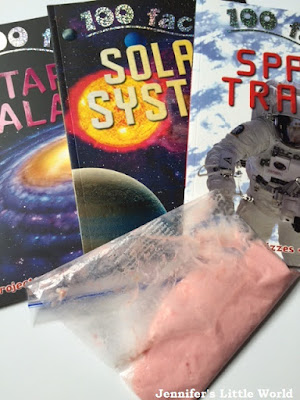
To celebrate the release of the three new Miles Kelly's 100 Fact Books, I was invited to come up with my own space themed snack inspired by the 100 Facts Space Travel book. Eating in space is of course quite different to eating on earth, not only do astronauts have to contend with eating in zero gravity, so they can't eat anything that will break up into tiny pieces, the food also has to be easy to prepare, capable of being stored for long periods, light in weight and mustn't need to be refrigerated. Most of the food is served in packets, to which water is added before eating.

To inspire us, we were sent the ingredients to make our very own Space Pudding to enjoy while looking through the books. All you need is some Angel Delight, powdered milk, water, a syringe and a re-sealable plastic sandwich bag.

Making a space snack with children

Harry very much enjoyed making the Space Pudding. First you need to add two tablespoons of Angel Delight and two tablespoons of milk powder to the bag, then add the water using a syringe. When all the water has been added, you squish the bag in your hands to mix it all together, leave it to stand for a couple of minutes, then eat by cutting a corner off the bag and squeezing it into your mouth - great fun!

Making a space snack with children

We watched a few videos to learn more about eating in space, and discovered that instead of bread for sandwiches, astronauts prefer to eat tortillas, because they don't make any crumbs which are annoying to have floating about the space station. They are also light, don't take up much space, and can be stored for a reasonable period of time.

So for our own Space Snack recipe we came up with a tortilla based snack. I had a think about what other foods we had in our cupboards that would travel well and would be sticky enough to stay where they were put in zero gravity and my thoughts turned instantly to our favourite family food - pizza!

So here is our recipe for a Tortilla Space Pizza Wrap:

Tortilla Space Pizza Wrap

One tortilla wrap
Tomato ketchup or tomato puree in a tube or sachet (about three tablespoons worth)
A bag of grated cheese with herbs already added (a large handful). In space this would have to be freeze dried grated cheese as there is no fridge!

Making a space snack with children

We put the grated cheese into a re-sealable bag and added a sprinkle of herbs and a couple of big squeezes of tomato ketchup. If we were really making this in space, we'd need to add some water too, to rehydrate the cheese. Then Harry squashed it up with his fingers to make sure that it was all mixed in. I cut a corner off the bag and Harry squeezed it onto the tortilla. I hope that the mixture would be sticky enough not to float away. Then Harry wrapped up the tortilla ready for eating, making sure that the bottom was secure enough to contain the filling.

We ate it cold, but it could easily be warmed up in the microwave. I think it tasted pretty good! I'm not a big fan of ketchup myself, but if the food was being prepared for space it could easily be made with a more tasty and healthy tomato sauce, perhaps with the herbs or other flavourings already added. I loved this challenge, and it really encouraged us to think creatively, as well as learning a great deal about everyday life in space. It would have been a great activity for our Space Day!

Making a space snack with children

Harry is very interested in space (he even has a space themed bedroom) and he couldn't wait to get his hands on these three fantastic 100 Facts Books from Miles Kelly. As you would expect, each book in the series contains 100 facts about each topic, with each double spread forming a chapter on a different theme.

100 Facts Space Travel talks about the history of space travel, what space travel is like now, and where technology could lead us in the future. Each page is a mixture of photographs and cartoon illustrations. All the facts are explained and expanded upon, and there are a few little quizzes and extra "I don't believe it!" facts added in.

100 Facts Stars and Galaxies looks at deep space, beginning with the formation of the universe, with facts all about the different types of stars, black holes and constellations, finishing by taking a look at the possibility of life elsewhere in the universe. There are little activity suggestions added in, like exploring how the universe is expanding by blowing up a balloon, and creating your own constellations by using a torch shining on holes pricked into a piece of cardboard.

Finally, 100 Facts Solar System takes a closer look at our own Solar System. It features each planet in turn, with a fact file, information about what the planet is composed of, and information about their moons.

All three books are laid out really well, with a mixture of fact boxes, diagrams and images, and different sizes and styles of text makes the information fun, and easy to dip in and out of. The books contain a huge amount of information, and I know that they are going to be both an interesting read and a useful source of reference.

We were sent these three books to review, as well as the ingredients for our Space Pudding.

Wednesday, 17 December 2014

Making Gingerbread houses with the children

This is the third year in a row that I've been making gingerbread houses. I remember how much I worried about making my first gingerbread house, and how proud I was of it! This year and last year instead of one I have made two smaller houses, so that the children can decorate one each.

I use a fantastic recipe from Tesco - How to Build a Gingerbread House. On the website you can find a video which is really helpful to watch first, and some templates that you can use for the pieces. To make two smaller houses I print the template at 75% of the size and the recipe makes enough gingerbread for the two houses along with extra for about eight gingerbread men or other decorations like little trees for the house.

The recipe is pretty straightforward. I never have any treacle so I just substitute golden syrup which seems to work fine. I also find that I don't need to add quite all of the melted butter and sugar to the dry ingredients, so I add it gradually and mix as I go. I make the gingerbread house pieces the day before and then store them overnight in a cake tin, separated by pieces of baking paper. This way they are nice and firm for when you come to assemble the house.

Making gingerbread houses with children

A trick that I learned from the video is to roll out the gingerbread directly onto the baking paper and cut the pieces out, then move the whole thing onto a baking tray. This means that the pieces don't become misshapen. You need plenty of baking paper!

I do find that the larger pieces that make up the roof need a little longer to cook than the window pieces. You need to remove the pieces from the oven as soon as they have started to brown slightly and then leave them to cool. They will still be quite soft when they first come out the oven, but they do harden up.

The windows are made using crushed boiled sweets, I find that I need about six large sweets for all the windows in the two houses. For a larger house you need one boiled sweet which you can place whole in the centre of each window before putting the pieces in the oven.

The next day it's time to assemble the house. The smaller houses each fit nicely onto a dinner plate, covered with tin foil. I use Royal Icing which you can buy in powder form and just add water. I don't follow the instructions exactly as I find it makes the icing too runny. I find about 300g of icing sugar and 40ml of water makes a nice thick icing, but just add the water gradually and keep mixing, it's best if you can use an electric mixer. This makes loads of icing, enough to assemble the houses and with plenty left over for decorating.

Making gingerbread houses with children

I use an icing syringe to pipe the icing onto the pieces, making sure to stick it to the plate at the bottom. Assemble the walls first and leave to set before adding the roof (it takes about 10-15 minutes to set firmly enough). I start with the back piece, icing a line along the plate and propping it up using a glass. Then I add the sides, again icing along the bottom to hold it in place. Then finally add on the front piece. I fill in any gaps with plenty of icing and if necessary I ice along the bottom sides again so it's nice and sturdy. Adding the roof is a little more tricky and you may need to hold it in place for a few minutes so that it doesn't slide off!

Making gingerbread houses with children

I make the gingerbread houses myself up to this point, as you do need a little bit of concentration! Then I let the children loose to decorate them. I find that chocolate buttons are good for decorating as they are light and stick down easily. Dolly mixtures add a bit of colour, and as I'm personally not a big fan of jelly sweets I always choose something that's nice and chocolatey too!

I helped the children decorate by piping them lines of icing that they could stick the sweets onto. They were so pleased with their finished houses!

Making gingerbread houses with children

The tradition continued! Here are our 2015 Gingerbread Houses.

Sunday, 8 June 2014

Recipe - Baked chocolate brownie cheesecake

For Mia's birthday I baked a dessert that I've been meaning to try for a long time - chocolate brownie cheesecake! The recipe comes from my brother who has impressed me with it in the past. It does take quite a few ingredients, but I found it pretty easy to make (and I had never made a cheesecake before).

Baked chocolate brownie cheesecake recipe

The cheesecake works best if you make it the day before and refrigerate overnight, so it's great if you are making it for an occasion where you want to prep as much as you can in advance. The brownie base can also be used to make standalone brownies, in fact I used this brownie recipe for my delicious cookie and brownie petit fours.

Ingredients:

Brownie base

130g dark chocolate, roughly chopped
130g unsalted butter
170g icing sugar
2 eggs
75g plain flour

Cheesecake topping

400g cream cheese (I used full fat Philadelphia)
150g icing sugar
1/2 teaspoon vanilla extract
2 eggs

Method

Start by making the brownie base. Melt the chocolate in a bowl. In a separate bowl, cream the butter and sugar together then beat in the eggs. Mix in the flour and the melted chocolate until you have a smooth mixture, then pour into a circular baking tray (mine measures 26cm in diameter which is about the minimum size I'd recommend using, but you could easily use one a few centimetres larger).

As I had the oven on anyway, I placed the brownie base into the oven (180C) for about five minutes just to make it a little firmer before putting on the topping.

Then make the cheesecake topping. Cream together the cream cheese and icing sugar then mix in the eggs. Spoon the mixture on top of the brownie base, making sure that it is spread evenly across. Smooth over with a knife. Bake in a pre-heated oven at 180C until the top has browned slightly and it is golden around the edges. I found that it took about 45 minutes. Leave to cool completely, then refrigerate overnight.

Baked chocolate brownie cheesecake recipe

Thursday, 6 March 2014

Mini Egg Cookies for Easter

My usual Easter baking is extremely traditional, and generally involves a couple of Cadbury Mini Eggs presented in simple 'nests' made from chocolate covered cornflakes. But this year I thought I'd have a go at something different, and so I tried some Mini Egg cookies. I know that it's not actually Easter for ages yet, but it's good to have a practice in advance. Also I've managed to resist Mini Eggs in the supermarket since just after Christmas, so I've done pretty well to get this far!

Mini Egg cookies simple recipe without egg

I used a very simple cookie recipe which requires few ingredients and was found originally on the Living it Little blog, sadly no longer available. It works very well when any type of confectionery is added - I've also used Smarties, Maltesers, Minstrels and chopped up chocolate. The Mini Eggs do make the cookies rather bulky, and so perhaps cookie style cakes would be a better description, but they are still delicious!

Recipe for Easter Mini Egg cookies


Ingredients:

4oz softened butter
4oz light muscovado sugar
6oz self-raising flour
1 tbsp golden syrup
Two 100g packets of Mini Eggs (give or take the few that don't make it into the bowl)

Method:

Cream together the sugar and the butter, then add the flour and syrup and mix to a dough before adding the Mini Eggs. I make my dough in an electric mixer, and I found that the mixer bashed the Mini Eggs about a bit which worked well in the cookies. Otherwise you could leave them whole, which will increase the depth of the cookie, or perhaps break them up a bit using a rolling pin before putting them in.

Roll the dough into small balls slightly larger than a walnut, flatten very slightly, and place on a greased baking tray. Bake in the oven for about 7 minutes at 180C.  The most important thing to remember with these cookies is that you need to remove them from the oven as soon as they start to brown on top, even though they will still be rather soft and spherical in shape. Leave them on the baking tray to cool and they will flatten out. I find that this recipe makes about 15 good sized cookies, although natural wastage does usually occur during the shaping of the cookies, especially if there are small children about.

Next I'm thinking about attempting a Cadbury's Creme Egg batch of cookies. I wonder if they'd work, or whether they'd turn out too sticky?

Enjoy!

Recipe for Easter Mini Egg cookies

Sunday, 5 January 2014

Five simple vegetarian soup recipes for a soupmaker

I love my new soup maker, so much that I blogged a review of it here - Andrew James soup maker review. But one problem that I have is that it doesn't have a huge capacity, and all of my soup recipes made a quantity that was too large to fit. So I've put together five really simple recipes which fit perfectly into my soup maker. They don't use too many ingredients, and are really easy to make, and taste delicious.

Each recipe makes four small portions or two large portions. Unless otherwise stated, just add all the ingredients into the soup maker and press start. My soups are all made with vegetable stock cubes, but I would imagine that you could use a meat based stock cube too.

Lentil and Carrot Soup

1tsp cumin seeds, toasted
Small pinch chilli flakes
100g dried red lentils
350g carrots, chopped
450ml stock
Seasoning

Tomato and Bean Soup

1 can chopped tomatoes
1 onion
1 carrot
Italian herb seasoning
350ml stock
Seasoning

Leek and Potato Soup

1 onion
1 small potato
1 leek
75ml double cream (half a small tub)
450ml stock
Seasoning

Spicy Butternut Squash Soup

1/2 butternut squash
1 onion
1 carrot
1 tsp mixed spice
450ml stock
Seasoning

Spicy butternut squash soup

Lentil, Chickpea and Chilli Soup

1 tsp cumin seeds, toasted
Small pinch chill flakes
1 onion
100g dried red lentils
1 can chopped tomatoes
1 can chickpeas
450ml stock
Seasoning

Lentil chickpea and chilli soup

Because my soup maker blends the soup very smoothly, even on the chunky setting, for the Lentil, Chickpea and Chilli soup I reserve half the can of chickpeas and stir it in at the end for a bit of texture.

I hope that these recipes are useful, and if you have any others to share I would love to try them out!

Thursday, 21 November 2013

Spicy Butternut Squash Soup - soup maker recipe

For my birthday, my husband bought me a soup maker. Perhaps not a traditional, romantic gift, but he knows me well. Actually I'm not sure he knew that it was a soup maker when he bought it, as what he was really after was a blender after I broke my old one. But having had it now for a few weeks I am really loving it. I enjoy making soup, but always found blending it difficult, having to transfer the boiling soup into the blender and it never all fitting in at once, and the soup maker makes it all so easy.

Simple spicy butternut squash soup recipe


I've been so pleased with my new soup maker that I wrote a full review which you can read here - Andrew James Soup Maker and Blender. One thing I've found though is that it doesn't make such a large quantity as many soup recipes, so I'm having to scale down my recipes to make them fit. Having been sent some Steenbergs Mixed Spice to try, I decided to try a spicy butternut squash soup.

Butternut squash soup

This simple recipe fits perfectly into my soup maker, and makes two large portions or three smaller portions.

You need:

Half a butternut squash, chopped
One carrot, chopped
One onion, chopped
450ml stock (I use vegetable stock)
One teaspoon of mixed spice
Pinch of salt and pepper

Simply add the ingredients into the soup maker and turn it on. You can make the same recipe on the hob though, just add the ingredients into a saucepan and cook until the vegetables are soft, then blend.

The spices were lovely and gave the soup a wonderful, warming taste. Delicious!

Steenbergs' Organic mixed spice

If you are looking for more recipes which are suitable for a soup maker you might like my post Five simple Vegetarian recipes for a Soup Maker

I was sent a jar of Steenbergs Organic Freetrade Mixed Spice to try.

Saturday, 16 November 2013

Italian Breadsticks

The Great British Bake Off may have finished on television, but the Great Bloggers Bake Off is still going strong, and I'm so glad because I enjoyed taking part in the challenges so much.

Although the weekly challenges have finished, The Crazy Kitchen and Mummy Mishaps are continuing to host linkys for us to share our baking achievements, and this month we will be attempting bakes from the show that we didn't get chance to try out first time round.

So I decided to have a go at bread sticks. I'd seen a recipe in my Kenwood Chef recipe book, but without pictures I didn't feel confident enough to attempt it. Despite feeding my children bread sticks almost daily since they were six months old, I was imagining that the recipe would create large, puffy ones in the style favoured by Olive Garden restaurants in the States. Having watched the contestants bake bread sticks early on in the series, I decided that I wanted to give them a go.

After taking part in the original challenges, I was lucky enough to be sent various different ingredients to try out in my baking, so look out for those over the next couple of weeks. This week, I tried some Tesco Finest Bread Flour for my bread sticks.

Making Italian breadsticks

I used a recipe from my Kenwood Chef Recipe Book and you can find it online here - Kenwood Chef Recipes. It's a very simple recipe, and for once no purchasing of unusual ingredients was required! Making the dough was easy, but making the bread sticks themselves was a bit of a faff. I didn't have enough baking trays or space in the oven so I had to make them in two batches, and I got very bored of rolling out and shaping all those individual sticks - they would definitely not pass muster according to the strictly measured Bake Off rules!

Making Italian breadsticks

I was pleasantly surprised with my finished bread sticks. They make a nice 'snap' if you break them across one of the thinner bits, so really they needed to be thinner all over, but they are still tasty and would be nice for parties. But although I'm glad that I gave these a go, unlike some of my other Great Bloggers Bake Off bakes I don't think I'll be bothering with these again - far too fiddly!

I was sent the bag of Tesco flour to use in my baking

Friday, 18 October 2013

Three different types of canape

I can't believe that The Great British Bake Off has nearly come to an end! I've had such a lot of fun challenging myself to make something new each week, and it has all gone so quickly!

This week for the signature challenge the bakers had to make three different types of savoury canapé, using choux pastry, another type of pastry and a third which could be anything of their choice. I'm afraid that I've bent the rules a little this week, and my third canapé is actually a sweet canapé, as sweet things tend to go down better in this house! I could perhaps have completed them all in the allocated two and a half hours, but chances of finding all that time to myself are very slim, so they were all made individually.

I started with choux pastry canapés. I've never made choux pastry before, and I chickened out a couple of weeks ago when it came up on the programme, so this week I knew I had to give it a go. I used this recipe - Choux Buns Recipe - savoury canapés with a cream cheese filling. To my complete surprise they actually worked well, looked pretty much as they were supposed to, and were very tasty!

Choux buns, savoury canapes with a cream cheese filling

The second savoury canapé recipe was from a recipe shared by my sister on her blog - Cheese Straws. I'm hoping that these count as shortcrust pasty canapés. They are pretty easy to make, very tasty, and the recipe makes plenty. They are also a good recipe to make with children, as they can cut them out into all different shapes.

Simple cheese straws

Finally, for my sweet canapés I made Mini Chocolate and Ginger Brownies, using a recipe from BBC Good Food - Mini Chocolate and Ginger Brownies. I've never used crystallised ginger in baking before, in fact I had to ask a lady to help me find it on the shelf in the supermarket. The chocolate brownie bites were pretty easy to make, although they took a lot longer to cook than the recipe suggested, I often find that with brownie mixtures for some reason. The resulting brownie had a nice firm texture which was easy to cut up into the little squares, although they did turn out to be a little taller than the picture suggested, more like mini brownie towers.

Mini chocolate and ginger brownies

And here's a picture of them all together, just to prove that I did at least bake them not too far apart!

Three different canapes

I'm linking this post up to the Great Bloggers Bake Off, which is hosted each week by The Crazy Kitchen and Mummy Mishaps.

Thursday, 17 October 2013

How to make a simple Piñata Birthday Cake

How to make a simple pinata birthday cake

Since I discovered Pinterest, I've really stepped up my Birthday cake making game. It was the Smartie and Kit Kat cake that started it about a year ago, and I've also attempted a Rainbow Cake and a Pink Ombre cake. None of these cakes were nearly as difficult as they looked, and they all looked very impressive. So for a recent family Birthday I decided that I would have a go at a Piñata Cake. A Piñata Cake is a cake which is filled with sweets that tumble out as you cut into it. There are some very impressive ones on Pinterest, but I came up with a simple way of making one that worked really well.

You need a regular Victoria Sandwich sponge cake recipe. You need to double the quantities to make four layers. My simple (doubled) recipe is 12 oz margarine, 12 oz caster sugar, 6 eggs and 12 oz self-raising flour.

Remove the four cakes from the sandwich tins and allow to cool. Then cut a circular hole in two of them. Place a whole layer at the bottom, then the two layers with missing centres, using some butter icing to stick the layers together. Fill the hole in the centre with small sweets - I used Smarties and gummy bears. You do need quite a lot to fill the hole - I used two bags of Smarties and one of gummy bears with a few left over for decoration. You could also use chocolate sweets like Maltesers and Minstrels, or perhaps Skittles. Then place the final layer on top and ice over the top and sides. The sweets packed inside will mean that the cake holds its shape.

How to make a simple pinata birthday cake


It's best not to make this cake too far in advance as the sweets may lose their colour after a couple of days inside the cake. Also, once you have cut into it and the sweets fall out it will begin to sag in the middle, so it needs eating up quickly, which is not a problem in this house!

How to make a simple pinata birthday cake

This is a cake which is easy to make and will really impress both children and adults!

Thursday, 10 October 2013

Lemon Courgette Cake

This week on the Great British Bake Off, the showstopper challenge was dairy free, novelty vegetable cakes. I was a bit unsure how to go about making a dairy free cake until I realised that my regular carrot cake recipe is actually dairy free, so I decided to mix it up a bit and try a new vegetable - a courgette. There were some wonderful novelty cakes on the programme this week but I'm afraid I stuck to a simple loaf cake, there are only so many hours in my day!

Simple lemon courgette cake

I used a recipe which you can find here - Lemon Courgette Cake. I kept pretty much to the recipe, although the comments suggested that it could use a little more lemon so I put in half of the juice from the lemon which I grated for the zest. It also took a little longer to cook than the recipe suggested. On the whole it was an easy recipe to follow.

It was delicious, lovely and moist. It was more the taste of the cinnamon that came out rather than the lemon, so perhaps adding the other half of the lemon juice might have increased the lemon taste a bit.

Simple lemon courgette cake

I'm linking up to the Great Bloggers Bake Off, hosted by The Crazy Kitchen and Mummy Mishaps and looking forward to seeing what everyone has been baking this week!