Showing posts with label Christmas. Show all posts

Tuesday, 23 December 2025

Our building up to Christmas traditions

Along with the build up to Christmas come a whole host of traditions, some that I've put in place over the years but lots that have just sort of happened!

Christmas starts for me with an early trip to the garden centre when they've just opened their Christmas displays. Our local Haskins does several different themed areas, and if you get there early in the season you can enjoy everything before it all gets picked over. I never actually buy anything, but I love browsing the displays and seeing what they've decided should be in fashion this year.

Come December and the elves are back. We've been happily welcoming the elves into our home for the run up to Christmas for what feels like forever. There has been some criticism in recent years that their antics have become less interesting compared to the more exciting earlier years, but they've managed a few surprises. 

Elf on the Shelf on the Christmas tree

We don't watch much television so we never buy a paper TV guide, except when it's time to get the Christmas TV guide. It's a big part of my husband's Christmas, so he always makes sure to buy one as soon as they are released. But we very rarely splurge on the expensive Radio Times, he always manages to find one of the more budget friendly ones. 

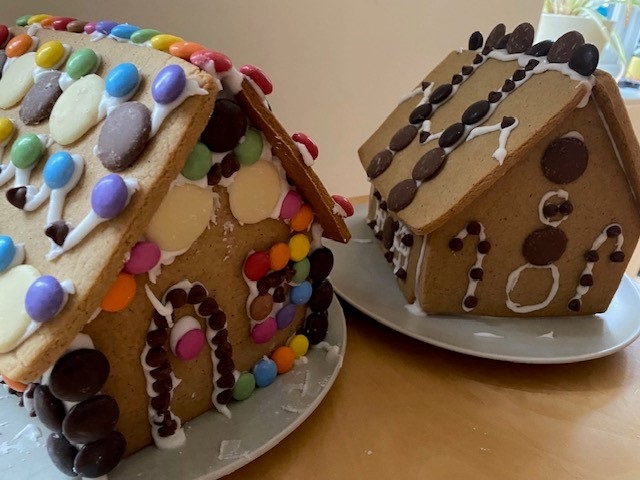
One of our most time consuming traditions is the yearly baking, assembling and decorating of the gingerbread houses. I've been making two for years, almost always making my own gingerbread from scratch. I've got it down to a fine art now and although it's an effort I really do enjoy making them. The children love decorating them too, and they are always delicious.

Children holding homemade gingerbread houses

At some point before Christmas we always sit down and watch Nativity! I'm not quite sure why this film appeals to me so much, but it wouldn't be Christmas without watching it. My favourite part is the establishing shot for the Mayor's reception which was filmed at Coombe Abbey where we got married, and I love all the festive songs and decorations. It's just a really fun film building up to a really sweet Nativity celebration.

Delivering the neighbour's Christmas cards is another festive tradition that the children have been helping me with for a few years. When they were younger I used to let them go out together, anxiously watching them from the window to make sure that they didn't get lost in our tiny cul-de-sac. Now I still send them out, but I don't feel the need to stand there hovering any more!

I never introduced Christmas Eve boxes, but the elves do always bring new pyjamas for the children when they leave on Christmas Eve. As they are a little more fussy now I've asked for some help this year to make sure that they get a set they really want!

Also on Christmas Eve we still make and sprinkle reindeer food. I keep it simple with just oats, some Cheerios, raisins and a bit of sugar for some sparkle. I love seeing them out in the garden in their pyjamas sprinkling it on the grass, even though they are enormous teenagers now!

The final Christmas Eve tradition is my husband wrapping his presents for me at the last minute. I didn't even realise that this was a family tradition until my daughter mentioned it this year. I hadn't known it was such a big part of her Christmas!

What things do you find yourself doing every year as Christmas approaches?

Friday, 5 December 2025

Simple Hama bead snowflakes for Christmas

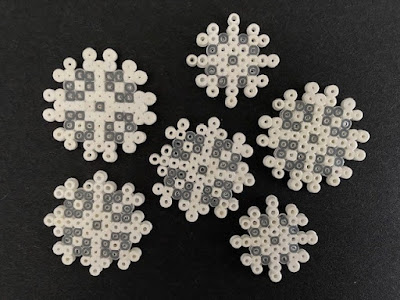
I know it's been ages since I shared a new Hama bead craft on my blog, so this week I've been working on some Hama bead snowflakes! They are a great way to add a bit of homemade craftiness to your Christmas decor.

Hama bead white snowflakes Christmas craft

The designs for these snowflakes are mainly based on the snowflake pattern that I came up with for my Hama bead snowflake bunting many years ago. I used designs which are created on the hexagon shaped pegboard. I also experimented with some smaller designs. The hexagon pegboard works really well as it easily divides into six sections, so you can just start by placing beads in the centre, head out towards the corners, and see what you end up with! 

Hama bead simple snowflake designs

When it comes to ironing the Hama beads, for this particular craft it is especially important to make sure that you iron the beads until they are well fused, and to iron them on both sides. Even though some areas are only one bead wide, as long as they have been well ironed then they will be sturdy enough to stand up to being used in your Christmas decor.

If you are new to crafting with Hama beads then you might find this post helpful - Ironing tips for Hama beads

This craft was a bit of a de-stashing exercise for me - I've been lucky enough to hoover up lots of Hama bead collections from friends and family which has left me with small numbers of beads across a huge range of colours. So I mixed in some of the pale blue, transparent and glitter blue beads to add some interest to my Hama bead snowflake collection!

Hama bead snowflakes in white and blue beads for Christmas

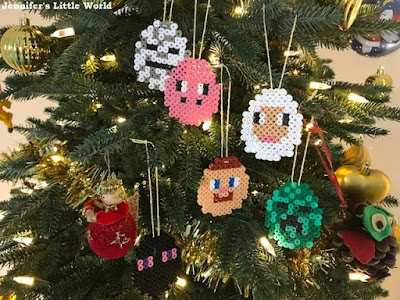
I don't have a final home for these snowflakes yet, but it would be easy to add some festive cord or ribbon so that they can be used as ornaments on the Christmas tree.

Hama bead snowflake Christmas ornaments

I can also imagine them hanging from lengths of cotton in a window or over an unused fireplace. They could be attached to gifts, or enclosed with Christmas cards.

Hama bead snowflakes displayed among Christmas decorations

These Hama bead snowflakes were so fun and simple to make, and I loved coming up with different ways to place the beads in order to create new designs.

If you are looking for more snowflake crafts then you might also enjoy these:

Mini Hama bead snowflake embellishments

Free simple cross stitch snowflake designs

Snowflake cross stitch embroidery frame design

Cross stitch felt snowflake bunting

Lollipop stick and button snowflakes

You can also see some of my favourite Hama bead Christmas crafts.

Wednesday, 3 December 2025

All my free Christmas themed cross stitch designs

Over the last few years I've shared a few simple cross stitch Christmas themed designs, which can also be used for other pixel crafts like Hama beads or diamond painting. I thought I'd gather them all together in one post, along with links to some of the crafts that I've made using these designs!

Mini Christmas cross stitch motifs

These tiny Christmas cross stitch patterns are very simple and use just a few colours, meaning that they are very quick to stitch up. There are 24 designs which makes them perfect to use for an Advent calendar craft - maybe to decorate the front of small gift bags or as part of a larger cross stitch design. You can see the image below, and this pattern is also available as a .pdf to download - Free Mini Christmas Cross Stitch Designs.

Free mini Christmas cross stitch designs

My favourite craft using these designs is my cross stitch gift tags. They are a very sweet way to add a personal touch to your gifts.

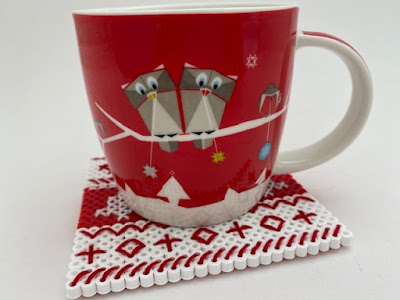
I also came up with a red and white Scandi inspired version of these motifs, perfect for any Scandi themed Christmas crafts that you might be working on.

Red and white Christmas themed cross stitch designs

Mini cross stitch snowflake designs


I love these tiny snowflakes which are so quick and easy to sew. They work best for cross stitch as they aren't sturdy enough for Hama beads (if you want to use Hama beads then you can use transparent beads for the gaps as seen here Hama bead snowflake designs). They are perfect for cards, or you could use for gift tags or other Christmas embroidery projects. I used them to make some simple cross stitch snowflake bunting.

Simple cross stitch snowflake designs

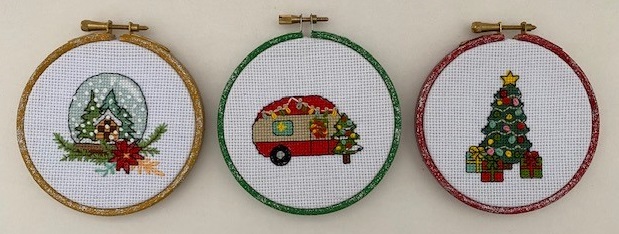
I combined some of these snowflakes to make a cross stitch snowflake embroidery hoop design which I really love. I've included the pattern below, or you can also download it as a printable .pdf file here Free Snowflake Embroidery Hoop Pattern.

Cross stitch snowflake embroidery hoop free pattern

Simple cross stitch bauble designs


Finally I have some little cross stitch Christmas bauble designs, which also work really well for Hama beads as seen in my Hama bead Christmas baubles. There are two shapes of bauble - a round one and an elongated one, and you can come up with lots of different ways to personalise them.

Free cross stitch bauble designs

Cross stitch bauble designs

I hope that these come in handy for some festive crafting!

Wednesday, 26 November 2025

Some of my favourite Hama bead Christmas crafts

If you've been following my blog for a while, then you'll know how much I love crafting with Hama beads. As the children have grown they haven't been used as they used to be, but I still have a Hama bead cupboard in the kitchen and I have some upcoming Hama crafting plans!  

Until then, I'm sharing some of my older Hama bead posts, all with a Christmas theme, in case you are planning some festive crafting for either children or adults.

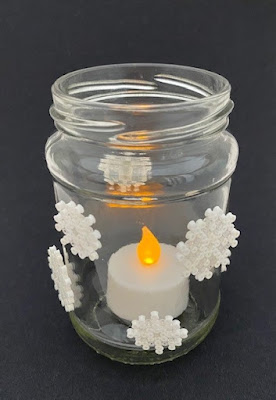
I love using Hama beads for Christmas decor, and one of my favourite things to make is Hama bead snowflakes. A long time ago I made some Hama bead snowflake bunting, and I'm currently planning some more crafts using the patterns that I created for that post. I've also created some more intricate Hama bead snowflake designs which use transparent beads to keep the structure of the snowflake intact. I've used them as mini embellishments and also to decorate a glass jar lantern.

Hama bead snowflake designs

I really love this colourful Hama bead fairy light bunting. I used a variety of beads from my stash, including a mix of solid and transparent beads, which really makes the fairy lights seem to glow. The pattern is so simple but I think it's really effective, and the finished pieces could also be used as individual hanging decorations as well as bunting.

Simple Hama bead fairy light bunting for Christmas

For a sweet, personalised Hama bead gift I love these little Hama bead Christmas wreath hanging ornaments, which can also be turned into magnets. You just need to make a simple circular frame using a random selection of beads in different shades of green, add a ribbon, and find an image for the centre. I used offcuts from old Christmas cards, or you can also insert a photograph of a loved one.

Hama bead hanging mini wreath ornaments

Another type of ornament are these simple Hama bead bauble tree decorations. I made them with a specially shaped piece at the top which can be used to showcase some festive Christmas ribbon in a large, decorative bow. In the post I have shared the designs for two different shaped baubles.

Hama bead bauble ornaments

One of my free Christmas patterns is this collection of mini Christmas themed Hama bead designs which can also be used for other pixel art crafts like cross stitch or diamond painting. I used them to make some tiny embellishments using mini Hama beads which can be used to make pin badges or as decorations for homemade Christmas cards.

Mini Hama bead embellishments using pixel art pattern

I've also shared another take on the Hama bead baubles by using a palette of red and white and some different motifs to create Scandi themed Hama bead baubles. You can find the patterns in the post, and I love how customisable they are. You can make them in any colour you choose to match your decor!

Scandi themed Hama bead baubles

These baubles even went on to inspire a selection of different Scandi themed Hama bead crafts

Finally, something from deep in the archives of this blog - my Hama bead Gingerbread House! This project uses the Hama bead house pegboard which is one of my favourite larger boards. You can customise it in so many different ways! This Christmas I definitely need to work on an updated version.

Simple Hama bead gingerbread house

If you would like some more Christmas themed Hama bead craft projects then you may like these older round up posts:

Hama bead Christmas crafts and projects - a selection of festive craft projects using Hama beads for both children and adults.

Hama bead Christmas crafts for adults - more Hama bead festive crafts, but these are particularly aimed at adults with more emphasis given to working with the fiddly mini Hama beads and creating functional and decorative items.

Finally, if you are new to crafting with Hama beads then you might find this post useful - Ironing tips for Hama beads.

Friday, 21 November 2025

Review - Miniature Gingerbread House craft kit from Rolife

I received this kit in exchange for a review

Last week I shared some gorgeous Christmas themed miniature craft kits from Rolife, and today I'm featuring another miniature craft kit from the Christmas collection, the Gingerbread House

Rolife Gingerbread House miniature Christmas craft kit review

With this kit you can assemble a Gingerbread House bakery, filled with festive treats that include gingerbread men, candy canes, cocoa and chocolate boxes. It's a 3 star kit which means that it isn't too difficult, but it will take a little more time than the basic kits. Suggested assembly time is around six hours, and I would say that is about right.

Rolife Gingerbread House craft kit review

The kit contains everything that you need apart from two AAA batteries for the lighting kit, however I did find it useful to have some glue on hand just to make sure that everything is firmly stuck together. Inside the kit you will find plain and coloured wooden boards with snap out pieces, paper cuts and stickers, tiny plastic components, a lighting kit, screwdriver, tweezers, double sided adhesive strips and of course full instructions.

Rolife Gingerbread House contents of the kit

I have to say that I really loved assembling this kit, and I think that it may be my favourite Rolife kit so far. I really enjoyed the festive vibes, and all of the miniature components were really sweet.

Rolife Gingerbread House first components assembled

One thing that I particularly enjoyed about this kit was that I felt the assembly order worked really well. First you assemble the larger pieces that fit inside the bakery - the dresser, cupboards and so on. I found it a good idea to use one the box lid to store the pieces as I finished them.

Rolife Gingerbread House pieces assembled stored in box
 
Then you assemble the structure of the house, putting the walls and door in place (this was a bit like building a real gingerbread house!) and installing the simple lighting kit. Finally you put together the very small pieces and glue them into place on and around the furniture to complete the bakery.

Rolife Gingerbread house halfway through assembly

I found the assembly of the kit straightforward and the instructions easy and logical to follow. There were a few times when I felt that I needed some extra glue, although the adhesive strips provided are very sticky. The instructions lead you clearly through each step, and this kit didn't require any measuring or cutting pieces to size which you find in some of the more difficult kits.

Rolife Gingerbread House kit interior close up

I loved all the tiny details in the kit. The little coffee machine with a mug of hot chocolate to go, the tiny cakes and biscuits, the miniature boxes of chocolates in all shapes and sizes. It takes time to spot everything that is packed inside the shop as there is so much attention to detail.

Rolife Gingerbread House with lighting kit turned on

The kit includes a lighting kit which lights up the inside of the shop. The battery box and on/off switch is accessed from the back of the house, it cleverly slots inside one of the cupboards. It looks so good when the light is on, especially on a dark winter's evening when you need a bit of festive cheer.

Rolife Gingerbread House kit review completed

I can see this Gingerbread House being part of a larger Christmas village, which is something that I've always wanted. You could buy and assemble a kit each year as a festive tradition that builds up into something really spectacular that is much more personal than buying the pieces readymade. There are a few other kits which would fit the theme really well, like the Christmas Candy Stand or the Honey Dessert Talk Miniature House.

Rolife Gingerbread House kit displayed on sideboard with poinsettia

I know that this Gingerbread House is going to be a part of our Christmas decor tradition for a long while to come!

Wednesday, 19 November 2025

The Christmas Nutcracker cross stitch from Bothy Threads

Back in Christmas 2023 I was lucky enough to be given a cross stitch kit by a friend. She had received it as a gift, and although she loves nutcrackers she doesn't love cross stitch, so she kindly passed it on to me. 

This counted cross stitch design is The Christmas Nutcracker by Bothy Threads and it is worked on navy blue Aida. The design uses full cross stitches as well as back stitch, Lazy Daisy stitch and French knots, includes sequins, and uses a somewhat limited colour palette. It's a great Christmas stitching project, and the final piece fits perfectly into a 30x40cm frame.

The Christmas Nutcracker from Bothy Threads cross stitch

I didn't get too far the first Christmas, I just sorted out the kit and then made a start working from the centre. I managed to complete the top of the Nutcracker, which gives a good base for working on the rest of the design. Because the Nutcracker is symmetrical and formed of large blocks of colour it's an easy section to work on without needing to constantly refer to the printed pattern.

Starting The Christmas Nutcracker from Bothy Threads cross stitch

By last Christmas I had made some more progress, with most of the top half of the design in place. It stitches up quite quickly, because although there are some tricky areas to count there are very few areas that contain similar colours worked together.

If you sit down for an evening of stitching you can feel like you've made quite a lot of progress and covered a fair bit of the canvas. The border looks tricky but once you've got the repeating pattern in your head you can stitch it up quite easily.

Christmas Nutcracker cross stitch from Bothy Threads

At the beginning of this year the project was put to one side while I concentrated on other things, although it was always at the back of mind to pick it up again this Christmas. In September my husband was away a lot, and I decided to sit down and have a really good go at getting it finished in time to frame for Christmas this year.

The cross stitch design is actually completed over two layers with two separate patterns. Most of the work is in the first layer which is the cross stitch layer. Then you can move on to the finishing off layer.

Here is a glimpse of the cross stitch with the first layer of stitching complete. You can see that there are still quite a few gaps, but the majority of the design is in place. 

The Christmas Nutcracker from Bothy Threads first layer complete

Then I moved on to adding the final stitches to complete the design - here's a comparison showing the first cross stitch layer and then how it looks with the second layer of stitching added to the top. This layer was quite tricky for me. Most of it is backstitch with just a few French knots, but it was the Lazy Daisy stitches that really threw me and there are so many of them - I struggled to get them to look perfect! But it looks so good once the final stitches are added and the design fills out. There are a few sequins dotted about as well.

The Christmas Nutcracker cross stitch from Bothy Threads

I really enjoyed completing this cross stitch, it was fun and satisfying to work on and not too complicated. There aren't many colours to keep track of, the pattern is easy to follow, and it works up fairly quickly. Stitching on the dark coloured Aida wasn't always easy, especially in the evening, but it looks really effective with the bright colours. 

Bothy Threads cross stitch The Christmas Nutcracker

It will take pride of place among my homemade Christmas decorations. If you are interested in more Christmas cross stitch designs then you might also enjoy seeing my finished Christmas ABC Sampler from Design Works which I completed a few years ago. 

Christmas ABC Sampler from Design Works

I also have my eye on another Christmas cross stitch kit from Bothy Threads, but I have a few kits that I need to get finished first. One of them is another Christmas themed design, which I'm wondering if I can also complete ready to display this year!

Friday, 14 November 2025

Review - Christmas 3D frame miniature kits from Rolife

I received these kits in exchange for a review

A few weeks ago I shared some gorgeous Christmas themed miniature kits from Rolife, and now that I've made a start on my Christmas crafting I'm delighted to share the results of these two kits from the DIY Miniature House Story Frames Series.

Christmas 3D frame miniature kits from Rolife

These kits are titled Christmas Eve Party and Santa's Toy Shop. Each kit contains everything that you need to assemble a miniature world which is fitted inside a deep frame. All you need to add are two AAA batteries so that you can light up the scene. I chose to work first on the Christmas Eve Party kit.

Rolife Christmas Eve Party contents of box

Inside the box you will find the plastic frame which holds it all together and a selection of materials including wooden pieces to press out, stickers, paper cut pieces, the lighting kit, a variety of small themed accessories and full instructions. There is also a small screwdriver for the battery box, plastic tweezers, and tiny double sided tape strips.

Rolife Christmas Eve Party kit contents

Christmas Eve Party depicts a dining room filled with Christmas treats. There is a dresser with shelves filled with festive articles, a display of Christmas plates, a table piled high with delicious food and drink, and a Christmas tree in the corner. The first step is to assemble all of the tiny items that sit inside the scene.

Rolife Christmas minature kit building in progress

Then the lighting kit is placed into position, and all the tiny items are stuck firmly in place before a plastic dust cover is added to the front. The picture below is taken before the front of the frame was added so that it can be photographed without a reflection. I'd recommend leaving it a day or so before adding the dust cover just so that you can check everything inside is stuck firmly - although it is possible to remove the front to make changes it might risk upsetting everything inside!

Rolife Christmas Eve Party kit completed

The dust cover is a great way to make sure that everything inside stays nice and clean, especially as this is something that you will want to bring out from year to year. I love all the detail in this kit, especially the tiny cake and mug of cocoa!

Rolife Christmas Eve frame miniature kit complete

Next I worked on Santa's Toy Shop. This kit is slightly different because it is in portrait rather than landscape format. It also doesn't have a dust cover, instead the elements of the kit extend outside the frame, making a tiny world that you can imagine walking into. It features the entrance to the toy shop, with a front door that can be pushed open to reveal more decorations inside. Piled up outside the shop is a heap of gift wrapped boxes, one filled with sparkling baubles, and the shop window displays more festive delights. 

Santa's Toy Shop Christmas frame kit from Rolife

Once again the assembly of the kit was simple and enjoyable. Both kits did have their fiddly parts, in particular the tree in Christmas Eve Party and the lamp post in Santa's Toy Shop. Some of the wooden pieces are very delicate and I did have a couple that snapped when I pushed them together too firmly. It was easily fixed with some superglue, but it's a reminder to be careful and not get impatient. I used glue (not supplied) in some places just to make sure that everything was stuck firmly.

Santa's Toy Shop miniature kit in progress

I also messed up slightly when I installed the battery box on this kit, I slotted it in backwards and then found it very difficult to remove. It's very important to read the instructions and check the pictures very carefully, all the information is there if you look properly!

The finished frame kits have a plastic hook at the back so they can be hung from the wall, or else they can be displayed free standing. I can't even decide which is my favourite! 

Christmas miniature frame kits from Rolife review

The lighting for the kits is very simple and easy to install. The battery box is accessed from the back, and two AAA batteries are required. There is a light sensitive button for the lights which is on the outside of the frame, and a light touch is enough to turn them on.

Rolife Christmas 3D frames review with lights inside

Here are the frames displayed proudly on my bookcase so you can see the scale, they each measure approximately 16cm by 21cm. They look lovely together but would also make great individual kits. They would be a lovely gift for a crafty friend, or something that the family can work on together to create something that will decorate the home at Christmas for years.

These kits are not too difficult to put together, and it's a very satisfying process. Each one takes about two hours to make so you can complete in an evening, but I'd recommend taking your time and enjoying the assembly, as well as making sure that each step is firmly stuck before moving on to the next. 

Rolife Christmas frame kits displayed on bookshelf

These kits would make a lovely addition to your Christmas decor, as well as giving you a lot of enjoyment when you work on completing them. Next I'm going to be working on the Gingerbread House miniature kit, and I'll be sharing my progress soon!

Thursday, 16 January 2025

Review preview - CuteBee Book Nook Kit with a Christmas theme

I received this kit in exchange for a review

Readers of this blog will know that I love crafting and I love reading, so what could be better than a craft which makes a lovely addition to a bookshelf! I have just made a start on this Book Nook craft kit from CuteBee, and so I'm sharing my first impressions before I begin to work on the kit and can share the finished product.

The Book Nook kit is a 3D wooden puzzle with lots of tiny pieces which are slotted together to form a Book Nook - a miniature world which can be displayed on your bookshelf. This kit is called the Christmas Wish Store and features all sorts of sweet little Christmas themed items, including a tree, a train and all sorts of toys and decorations.

CuteBee Christmas Book Nook kit

The kit is very well packaged with everything fitted neatly inside. Most of the kit is wooden sheets with coloured shapes to press out, there are also some small plastic decorations along with the equipment to add lighting and music. It was very easy to check through the instructions and make sure that everything was included, and all the parts are clearly labelled.

Christmas Book Nook craft kit from CuteBee

You need a firm hand to push out the wooden pieces, but they are sturdy and I wasn't worried about breaking them. There are some spares for the very fiddly parts, for example the top of the train roof which needs to be curved slightly. It's important to only press out the pieces as you need them as you would very quickly get muddled!

CuteBee Christmas Book Nook contents

Unused pieces can be stored in the original box, but I found it helpful to have a separate tray to keep the components that are assembled so that they don't get lost or damaged. So far I've built a storage box and a tiny train, and I found putting the pieces together to be really fun and absorbing. 

The kit is mainly assembled without glue, and the parts that need glue (not included) are clearly marked. You can also add a bit of glue if you are concerned that the pieces are too loose, but I found that wasn't usually necessary.

I'm really looking forward to working on this kit, I can see it being something that I work on from time to time when I have a few minutes to craft, as it can easily be picked up and put down and it doesn't need too much space to work on.

I will share the Book Nook when it's complete!