Showing posts with label pre-schooler activity. Show all posts

Friday, 24 January 2020

Valentine's Day crafts for toddlers

Over the years I've shared many Valentine's Day craft posts on the blog, and although my children are now getting a bit too old to indulge me with some seasonal crafting, I'm still proud of the crafts that we've worked on over the years. So with Valentine's Day approaching once again I thought I'd share some of the toddler and pre-schooler Valentine's Day crafts that we enjoyed doing together.

Stock up on red paint and cardboard, then click on the links below to find the details of each craft!

Valentine's Day crafts for toddlers and pre-schoolers

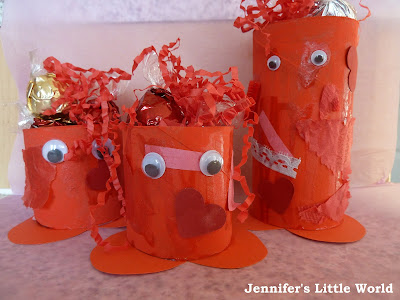
Valentine's Day toilet roll tube gift boxes


These simple gift boxes are so easy to make. All you need is a selection of cardboard tubes which you need to paint bright red or pink, then cut heart shaped pieces of red card to form the base. Glue on googly eyes and scraps of pink and red tissue paper and card. I also used a heart punch to make simple heart shapes. Stuff with shredded paper and fill with small sweets and chocolates.

Valentine's Day cardboard tube gift boxes

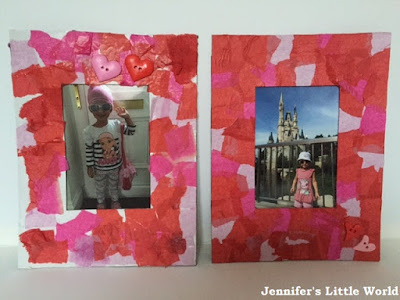
Tissue paper Valentine's Day photo frames


These photo frames are fun for even the youngest children to make. Cut out the shape from thick cardboard, then coat in glue and stick down bits of torn coloured tissue paper. You can then embellish with buttons, beads or paper cut outs.

Valentine's Day tissue paper collage photo frames

Valentine's Day keepsake bookmarks


To make these sturdy bookmarks all you need is a strip of coloured cardboard and some heart cutouts from paper, I used a heart punch. They are laminated and then a matching ribbon is threaded through the hole at the bottom. We wrote personalised messages on the back and gave them as gifts, and although we made them a couple of years ago they are still going strong!

Valentine's Day keepsake bookmarks

Heart sun catchers


These sun catchers can even be made by very young children. They are made using clear sticky backed plastic, which is really easy for young toddlers to use in crafts as there is no mess with glue. They just need to fill the outline with pieces of torn coloured tissue paper, then you can apply another piece of the clear plastic to make a neat finish.


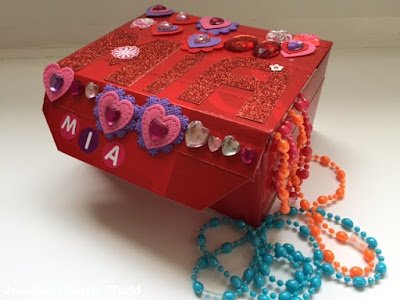
Valentine's themed jewellery box


Young children love having little boxes that they can use to store their precious bits and pieces! My daughter and I decorated this box with a Valentine's Day theme by painting it red and then adding heart themed stickers and embellishments. It's still in use in her room today!

Valentine's Day themed keepsake box

Hama bead heart bunting


These Hama bead hearts are really simple to make using the small Hama bead heart pegboard, and they make a lovely set of bunting when strung together on some narrow ribbon.

Hama bead heart bunting decoration


I hope that you found something to keep you and your toddler busy!

If you have slightly older children that enjoy using Hama beads, you might also like my round up of Valentine's Day themed Hama bead crafts

Monday, 20 January 2020

Chinese New Year crafts for toddlers

In 2020, Chinese New Year will be celebrated on Saturday 25th January. I've rounded up some of the Chinese New Year crafts that we've enjoyed over the last few years, in case you are looking for some crafting inspiration for your toddler or pre-schooler. These crafts are great for very young children because they are easy and fun to do, and they use craft materials that can easily be found around the home. Click the links to be taken to the original post will full instructions and photos for the different Chinese New year crafts.

Chinese New Year crafts for toddlers

Simple cardboard lanterns


These simple lanterns can be made with thin cardboard or thick paper, then decorated using stickers or sequins. With coloured pipecleaner handles they look great strung up to decorate the room!

Glittery cardboard lanterns craft

Paper cup lanterns


These paper cup lanterns are really simple to make and are a great way of recycling old paper or plastic cups that you may otherwise be throwing out. You just need stickers or sequins to decorate, and you can add some tissue paper streams to the bottom for some extra decoration. They are really fun for children to play with too, and make great decorations.

Paper cup lanterns for Chinese New Year

Paper plate dragon mask


Children love dressing up, and a paper plate makes a really good base for a dragon themed mask, complete with streamers and glitter.

Paper plate dragon mask for Chinese New Year

Cardboard tube dragon puppets


These dragon puppets are made from old cardboard tubes and are great fun for children to make and decorate before putting on a Chinese themed show.

Chinese New Year cardboard tube dragon puppets

I hope that I've inspired you for some fun Chinese New Year crafting!

Monday, 5 November 2018

How to make a nature postcard

This guest post is from Becky Goddard-Hill, co-author of Create Your Own Happy (affiliate link) - a happiness boosting activity book for 7-12 year olds and their families. All the activities are based on scientific findings that explain why doing them will create happiness.

  How to make a nature postcard

Making a ‘nature photograph’ is a great way to tell the story of an outdoor adventure, and bring nature inside your home. This is a really simple activity and suits kids (or grown-ups of any age) It can be done by yourself or in a group and combines a little nature hunt with a beautiful craft.

 What you need: 


A postcard sized piece of coloured card

Double sided sticky tape

A forest, wood, park, garden or anywhere nature is growing.

How you make it: 


Put a strip of double-sided sticky tape across the middle of one side of your piece of card and take it out with you for a nature walk.

Pick things up as you go and stick them on your card. Try looking for different colours, textures, shapes and sizes, from tiny seeds to bits of bark, leaves and small flowers.

Only pick up fallen things as we don’t want to disturb growing things.

You can arrange them on the card to make an interesting picture or pattern.

You should now have a beautiful ‘nature photograph’ that you can hang in your home or seal with sticky back plastic and send to a friend.

How to make a nature postcard with children

Why nature makes you happy 


Here are 2 amazing bits of research that show us how being out in nature can make us happier and healthier

When a group of scientists at the University of Chicago tracked people’s happiness for 17 years, they found the people were happiest when they were living near trees. Pennsylvania hospital patients with a window with a tree view went home on average a day earlier than people with no view.

Japanese researchers found that a one-day trip to a park can boost our ‘natural killer’ white blood cells and proteins that help to fight off illness for at least seven days afterwards

You really create your own happy by getting out in nature. This will make you healthy AND happy and you will have a beautiful nature photograph too!

Create Your Own Happy book for children

This post contains an Amazon affiliate link.

Thursday, 13 August 2015

The toy kitchen, one of our top toys

I recently wrote a post about our love affair with Duplo, highlighting a toy that we've had so much play value from, and it made me think about some of the other toys which have been particularly popular with my children. Another firm favourite has been their toy kitchen and all the play food and accessories that go along with it.

I was a bit reluctant to have a proper play kitchen for the children at first, as they take up a lot of space. But when Ram spotted a great deal on a lovely wooden toy kitchen it was impossible to refuse, and we asked my parents if they'd like to buy it for the children one Christmas a few years back. This is the one that we have from John Lewis (it's not usually this tidy!)

Toy kitchen from John Lewis

One of the nice things about this particular toy kitchen is that it has plenty of storage space inside for all the other bits and pieces. When we moved into our house a few years back the previous owner was emigrating, and she left behind lots of plastic play food and toy kitchenware. Along with some bits that we'd already collected, and pieces that we've accumulated since, there's plenty to keep them busy (and to store). Quite a lot of our play food is home made, like my realistic play food, the felt sandwich set and the very popular salt dough and felt pizza.

Realistic play food for the toy kitchen

I bought some of the extra kitchenware from Ikea which does some lovely bits. I was very tempted recently to replace the plastic stuff with some gorgeous china plates and cups but I'm glad that I didn't in the end because the plastic ones are constantly being carried about the house and transported in Mia's little handbags, and I don't think they'd last very long!
I'm always coming across little picnics that Mia has set up around the house, and I leave them there for as long as I can because I love seeing them, they are so sweet! Even if I am usually the one that ends up having to sort out all the bits and pieces into their correct boxes and put them away.

Toy picnic set up by a child

In fact, the only problem that I do have with the toy kitchen is that sometimes I seem to spend as long cleaning it up as I do my full size kitchen!

Monday, 27 July 2015

Cheerful garden crafts for the summer

A selection of pretty crafts for the garden


Over the years we've shared many crafts on the blog, and lots of them have had an outdoors or garden theme, intended to both add a bit of fun to the garden and also ways to bring the garden inside. Here are some of my favourites to inspire you this summer.

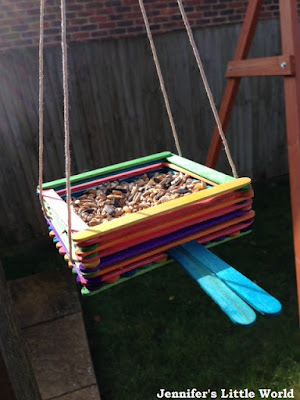
The lollipop stick bird feeder is really easy to put together and it looks so bright and colourful when it's hanging up in the garden. Unfortunately we have a lot of cats in our garden which does rather limit the birds that come to it, but it's so pretty to look at I think it's still worth having!

A selection of pretty crafts for the garden

Both children love making fairy gardens, and the slightly different yet very similar mermaid gardens. You just need a shallow saucer or similar container, a bit of soil, and then any little bits and pieces that you can find around the garden to decorate. If you want you can add coloured glass pebbles, artificial flowers, fairy figures and so on. They don't last for very long, but if you can keep them in a sheltered spot you can continue adding to them over time.

A selection of pretty crafts for the garden

These easy cress heads are simple to make to display on a windowsill, and because cress grows so quickly they are a very satisfying crop to grow with young children. All you need is an old pair of tights, some soil and some cress seeds, and you can see how we made ours here - simple cress heads.

A selection of pretty crafts for the garden

The bean bag comet is a really simple first sewing project, and it's really quick to sew one up from an odd bit of fabric. It's just a beanbag with a long tail of ribbons, and it's great fun for children to throw around the garden. They can use the ribbons to catch it, to twirl it around so that it will fly further, and to admire them streaming through the air as it flies.

A selection of pretty crafts for the garden

My children had a lot of fun collecting pebbles at the beach and then bringing them home to paint and turn into pebble monsters. They are displayed in pots all over the house and garden, and despite being a few years old now they've lasted really well!

A selection of pretty crafts for the garden

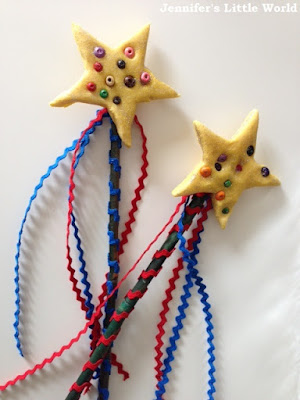
The children also helped me to make these salt dough fairy wands, and even though they are just as much fun inside the house they've been particularly popular for fairy role play in the garden, because they are great fun to run around with and watch the ric rac streamers chasing around in the breeze.

A selection of pretty crafts for the garden

Finally, if the weather just isn't good enough to get outside, why not do a bit of gardening themed sensory play! This gardening Tuff spot inspired activity was a lot of fun, and kept both children entertained for several days. You just need some coloured rice or similar sensory base and a few little gardening themed bits and pieces to inspire all sorts of role play.

A selection of pretty crafts for the garden

Tuesday, 19 May 2015

Setting up a library role play area with Twinkl

The other day Harry decided that he was going to turn his room into a library. He made some little library cards and stuck some labels on his shelves, it was very sweet. So while he was at school I stepped it up a notch and got out the printer and the laminator to surprise him.

Library role play area with Twinkl

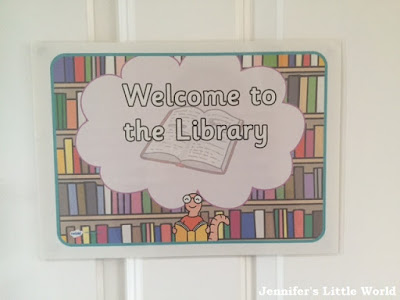
I turned as always to Twinkl, and found plenty of resources to get me started. I began with a Welcome to the Library sign for his bedroom door, part of a pack of Library Display Signs (Twinkl subscriber resource). I'm so glad that we now have a working colour printer as previously I was always printing in black and white (I'm afraid that it's going to cost us a fortune in printer cartridges though as I do have a tendency to get carried away!).

Library role play area with Twinkl

I also printed out a poster for the wall which says Please be Quiet in the Library from a pack of Library Display Posters (Twinkl subscriber resource). I also couldn't resist this gorgeous poster with the words "Reading gives us somewhere to go when we have to stay where we are" (Twinkl subscriber resource).

Even though I'm pretty good at weeding through his books and passing on the ones that are no longer suitable or review books that didn't really grab us, Harry still seems to have a lot of books. But each child has a large Ikea Billy bookcase in their room so they have plenty of book storage. Mia has a couple of shelves of books in her room too of course, but the majority are in Harry's room simply because he has quite a collection of books that both children have yet to grow into, and as he's the oldest it seemed the logical place to store them. I'm awful for picking up copies of books that I enjoyed when I was little, and many of the books are my old books, as well as lots that are my Dad's old books!

Library role play area with Twinkl

Harry's books were vaguely sorted into categories, but to help with the organisation I used the free Editable Book Shelf Labels (free download) so that I could come up with my own categories. I kept it simple for now, I might return to make more if he starts to collect more books on particular topics. One of the shelves is labelled By Harry, where I'll put the holiday scrapbooks that he loves making, and his own notebooks of stories. Twinkl also have some lovely Library Role Play Book Labels (Twinkl subscriber resource) with some simple categories and pictures.

Library role play area with Twinkl

So that we could actually play libraries I made each child a Librarian Role Play Badge (Twinkl subscriber resource) and made us each a Role Play Library Card (Twinkl subscriber resource). Harry is very proud of the library card that he has for the school library so I tried to make it look similar and decorated it with a sticker.

Library role play area with Twinkl

Harry really loves his new library! He's desperate for us all to borrow his books, and he very carefully ensures that we are each selecting books at the appropriate reading level. It's great for role play, and also for helping him to work his way through all his lovely books!

I'm a Twinkl blogger and have been provided with a free Premium subscription. Twinkl are amazing though, and I'm always writing about them with no obligation, just because I want to share their fabulous resources.

Friday, 10 October 2014

Creating a holiday scrapbook with young children

I love to travel, and I've always made scrapbooks to document my adventures. I first started making holiday scrapbooks on my childhood holidays to France, where I would fill old exercise books with pictures, postcards and notes. As an adult, I would keep a detailed diary while we were away, then on my return write it all up, glueing in pictures cut from tourist leaflets and ticket stubs.

On our recent holidays with small children it has been forgotten. I have usually been so busy looking after and entertaining the little ones that I don't think about making time to sit down and write up a diary (although this blog has proven to be a fantastic way of keeping a record about some of the places that we have visited as a family.)

On our recent holiday to Snowdonia, I decided that it would be the perfect opportunity for Harry to start his own holiday scrapbook. We bought him a cheap exercise book which had a plastic wallet attached to the cover, and I provided him with a pencil, crayons, glue and scissors. Then when we were out and about we collected tourist leaflets about the places that we had visited, postcards, and other paper ephemera souvenirs like tickets. I've never been organised enough to add actual photographs to my scrapbooks, but you could easily do this too with a bit of planning. Then every day at some point we sat down together and spent a few minutes writing about that day.

Child working on a holiday scrapbook

I cut out pictures for him from the leaflets, and he arranged them on to the page and glued them down. Then we added a date, a note about the location, and he drew some pictures himself. He wasn't keen on doing too much writing, but I gave him a few prompts and he wrote captions and labels for his pictures.

Page from a child's holiday scrapbook

You could ask your child some questions and write down their answers, or just chat to them about what you've done that day and write down what they say. Older children can be given a sentence to finish or a topic to write about. We also labelled maps with places that we visited and labelled diagrams of things that we've seen, for example the parts of a castle. 

Pages from a child's holiday scrapbook

Slightly older children can keep a more detailed diary, and research more about places that you've visited to add in some extra information.

It would also be a nice idea for children to start an online travel blog that could be shared with friends and family, and then it would be easy to include your digital photographs. This would be easy to update as you were away, as it only takes a few minutes to upload a photo and a few lines of text.

While you are out and about keep an eye out for ephemera that you can use in the scrapbook - we've used restaurant and attraction business cards, receipts, tickets, leaflets and so on. You can also buy postcards, stickers or bookmarks. Craft shops that sell scrapbooking supplies have ranges of themed stickers, for example stickers related to a country that you are visiting.

It's a good idea to photograph or scan the pages when you have finished so that you have a permanent record in case something happens to the original book. Something that I really need to get started on with my collection of holiday scrapbooks!

More recently we created a scrapbook together of our Summer Holiday 2016 - you can find out how we did it here - Making a Holiday Scrapbook

Wednesday, 8 October 2014

Different Rangoli to make with children for Diwali

Rangoli are beautiful, artistic designs that originate in India. They are created on the floor, either indoors or outdoors, and are usually formed with natural materials such as dyed sand, rice or flour. They can be very simple or incredibly complex and usually feature geometric designs and patterns. They are made to welcome the Hindu deities, they act as decoration and are thought to bring good luck. Rangoli are often created for Diwali, the Festival of Lights.

Designing and creating Rangoli is a great activity for children of all ages, because you can tailor them to the age and ability of the child. There are many different ways that you can make Rangoli with children, and this post contains some of the ways that we've created Rangoli together.

If you're a regular reader of my blog, you'll know how much we all love Hama beads in this house. The Hama bead circular pegboards and the huge range of coloured Hama beads available makes them perfect for making Rangoli designs that can be used as coasters, place mats or decorations for a Diwali celebration.

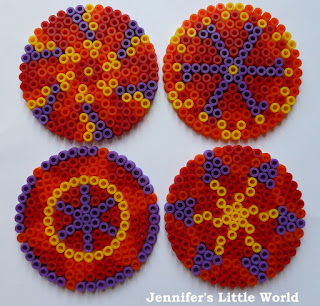
I began with a series of designs for small Hama bead Rangoli. These designs use the small circle template and are very simple, easy for young children to copy or use as a base for their own ideas.

Small Hama bead Rangoli

Then I moved onto creating large Hama bead Rangoli designs. These designs use a lot of beads as the large Hama bead circle template is quite big, but the final designs really are vibrant and eye catching. I love that the pegboard is so versatile, there are so many different ways that you can place the beads on the pegs!

Large Hama bead rangoli for Diwali

Dyed rice is a very popular choice of material when making Rangoli. Rice is very cheap and it's easy to dye using food colouring. For these dyed rice Rangoli I drew the basic design onto painted cardboard and filled the outlines with glue before the children spooned the dyed rice into the different shapes.

Dyed rice rangoli

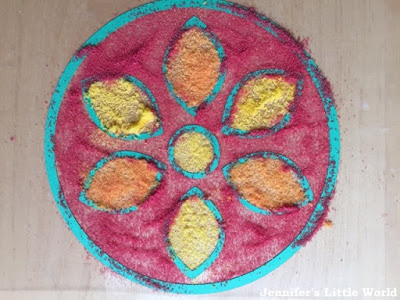
Salt is another great natural material that is easily dyed with food colouring. Our recent dyed salt Rangoli designs were really easy for the children to make using clear contact paper and they also make lovely window decorations.

Dyed salt rangoli

Different Rangoli to make with children for Diwali

I have rounded up all my other Diwali crafts and activities into one post which you can find here - Simple Diwali crafts for young children.

Wednesday, 1 October 2014

Dyed Salt Rangoli for Diwali using the Cricut Mini

How to make dyed salt rangoli

Rangoli are designs that are created on the floor, either indoors or outdoors, usually using natural materials like dyed sand, dyed rice, coloured powders or flower petals. The designs can be simple or intricate, and are often based around geometric shapes and patterns. Rangoli are often seen at Diwali as decoration and to encourage the goddess Lakshmi to enter homes. They are a fun activity to do with children because there are so many different ways that you can design and make them.

This year we've made Rangoli using dyed salt in a cardboard template placed on sticky clear contact paper. I used a Cricut Mini to make our templates but you can easily cut them by hand

You need:

Salt and food colouring
Template shapes - mine were cut using a Cricut Mini
Clear contact paper (sticky backed plastic)
Tape to hold in position on the table
(Laminator if required)

Instructions:

This activity does require some preparation, and it's a lot easier to do if it's all set up beforehand!

First you need to dye the salt. I used cheap supermarket salt and liquid food colouring. Pour the salt into a bowl and mix in a generous amount (at least a teaspoon) of food colouring. Stir well, then leave somewhere warm to dry out. I prepared my dyed salt a few days in advance.

How to dye salt

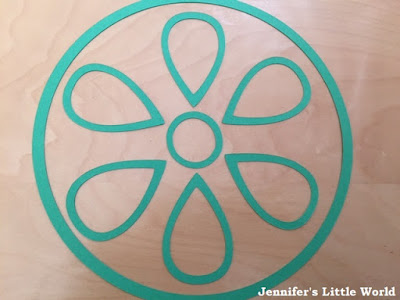
Then you need to prepare the Rangoli template. I used a Cricut Mini to cut out my shapes. A limitation of the Cricut Mini is that you can only cut shapes that you have in your library - I'm too mean to purchase additional cartridges, but I find that the basic shapes included in the Craft Room are very good. I used a selection of designs including circles, ovals and leaf shapes, and tweaked them a bit to get the shapes that I wanted.

If you are cutting the shapes out by hand I'd recommend using a craft knife and cutting mat. There are lots of designs online that you can use for inspiration, it's best to look for a simple one like this basic Rangoli pattern. Cut the design from thin cardboard in a contrasting colour.

Rangoli designs with the cricut

Lay your clear contact paper out on the table sticky side up and secure the corners with tape. Lay your design out and make sure that it is stuck down firmly to the sticky paper. 

Cricut rangoli design

Then you can let the children loose! Use fingers to sprinkle the salt and press down onto the paper. It doesn't matter if you put down too much salt as you can carefully shake off the excess salt over a bin. Seal the design with a second sheet of clear contact paper stuck down over the top. 

Dyed salt rangoli craft

The finished Rangoli were fine as a temporary craft, but I wasn't sure if they would last well if I hung them up. So I ran them through the laminator to make them a little sturdier and to be sure that no salt would escape.

How to make dyed salt rangoli

The dyed salt can also be used to make a temporary Rangoli design outdoors or on the floor with older children. Simply draw out a design on the floor using chalk and fill in with the coloured salt.

I've made several different types of Rangoli with the children. We have made Rangoli using dyed rice, and I've also designed Rangoli using Hama beads. We've made large Rangoli Hama bead patterns and small Rangoli Hama bead designs.

If you are teaching your young children about Diwali, here are some books that they might enjoy:

The Best Diwali Ever (affiliate link) - A heart warming picture book about Diwali, siblings and how very special this celebration can be.

Diwali colouring book for kids (affiliate link) - A simple coloring book for young children, suitable for ages 2-5. Contains all sorts of things to colour including lamps, fireworks, candles, lanterns, food & rangoli patterns.

First Festivals: Diwali (affiliate link) - Featuring simple text, gorgeous illustrations and satisfying lift-the-flaps, this book explores common Diwali traditions and helps young children understand the importance of this special holiday.

Mr Men and Little Miss Happy Diwali (affiliate link) - The five-day festival of lights is celebrated by millions of people across the world and the Mr Men and Little Miss can't wait to join in. They're busy cleaning their homes, creating Rangolis, lighting lamps and enjoying all the festivities, including large feasts that Mr Greedy is particularly looking forward to. It’s going to be a busy five days of light and laughter!

You can also find all sorts of different Diwali crafts and activities on my popular Diwali Pinterest board.

Follow Jennifer Jain's board Diwali Crafts and Activities on Pinterest.

Wednesday, 24 September 2014

Simple magic tricks to make and perform for children


Harry has been very interested in magic tricks lately. We've seen a couple of little magic shows, and he has been fascinated watching magic trick videos on YouTube. Most magic tricks take a lot of time to practice, which is difficult for little ones, so I researched a few super simple tricks that take little preparation and young children can easily learn to perform themselves. They look really effective too!

Simple magic tricks to make and perform with children


Harry loves performing his magic tricks, although he gets just as much enjoyment from showing people how they were done! Here is his repertoire of magic tricks:

The disappearing coin trick


You need:

A plastic, clear cup or tumbler
Coloured card
A coin
A handkerchief or small cloth

To make the props:

Draw around the rim of the plastic cup on to some coloured card and cut out the circle. Glue the coloured circle firmly across the top of the glass. Use the remainder of the coloured card as the base for the trick.

Simple magic tricks to make and perform with children


To perform the trick:

Explain to your audience that you will be making a coin disappear. Take your coin and place it on the base sheet of coloured cardboard. Place the handkerchief over the glass so that it is completely covered, then move the handkerchief covered glass and place it on top of the coin. Remove the handkerchief, and the coin has disappeared! Make sure that you clear away the props for this trick quickly though before your audience spots what is going on, and make sure that the upturned glass always remains on your base sheet of coloured cardboard.

A coin through the hand


You need:

Two coins that look the same

To perform the trick:

This trick is very easy even for young children, and it looks really effective. It does need a little bit of practice, and it's much easier to demonstrate rather than explain in writing. We learned how to do it from this video:


The magic floating toilet roll tube


You need:

A toilet roll or kitchen roll tube (or a plastic/styrofoam cup)
Decorations

To make the prop:

Firstly you need to prepare your toilet roll tube. Make a small hole in the back of the tube about halfway down which is large enough to fit your thumb. Then decorate the tube using felt pens, stickers, coloured tape, paint and so on.

Simple magic tricks to make and perform with children


To perform the trick:

Stand facing your audience and hold the toilet roll tube with a hand on each side. Push one of your thumbs through the hole in the back of the tube, making completely sure that your audience can't see it. Then with a bit of practice you can move your hands away from the tube and move it using just your thumb, so that it looks as though it is floating in the air. Make it fly away from you and pretend to chase after it. It might help to watch the trick being performed first, like in this video:


The classic cups and balls trick


This final trick is a bit more complicated for little ones, but an adult can pick it up really easily and it's great for impressing the children with. Again, it's one that you need to learn from a video. I taught myself quickly and I've been showing it off ever since!


There is a wealth of videos on YouTube with magic tricks for all ages and skills, it's definitely worth having a go at learning some!