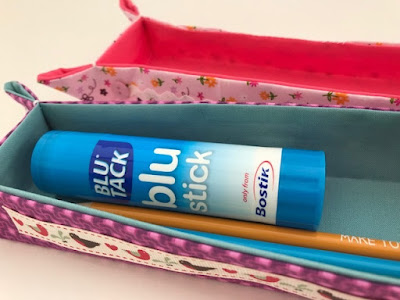
Today I'm sharing a really simple craft - how to make some fabric trays to keep pens, pencils and other stationery organised on your desk.
You need:
Two pieces of fabric, one for the inside of the tray and one for the outside
Fusible interfacing, I used White Lightweight Fusible Iron On Interfacing Fabric
Fabric glue
Embellishments - for example ribbon, sequins, buttons
Instructions:
First you need to make a template for your tray. I wanted to make a tray to hold pencils, so I laid out some pencils on white paper and drew around them to decide on the size of the base of the tray. I added a border of 4cm for the sides and seam allowance. My final template measured 30cm by 14cm.
Choose your fabric and cut a rectangle from each of your chosen fabrics. Then cut two from the fusible interfacing (you may only need one if you are using thicker interfacing). Pin the template to the fabric to make it easier to cut accurately.
Lay the two pieces of fabric with their right sides facing and sandwich with a piece of the interfacing on both the top and on the bottom. The interfacing fabric makes the fabric a little stiffer so that the tray will stand up better. Sew the four pieces together, leaving an opening of a few centimetres. Trim the corners from your fabric sandwich and turn right side out, using a knitting needle or similar to make sure that the corners are pushed out fully. Press on both sides with an iron.
Fold in a corner of the rectangle and measure 3cm from the tip. Use a needle and thread to make some stitches to hold the corner together firmly. Repeat for each corner of the tray.
To make sure that the tray will keep its shape, use an iron to press down the sides and make a firm crease along the bottom edge of the tray.
Your tray is now finished and ready to decorate! To stick the embellishments to the tray I used fabric glue, depending on your glue you may need to use a generous amount of glue. I used the glue to stick star sequins to the corners of the tray and to add a scrap of ribbon along the front.
Once you've added the glue to the ribbon you just need to press it firmly into place and leave to dry, which doesn't take too long.
I made a second tray using some different fabrics, and this time I decorated it with buttons and ric rac.
It's a great and pretty way to keep everything organised on your desk, and you can make them in all different sizes to suit the things that you want to store!
This post uses products which I received as a Bostik blogger, but I've received no additional compensation for this post.


No comments:
Post a Comment
I love reading your comments!