Showing posts with label crochet. Show all posts

Thursday, 9 January 2020

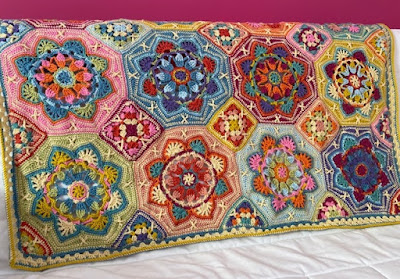
My completed Persian Tiles blanket in the Eastern Jewels colour scheme

I've been looking forward to writing this post for some time. Over Christmas I was really pleased to finally finish one of my long term craft projects - my Persian Tiles blanket! The blanket is made up of 16 octagons, 9 squares, 12 triangles and 4 corners, sewn together with a narrow border. It's made using Styelecraft yarn and it was bought for me as a kit which contained the original Persian Tiles pattern, the Eastern Jewels colour scheme, along with all the yarn needed and more. My finished blanket makes a large square and measures 117 cm on each side. There was enough yarn in the kit that you could probably add another row of octagons if you wanted to.

Persian Tiles Eastern Jewels crochet blanket spread out

The blanket looks very complicated, but I'm not a particularly good crocheter and I managed to get along with it. I'm quite good at covering up my mistakes! The individual stitches are all very simple, and there is plenty of help on YouTube if you need it. There's also a community Facebook group which I found very helpful, and it includes videos of some of the tricky parts, like the crosses that are found on each piece.

Persian Tiles Eastern Jewels crochet blanket close up

I really enjoyed working on the blanket. The colours are so vibrant, and they go together beautifully. It was a bit fiddly with all the colour changes, and of course there were so many ends to sew in, but it was well worth it as I really love the finished product.

Persian Tiles crochet blanket in the Eastern Jewels colour scheme

The crochet pattern for this blanket is Persian Tiles, designed by Janie Crow. I made it using the Eastern Jewels colourway which was created by Lucia Dunn from Lucia's Fig Tree, and you can read a really interesting post about how she chose the colours here - Eastern Jewels Persian Blanket

The Eastern Jewels Persian Tiles is available as a kit from a number of retailers for around £30, or you can buy the Persian Tiles pattern separately and use either the original colours or your own colours. At the time of writing, it was only possible to buy the Eastern Jewels colour scheme if you bought it as part of a kit including the Persian Tiles pattern and yarn, as it's not available separately.

Folded up colourful crochet blanket

Saturday, 3 February 2018

A little crafting catch up

At the beginning of the year I published a post about my crafty plans for the year ahead, and so a month in I thought that I'd do a little update. My big aim for this year is to spend some time crafting every day, and so far I've managed it easily. I'm lucky because I do have stretches of time during the day when I can work on my projects, but I've also been trying to find gaps of time when I would otherwise have been doing something far less productive. For example while the children are reading in bed before they go to sleep, normally I'm just sitting playing on my phone waiting for my evening to begin.

I started the year working on my Christmas ABC Sampler (affiliate link), a lovely, large, Christmas themed sampler. Although it felt a bit odd to be working on it when Christmas was over and done with! It's a beautiful design with lots of different colours, including metallic thread, which I've never used before and beads, which I'll add on at the very end. I don't have a particular deadline in mind to finish it, but I'm aiming to complete one letter each month.

I started with Ornaments because that was where the centre square fell. I spent a lovely afternoon by myself in a hotel in Telford, accompanying my husband on a business trip, and that was when I completed the majority of the square. For the next section I chose Tree, as it was quite a large area and I wanted to continue making a decent dent in the project. It's proving to be quite a complicated sampler to work on as there are lots of different colours mixed in together, many of which are quite similar. It looks beautiful when a section is complete but it can be a bit difficult to keep track of the individual stitches - luckily I've not made any major mistakes so far!

Christmas ABC cross stitch sampler in progress

Secondly this month I've been working on my Persian Tiles crochet blanket. My Mum bought me this for Christmas and I was quite daunted by it at first, but once I got on with it I realised that I could follow the pattern without too much trouble. For a complicated design the pattern is fairly simple, and there are many tutorials on YouTube for the different stitches if I forget what I'm doing. I'm sure that it's full of mistakes but hopefully they aren't too noticeable. So far I've finished six of the squares and three octagons, so still a little way to go but it feels like a good start. The squares work up quite quickly but the octagons take a little longer and involve a bit more thought.

Persian Tiles Eastern Jewels blanket in progress

I share many crafty photos over on Instagram, and if you enjoy sharing your crafty progress, Nicola and I would love you to join in with our Crafting is my Therapy community. Each month we use a different hashtag, so this month we are using #craftingismytherapy_february, and I'm always amazed by the beautiful projects that people link up, from a wide variety of crafts. We also share some of our favourites each month, and it's a great way to find more crafters to follow. We'd love to see you there!

Contains an Amazon Affiliate link.

Friday, 19 January 2018

Making a start on the Persian Tiles crochet blanket

For Christmas I received a rather daunting present from my Mum - a crochet kit to make the Persian Tiles crochet blanket. The kit comes with a pattern, and the yarn and colour substitution chart to make the blanket in the Eastern Jewels colourway. The pattern is designed by Jane Crowfoot and the Eastern Jewels colourway has been created by Lucia Dunn for Stylecraft yarns.

Persian Tiles Eastern Jewels crochet blanket kit in bag

The original colourway is in blues with pops of orange, red, and yellow and it is lovely, but I much prefer the more varied colours of the Eastern Jewels blanket, even if it is a little more daunting to keep track of all the different coloured yarns!

I was a bit nervous when I saw the photograph on the cover. It all looks very complicated with lots of rows, especially on the 16 octagons, and although it's beautiful I couldn't understand how the crosses around the edges of the tiles were made. But my sister added me to a Facebook group for people that are working on the blanket and it was a massive help. I could see photographs of real tiles that people had made and read about problems that people were having to prepare myself in advance.

I decided to start with the squares, as I could see that the first few rounds were just a basic granny square which I'm pretty confident with. To my surprise I found that the pattern was quite easy to follow and I completed my first square quite quickly. It wasn't completely perfect as I didn't get the cross in exactly the correct position, but two squares later I think that I've got it sorted.

Persian Tiles crochet pattern granny squares

This gave me the confidence to have a go at my first octagon. Once again, it wasn't as difficult as I was expecting. There were a few moments when I wasn't sure exactly where to insert a stitch, but I gave it my best shot and I think it looks pretty good. Even better, the sides measure up the same as the squares so it should all fit together nicely!

Starting the Persian Tiles crochet blanket octagons

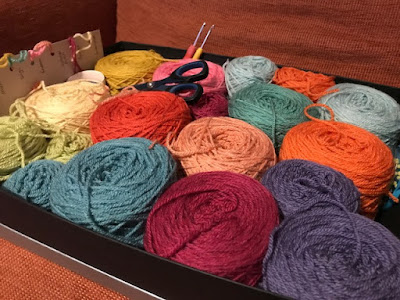
I was getting in a bit of a muddle with all the different balls of yarn getting tangled all over the place, so I borrowed my Mum's wool winder and made them all into nice little balls which I can squish into a cardboard box and keep them upright and easy to access, it has made starting the second octagon much easier.

Organising yarn for a large crochet blanket project

Now it's just a case of getting on with it a tile at a time!

If you want to have a go at the blanket yourself, you can buy the kit from various places, mine came from Wool Warehouse. You can purchase the Persian Tiles pattern individually if you want to use yarn from your stash, or you can buy it as a kit with all the yarn that you need. If you want the colour chart for the Eastern Jewels colourway that I'm using then you need to buy it as part of a kit, you can't buy the colour substitution chart separately.

Thursday, 1 June 2017

My latest crochet project

After I finished my crochet bunting I was planning on taking a break from crochet for a little while. But I found that I missed having a craft to work on that didn't take too much thought and was easy to pick up. So I decided that it was time to make another crochet blanket! I still had quite a lot of yarn left after finishing the bunting, in a lovely selection of pinks and purples. I try not to build up too much of a yarn stash, so I wanted to find a project that would use it up and could also be combined with something that I already had.

When I was planning my Sky Blanket I was lucky enough to be sent more than enough yarn than I needed from Make it Coats. One colour that I barely used was white, and so I ended up with plenty of extra white yarn. So I decided to combine the leftover bunting yarn with some of the white, and go with a simple large granny square blanket.

Granny square pink and purple

So far each side of the blanket is measuring about 70 cm, and although I've just started my second ball of white yarn I have plenty of the coloured balls left. I'm intending the blanket to be for Mia as it will match her bunting, and she seems to be pleased with that idea. I'm now trying to think whether I want it to stay square or whether I need to turn it into a rectangle, either with rows of treble groups down each end or with plain rows, then with a border around. It will probably depend how much yarn I'm left with when it's reached the width that I'm aiming for!

Granny square crochet blanket

I like doing crochet in front of the television, but when my husband and I watch our shows together we devote our full attention to them and sit in the dark with no distractions. So I do my crochet when he's out or away and I can stick on something that doesn't take too much concentration. I also enjoy sitting in front of the PC and watching videos on YouTube, catching up with some of my favourite vloggers. Recently I've discovered the world of speed cleaning and decluttering videos and I've found a few favourites that I'm eagerly binge watching - they give me the motivation to get on with my own housework (perhaps I should film myself while I do it to earn a few pennies from YouTube ads!)

I also have a few balls of blue left over from the Sky Blanket and a couple of balls of green yarn from other projects, so I'm thinking if this blanket turns out nicely I'll make a second similar one for Harry.

Tuesday, 25 April 2017

My Attic24 Summer Bunting

My latest completed crochet project is the Summer Bunting by Lucy at Attic24. I love all Lucy's crochet projects and had been wanting to try one out for a long while, but being fairly new to crochet I wanted to start with something simple. The Summer Bunting is available as a kit to purchase from Wool Warehouse, and at just £9.50 for everything that you need I think that it's a bargain! I chose to complete the project in the pink yarns as I had it in mind for Mia's room, but it's also available in shades of blue.

I received the bunting kit as a Christmas present the year before last, and I'm afraid that I had put it to one side while I was working on my crochet blankets last year. I'm not very good at following crochet patterns, and I wanted to make sure that I did it right. But in the end I found the pattern pretty easy to follow, and although perhaps I may not have got it quite right all of the time, I'm very pleased with the finished result!

Attic24 crochet pink bunting

The bunting uses four different colours of yarn, and the pattern just says to spread them evenly across the triangles. Next time I would plan it out in advance, as I hadn't thought through logically how many different combinations there were! That is what delayed me a little bit going along, as I wasn't sure the best way to do it. I think that I managed to sort it out though.

Bunting is very difficult to photograph nicely, but here it is hanging up in Mia's bedroom over her bed. She was delighted with it and chose exactly where she wanted to hang it.

Attic24 crochet bunting

There was plenty of yarn leftover once I'd finished the bunting - enough to make many many more strings! But I've added it to my stash for now as I have a few colourful crochet projects in mind. I've also been busy browsing the Attic24 kits and pondering my next purchase, there are some lovely blanket kits that have caught my eye!

Attic24 pink summer crochet bunting

Monday, 20 February 2017

The Sky Blanket is finished, what's next?

For the whole of 2016 my crafting was pretty much dominated by my Sky Blanket. I completed a few other projects here and there, but the Sky Blanket was always there to be worked on and with a strict timetable to stick to. Now that it's finished, I can pick up some of the other projects that I've been thinking about!

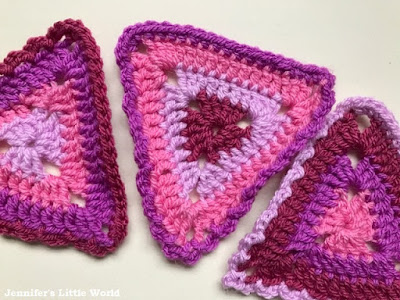
My next crochet project is this Pink Crochet Bunting using a kit from Attic24. I'm not very good at following crochet patterns but it really is quite a simple pattern (assuming that I've got it right!). There are twelve triangles to make with four colours to choose from, then they are all joined together in a line and embellished with buttons. It's a nice portable project to take away and I'm hoping that it won't take me too long to finish. I'm not sure where the bunting will end up, but as it's pink I think that Mia may have her eye on it!

Crochet bunting triangles

I really want to make another crochet blanket, but I have three now and although they are used (I'm always sitting under a blanket if I'm watching television) I have enough for the time being. My sister bought me this book for my birthday - Crocheted Mandalas (affiliate link) - and I'm thinking that a large mandala would make a nice lap blanket for when I'm sitting at my computer during the day. I've not decided which one to go for yet, I want to start with something simple and it would be nice to find one that I could just keep making bigger and bigger until it reaches the right size. I'm thinking perhaps to start with a Granny Square mandala. It will probably end up being mainly blue, as I have plenty of sky coloured yarn left in my stash!

Crocheted mandala book

I'm also thinking that I'd like to make some crochet cushion covers. I've ended up with quite a lot of white yarn in my stash which needs a project, and I've seen some lovely granny square designs which are white with a different pop of colour in each one. We also have lots of old cushions hanging about that are looking very sad, I think that a nice cover would make them look lovely.

In addition to all this I have lots of Easter crafting planned for the next few weeks. I'm looking forward to some nice, bright cheerful crafting and hopefully some sunshine to go along with it!

Monday, 13 February 2017

My completed crochet Sky Blanket

My completed crochet Sky Blanket

I'm thrilled to announce that my Sky Blanket 2016 is finally complete! It's been a long project but I've loved completing it and I'm so pleased with my lovely, enormous, snuggly blanket.

My completed crochet Sky Blanket

The final blanket measures 144cm in width (with a starting chain of 200 plus border) and 337cm in length including the border. The border is four rows wide, with half trebles down the sides and double crochet across the top and bottom, so the side border is very slightly wider. The blanket is mainly crocheted in half trebles, with the occasional row of trebles or mixed stitches.

My completed crochet Sky Blanket

Obviously the colours of yarn that you will need for a project like this will vary greatly depending on where in the world you live and the rules that you use for your blanket. I chose to stick with natural sky colours, and to add embellishments to represent special days and sky colours. This is the colour breakdown that I had for my typical year in the UK:

White (for snow and fog) - 5
Light blue - 125
Medium blue - 67
Light grey - 142
Dark grey - 23
Mixed colours - 4 = 366 rows (2016 was a leap year)

For the blanket I used Red Heart Detroit yarn which comes in 100g balls. I found that one ball allowed me to complete around 15 rows of half trebles. So I did get through quite a bit of yarn! I ended up with more grey rows than I was expecting, although looking at the colour breakdown there were more blue sky days overall. Of course the weather here is so mixed that on many days I could have used any of these colours in my blanket!

Here is how my blanket progressed throughout the year - JanuaryFebruaryMarchAprilMayJuneJulyAugust, September, October, November and December, and here's how it looked as it went along:

My completed crochet Sky Blanket

If you are interested in making your own Sky Blanket, I have written several posts which might help. I've shared some tips on completing a Sky Blanket, and what I would do differently next time. I have also included the blanket as a project on Ravelry, where you can find links to all my blog posts and progress pictures - Crochet Sky Blanket.

There was a group of us taking part in the Sky Blanket project throughout 2016, and you can find us across social media, in particular Instagram, using the hashtag #skyblanket2016. The project was started by Bug, Bird & Bee, The Boy and Me and You Little Sew and Sew.

My completed crochet Sky Blanket

With thanks to Make it Coats for providing me with the yarn for this project.

Monday, 9 January 2017

My Sky Blanket in December #SkyBlanket2016

My Sky Blanket is now complete! Here is a link to the completed Sky Blanket

Here is how my blanket progressed throughout the year - JanuaryFebruaryMarchAprilMayJuneJulyAugust, September, October, November and December.

If you have found this page because you would like to make your own Sky Blanket, you might like these posts:


Sky Blanket progress at the end of the year

The year is over, and along with it my Sky Blanket project has come to an end! Well, technically, the blanket is not complete yet, as I still have to crochet the border. But the daily rows are all done, and I'm hoping to call the blanket finished within the next few weeks.

Here is how my blanket has progressed so far - JanuaryFebruaryMarchAprilMayJuneJulyAugust, September, October and November - and here is how the blanket looked with the daily rows finished at the end of December.

Sky Blanket progress at the end of the year

It's a bit easier to see the blanket from the front, and as you can see it is enormous! It measures over 3 metres in length, and I concur that it is a rather ridiculous size for a blanket. But once I set myself to a challenge I like to see it through, and I just couldn't bear to stop, or change anything to make it smaller. I have written a blog post about things that I would do differently next time, chief amongst them being to find a way to make it smaller, but I do love it and I can't wait until the border is finished and I can snuggle underneath it properly.

Sky Blanket progress at the end of the year

For the border I'm going to use this yarn from Red Heart. I received it from Make it Coats along with the other yarn that I used for the blanket, but I didn't use it for any of the daily rows as it was quite similar to the colour that I used for medium blue. So it doesn't duplicate the colours and I think that it is complementary to the coloured stripes. I'm not sure how wide the border will be yet, I'm thinking about making it wider down the sides to even it out a bit, but there is going to be a lot of crochet involved so I might just decide that I want to get it finished!

Sky Blanket progress at the end of the year

I filmed my Sky Blanket at the beginning of December as part of Vlogmas 2016, and you can see the video here, although not quite complete it gives a good impression of the size of the blanket!


Here's a collage of the progress throughout the year. It seemed to take ages to get going but it built up very quickly, and by about the end of June it was definitely a decent blanket size. Perhaps a six month sky blanket project would be an idea for next time!

Sky Blanket progress throughout the year

There was a group of us taking part in the Sky Blanket project throughout 2016, and you can find us across social media, in particular Instagram, using the hashtag #skyblanket2016. The project was started by Bug, Bird & Bee, The Boy and Me and You Little Sew and Sew.

If you aren't sure if a Sky Blanket is the project for you, you might like this blog post with some more ideas for a year long craft project.

With many thanks to Make it Coats for supplying me with the yarn for this project.

Wednesday, 4 January 2017

Tips for completing a crochet Sky Blanket

You can see my completed Sky Blanket here - My crochet Sky Blanket

As a new year starts, my Sky Blanket 2016 project draws to a close. This crochet blanket has kept me busy for the entire year, and even though it's up to date in terms of rows there is still plenty to get done, with a large border to complete. If you are starting a similar project this year, I thought I'd share a few tips to help with the planning and to keep you on track.

Top tips for completing a Sky Blanket

* When making a start on the blanket, you need to remember that it could end up being very large when it is completed. If you are planning to knit or crochet a row a day it will be huge. Working smaller squares and sewing them together will make a more manageable blanket.

* The blanket will also use a lot of yarn. I estimated that a 100g ball of yarn would crochet approximately 17 rows of half trebles on my 200 chain blanket. So for 366 (leap year) rows that's more than 21 big 100g balls, and of course it's unlikely to be an even spread across the colours so you'll need to allow more for some colours (here in the UK that's realistically going to be extra grey). Try to choose a yarn that will still be available if you need to purchase more as you go along.

* It's a long project and you can always make changes as you go along - I intended to just keep to the same stitch throughout the blanket but a couple of months in I decided to mix it up a bit with a few different stitches to keep it interesting and I'm so glad that I did.

* Don't be too ambitious and give yourself too much to do each day, it's better to have a completed smaller blanket than an unfinished one lying around. This is especially important if you are going to be away for a while or there will be periods of time when you won't be able to work on it and you'll have to catch up.

* If you are planning on travelling or being away from home a lot, think about keeping the project portable my making squares etc. - by around April I found that the blanket was becoming far too big to be packing to take away with me and so I had to catch up when I got back.

* Sew in all the ends as you go along, otherwise it will be a daunting task!

* Keep a record of the sky colour each day, whether written or photographic. Even if you are completing a row each day, it's amazing how quickly you forget! Also, don't get too hung up about it. Especially here in the UK, most days most colours will appear in the sky at some point during an average day!

* Don't get hung up on finishing the blanket on December 31st. Especially if you are planning to add a border, with the size that the blanket will be that's quite a time consuming process!

* Try and find others that are doing the same challenge, there are bound to be plenty sharing their progress across social media. Join in with hashtags so that you are inspired to keep going (and inspired by how others are working on their blankets). We used the hashtag #skyblanket2016 and you can find lots of inspiration on Instagram.

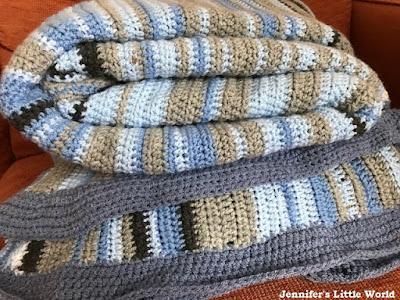
Finished crochet Sky Blanket rolled up

* As the year draws to a close, it's time to start planning the next project! Why not have a look at my list of ideas for a year long craft project! I'm not going to be working on anything like this for a little while I don't think, I'm looking forward to trying something new, but in a couple of years time I may well be back!

Monday, 2 January 2017

Update on my 2016 crafting, and crafty plans for 2017

At the beginning of 2016 I wrote all about my crafting plans for the year ahead, so I thought that I'd post a little bit of an update and have a think about what I want to achieve this year.

My big craft project for this year was my Sky Blanket, and I'm pleased to say that I kept pretty well on top of it, completing each month up to date if not each day. We were away over New Year and so I didn't have a triumphant New Year's Eve final row crochet session, but the daily rows at least will be finished within a few days of the new year beginning. It's a project that will continue well into 2017 though, as it's going to need a large, wide border to even it out. Look out for the final update blog post, but in the meantime here's how it looked at the end of November!

Sky Blanket in progress

My other large project this year was my crochet granny square blanket, which I finished quite early on. It was hard work sewing all the squares together and making the wide border, but I'm really pleased with it, especially the scalloped edging.

Granny Square blue crochet blanket

I'm afraid to say that the other projects I was planning to complete didn't get done. My Sky Blanket ended up taking up most a lot of my available crafting time, and along with the other projects that cropped up along the way I didn't manage to get to them!

So I'm starting the year with the main focus on the Sky Blanket before I lose momentum. When it's finished I'll be picking up my sadly neglected crochet project - the Attic24 Pink Bunting. Once I get going with it I don't think it will take me very long to complete as the pattern is quite quick and easy. I'm not sure yet where it will go, I'm hoping that Mia might like it for her room as it's very pink and girly.

I'm not sure that I'm ready for another big project just yet, but I would love to have a go at another one of the Attic24 kits, especially one of the blankets, as I think that they are very reasonably priced (you can see the shop here at Wool Warehouse). But I've made three blankets now, so perhaps it's time to move onto something else!

On a whim in Ikea the other week I picked up a white Ikea Ribba frame. I initally bought it with the intention of using it for my mini Hama bead Russian Doll picture. But I'd also quite like to make some kind of framed beach themed picture using shells or sea glass so I might gather some inspiration for making one. I've already pinned a few ideas on my By The Sea Pinterest board!

I've also neglected the mini Hama beads lately and I'd love to get back into using them for something, perhaps another little mosaic picture. I spent ages sorting them all by colour so it's a shame not to be using them!

What are your crafty plans for the year ahead?

Thursday, 29 December 2016

Sky Blanket - What I would do differently next time

You can see my completed Sky Blanket here - My crochet Sky Blanket

As the end of the year approaches, my Sky Blanket project draws to a close. Although I'll finish my daily rows at the end of December, I'm planning a big border so I've a way to go yet before I share a picture of the finished blanket. I love my blanket, but working on this project over the last year has given me a few ideas about what I would do differently next time, and so I thought I'd share them.

Completing a Sky Blanket - what I would do differently next time

Firstly, I would use a wider range of colours. I was adamant that I wanted to stick to the basic sky colours of blues and greys, but with hindsight I could have made a much more colourful blanket if I'd chosen some pinks and oranges for the sunsets, or a rainbow yarn. Having said that I do quite like the simple palette of my blanket so perhaps too many colours would have been a bit much.

Next time I'd definitely use a wider variety of greys though, and I'd also look for some sparkly grey yarn to make all those grey rainy days a bit more interesting!

I could have also varied my stitches a bit. I did this to a certain extent, and I do like the uniform quality of my blanket, but I've seen some fantastic examples of blankets that are almost like samplers with all sorts of different stitches.

Next time I wouldn't get too hung up on which exact colour to use. In a country like the UK with such a variety of weather, to be honest on most days I could have chosen any colour to represent the sky. As I went through the project I tended to lean towards a colour which represented the colour of the sky for most of the day, rather than looking at the sky at a strict time that day. If I'd spent a reasonable amount of the day outside, for example if we'd had a day out or I'd been for a run, then I chose a colour that represented the sky at that time.

It was a very rare day when the sky stayed the same colour for the majority of the day. I've seen some blankets where the knitter or crocheter has used a couple of different yarn colours for each row or square, and I think that works really well, I was just worried about how much yarn the blanket would end up using!

My blanket did end up very long and skinny. This meant that it was very easy to keep on top of, as each row only took me about 10-15 minutes to crochet. Perhaps next time I'd add in a few extra stitches. My blanket had a starting chain of 200, perhaps I'd up that to 250 or 300.

I could have got around this by making a blanket with different squares instead of rows. Then I could have planned the blanket right from the beginning and I would have been able to work out the rough size of the finished blanket. It would also have been more portable to take away with me. I would have to sew them up as I went along though, I can't imagine trying to sew together 365/6 squares all in one go!

Completing a Sky Blanket - what I would do differently next time

In order to show the year more clearly, I would have liked to include a plain coloured row in between the rows for each month. This would have divided the blanket up nicely and perhaps made it more obvious how it related to the year as a whole. Similarly I could have done a plain row at the beginning and end, and perhaps tried to find a way to make it obvious which wintery end was which.

Finally, I would have kept a close eye on my stitch count as I went along. Being relatively new to crochet I'm still learning, and discovered at the beginning of November that I'd lost almost 40 stitches from the row. Having only started with 200, there was a significant difference between the two ends of the blanket. I was able to catch up and add them back in, but it would have been better if I'd checked every month or so and sorted it out as I went along!

I hope that these tips were helpful! I posted about the progress of my Sky Blanket monthly throughout 2016, and you can links to each monthly post here - My completed Sky Blanket.

If you are looking for a long term craft project to keep you busy for a year but aren't sure whether a Sky Blanket is the one for you, you might like the different projects that I rounded up in my blog post Ideas for a Long Term Craft Project

Monday, 5 December 2016

My Sky Blanket in November #SkyBlanket2016

My Sky Blanket is now complete! Here is a link to the completed Sky Blanket

Here is how my blanket progressed throughout the year - JanuaryFebruaryMarchAprilMayJuneJulyAugust, September, October, November and December.

If you have found this page because you would like to make your own Sky Blanket, you might like these posts:


Sky Blanket progress in November

Welcome to November, and only one month of my Sky Blanket left to go! To begin with, here is how my blanket has progressed so far - JanuaryFebruaryMarchAprilMayJuneJulyAugust, September and October...

... and here it is in the usual spot on the sofa!

Sky Blanket progress in November

It is so large now that I'm working on it a few days at a time, generally catching up at the weekend. I noticed that it wasn't taking as long to crochet each row so I thought I should probably count my stitches, and was mildly alarmed to discover that I had lost nearly 40 stitches since I started - whoops! That's a lesson to me to keep an eye on these things much more regularly! So for the last couple of weeks I've been adding in a few stitches into each row and I'm back to the 200 that I started with now. I don't think that it's too obvious in the blanket as it has obviously happened gradually and the edges are quite wobbly anyway, hopefully I can stretch it out a bit when it's done.

I'm starting to make plans for when the year is finished now. The blanket is definitely going to need a border, and as it has turned out quite long and skinny I'm thinking about making a border which has quite wide sides to even it out a bit. I have quite a lot of yarn in a shade of blue that I didn't use in the blanket, so I will probably use that. It does mean that it's going to be a little while yet before the entire blanket is completed though (and it will be massive...)

I've also been adding in a few of the embellishments that I missed through the year. As we've all had our birthdays now I've added in all our birthday buttons. Harry and Mia chose their green and pink ones, I have a star, and Mia chose a large blue button for Ram.

Sky Blanket progress in November

I'm planning a few more embellishments too. I'm investigating adding some little crochet extras on, for example some Autumn leaves as the colours were so lovely this year, and perhaps a snowflake to represent cold at least if not snow. Maybe a star for Christmas. It would be nice to add a little more colour to the blanket.

There was a group of us taking part in the Sky Blanket project throughout 2016, and you can find us across social media, in particular Instagram, using the hashtag #skyblanket2016. The project was started by Bug, Bird & Bee, The Boy and Me and You Little Sew and Sew.

If you aren't sure if a Sky Blanket is the project for you, you might like this blog post with some more ideas for a year long craft project.
With many thanks to Make it Coats for supplying me with the yarn for this project.
Thursday, 3 November 2016

My Sky Blanket in October #SkyBlanket2016

My Sky Blanket is now complete! Here is a link to the completed Sky Blanket

Here is how my blanket progressed throughout the year - JanuaryFebruaryMarchAprilMayJuneJulyAugust, September, October, November and December.
If you have found this page because you would like to make your own Sky Blanket, you might like these posts:


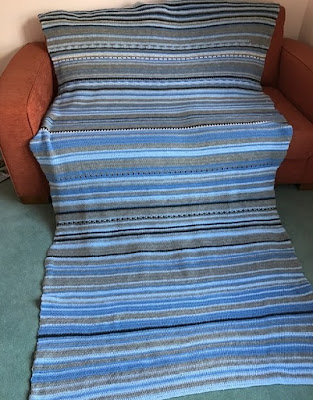
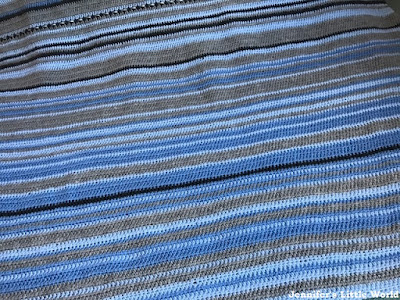
Sky Blanket progress in October

As the temperature has been dropping I have been very grateful for my nice, big snuggly Sky Blanket! I usually work on a few days at a time while I'm watching television, and it's nice to be able to sit underneath it while I'm working, and when I've finished that day's row. I keep saying it, but this blanket is going to be enormous when it's finished!

Here is how my blanket has progressed so far...


... and here is how it is looking now:

Sky Blanket progress in October

On the 1st October I went to my friend's wedding which was a great day. It rained torrentially for the whole morning, but when we arrived the sun came out, and the afternoon was beautiful. As we were eating our meal we were treated to a beautiful double rainbow over the adjacent ruins (all the photographers came running!) and so I reflected it in my blanket with dark grey and my rainbow ribbon.

Sky Blanket progress in October

I also added a pink button for a beautiful pink sunset - now that the days are getting shorter I tend to be around for sunrise and sunset times so I'm more likely to see them. There has been quite a lot of grey this month which is a little bit of a worry as I've only got about a ball and a half of grey yarn left, fingers crossed there is still plenty of blue sky left to come!

Sky Blanket progress in October

There was a group of us taking part in the Sky Blanket project throughout 2016, and you can find us across social media, in particular Instagram, using the hashtag #skyblanket2016. The project was started by Bug, Bird & Bee, The Boy and Me and You Little Sew and Sew.

If you aren't sure if a Sky Blanket is the project for you, you might like this blog post with some more ideas for a year long craft project.

With many thanks to Make it Coats for supplying me with the yarn for this project.

Wednesday, 5 October 2016

My Sky Blanket in September #SkyBlanket2016

My Sky Blanket is now complete! Here is a link to the completed Sky Blanket

Here is how my blanket progressed throughout the year - JanuaryFebruaryMarchAprilMayJuneJulyAugust, September, October, November and December.

If you have found this page because you would like to make your own Sky Blanket, you might like these posts:


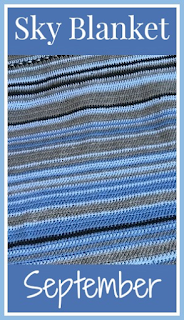
Sky Blanket progress in September

I can't believe how quickly the year is going! It's October already, and so that means it's time for my Sky Blanket in September update post. As a reminder, here's how my blanket has progressed so far - January, February, March, April, MayJuneJuly and August, and here is how it is looking now:

Sky Blanket progress in September

As you can see, it has long outgrown my sofa photo spot, it really is getting very large now! I hope that it's not going to end up too long and skinny, I think that we may end up using it sideways along the length of the sofa. It certainly is nice and warm and cosy to sit underneath. I'm finding it a bit of a pain to keep dragging out to work on so I've been doing a few days at a time, and trying to be good and sew in the ends as I go. It is definitely going to need a border to even out the edges a little bit, but that's going to be a good bit of work!

Sky Blanket progress in September

The month has been another mixed one, still plenty of blue in there but interspersed with grey too. I'm wondering whether when the blanket is finished there will be any distinction at all between summer and winter!

Sky Blanket progress in September

I very much like the combination of colours that I've ended up with and I like the stiches (mainly half treble) that I've used, it makes a nice solid blanket that hopefully won't stretch out of shape.

There was a group of us taking part in the Sky Blanket project throughout 2016, and you can find us across social media, in particular Instagram, using the hashtag #skyblanket2016. The project was started by Bug, Bird & Bee, The Boy and Me and You Little Sew and Sew.

If you aren't sure if a Sky Blanket is the project for you, you might like this blog post with some more ideas for a year long craft project.

With many thanks to Make it Coats for supplying me with the yarn for this project.