Wednesday 31 January 2024

How to achieve upcycled elegance with a bedroom furniture makeover?

This is a collaborative post

Transforming your bedroom doesn't have to mean spending a fortune on new furnishings. With upcycling, you can breathe new life into pieces you already own, creating a fresh look that's as environmentally friendly as stylish. With some creativity and DIY effort, you can turn your existing bedroom furniture into stunning, original pieces that reflect your personal taste and contribute to a sustainable lifestyle.

Upcycling your bedroom furniture can be a fulfilling project that benefits the planet by reducing waste and gives you a budget-friendly means to a bedroom makeover. Whether it's a vintage dresser with some love or a bedside table that's seen better days, your bedroom can become an oasis of repurposed elegance. By making over what you already have, you ensure your space is uniquely yours, filled with storied pieces that can't be found in any store.

Embarking on a DIY bedroom furniture upcycling project can initially seem daunting, but with the right methods and a touch of creativity, the process is manageable and rewarding. From selecting the right materials to applying the final touches, each step you take enhances your room's aesthetics and showcases your commitment to ecologically conscious living. You'll find that with some time and effort, you can achieve a high-end look without the high-end price tag, all while making an environmentally responsible choice.

Planning Your Upcycling Project

To add character and sophistication to your bedroom, an upcycling project can transform existing furniture into treasured pieces. It combines creativity and practicality, creating a personalized space tailored to your taste and needs.

Choosing the Right Furniture

Identify furniture that's a good candidate for upcycling; often, pieces sourced from a thrift store or those with a vintage flair hold great potential. For a significant impact, consider repurposing an old dresser or nightstand. If you're keen on revamping your sleeping space, look for comfortable king size beds that can serve as a central piece.

Design and Inspiration

Gather inspiration from home décor magazines, Pinterest, or upcycling blogs. Visualize the finished product in your room—whether it's a paint-refreshed bookshelf or a reupholstered chair. Incorporate wallpapers, patterns, or themes that align with a room's aesthetic that feels personal and inviting.

Materials and Tools

The right materials and tools are vital. Basic supplies include paint, brushes, sandpaper, and wallpaper if you add a patterned backdrop to shelves or drawers. Ensure you have a well-ventilated space and wear protective gear when handling paints and stains for your upcycling venture.

Executing the Makeover

Achieving upcycled elegance with your bedroom furniture makeover is about more than just slapping on a coat of paint—it’s a transformative process that requires meticulous preparation, specific painting techniques, and the addition of unique touches that reflect your personal style.

Preparation and Cleaning

Before you begin, ensure your furniture is clean and free of any dirt, grease or old finishes that can impede the adhesion of new paint. You can do this by wiping down the surfaces with a damp cloth and then with a mild cleaner. Remove all drawers and hardware if you're working on a dresser makeover. Sanding may be necessary for some surfaces to create a smooth canvas for painting.

Painting Techniques

The choice of paint can greatly affect the final outcome. For a furniture makeover, consider using chalk paint for a matte finish that requires minimal prep work. Start with a even base coat, working in the direction of the grain to avoid streaks. Multiple thin coats are better for cabinets or nightstands than one thick coat. After achieving the desired opaqueness, seal the paint with a clear wax or lacquer to protect your finish.

Adding Unique Touches

Now's your chance to inject some individuality into your DIY project. Replace old knobs with new hardware to modernize a piece instantly, or add distinctiveness to a nightstand with unique decorative elements. Consider new upholstery for padded items or applying a bold pattern with stencils. The before and after of your upcycled furniture ideas should showcase your creativity and attention to detail—transforming the mundane into something remarkable.

Upcycled bedroom furniture
Photo credit Kenny Eliason via Unsplash

Conclusion

Adopting upcycling in your bedroom furniture makeover can transform a space with minimal environmental impact. Your creativity breathes new life into old pieces, saving money and adding a touch of uniqueness. By repurposing items with history, you give your bedroom an elegant, personal, and eco-friendly flair. Embrace these sustainable practices for a stylish and responsible bedroom redesign.

Monday 29 January 2024

Garden of Sun Signs 3000 piece jigsaw puzzle from Ravensburger

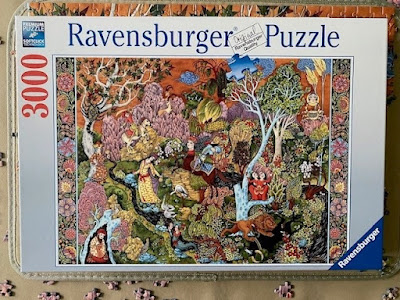
Earlier in the year I wrote about the start that I had made on my first 3000 piece jigsaw. I chose Garden of Sun Signs from Ravensburger and you can read more about why I chose this puzzle here - A jigsaw challenge for the New Year. Here is the puzzle - it shows a garden filled with trees and plants along with representations of the twelve signs of the zodiac.

Garden of Sun Signs 3000 piece jigsaw puzzle from Ravensburger

I began the puzzle with a long sort out of pieces. I received some simple stacking trays for Christmas which made the job much easier. I concentrated on sorting out the edge pieces, the parts that contained the pale blue border, the pink rocks, the brown sky, the blue clouds, and any interesting pieces. 

I began the puzzle by working on the areas of brown sky and the blue clouds, which then led to the tree in the top left corner. I then moved on to as many of the pink rock and flower areas as I could. It was fairly challenging, I had to do some shape sorting for the rocks as they were all very similar, and I had to do another two sorts to pick out enough tree pieces to be able to put together a decent section. The tree in the top right was tricky as it was incredibly difficult to work out what pieces belonged there, I left most of it until almost the end.

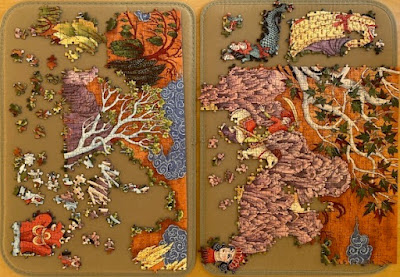
I completed as much of the jigsaw as I could on my portable jigsaw board, which is the size of a standard 1000 piece jigsaw with two removable inserts. It was a bit frustrating, but it did mean that I could carry the jigsaw around to work on it and didn't need to take up a whole table.

Garden of Sun Signs jigsaw puzzle in progress

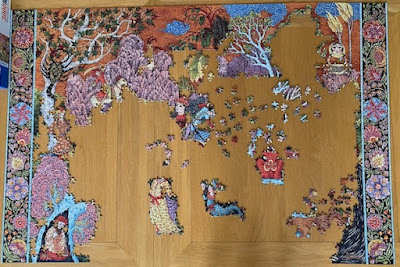
The next major area that I worked on was the side panels. I had already sorted out the edges and it was quite easy to pick out the pieces that belong in this section as they are distinctive and clearly different to the other pieces. This part was really enjoyable to put together, not too difficult but challenging enough to be interesting.

Garden of Sun Signs jigsaw puzzle working in smaller parts

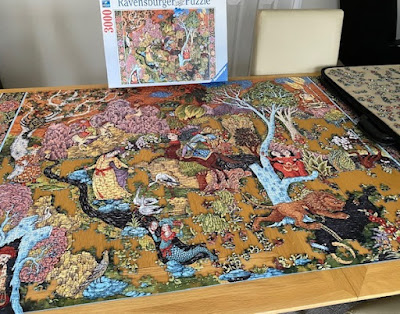
Finally I reached the point where I wasn't able to work efficiently on the jigsaw while it was in pieces, so I transferred it to our dining room table. The finished puzzle measures 121cm by 80cm which is only slightly smaller than our largest table. Luckily we don't use the dining table regularly for eating! It was really good to see everything in position and it helped me to decide what to work on next.

Ravensburger Garden of Sun Signs jigsaw in progress review

Once I had placed the completed sections in position I was able to put together the final edge pieces along the bottom. I was dismayed to discover that there was a piece missing from the bottom edge - and so relieved when it turned up in a small selection of pieces that I had already sorted through at least five times!

Progress began to speed up at this point. I started to focus more now on the different zodiac signs, hunting through the miscellaneous piece box again. I also sorted out all the green pieces separately to put to one side. I worked on the large tree trunk to the right and Leo and Taurus underneath. 

Then I began to get a bit stuck because there was still so much of the jigsaw left to complete, and I was starting to realise just how much of that was different greens. There were also lots of pieces that I felt should have turned up by now which always makes me feel a bit anxious as I worry that they are missing. I decided to do another sort and tackle the light brown/beige areas and I also worked on the river which helped to pull things together. After re-sorting I was able to pick out almost all of the zodiac sign pieces and get them complete.

Garden of Sun Signs from Ravensburger progress

At this point I was left mainly with the green and flowered areas. This is when I began to slow down a bit again as I wasn't sure where to head next. I tried to sort out the different types of plants and flowers and did some colour sorting.

jigsaw puzzle set up for 3000 pieces

It was a big moment when I was able to fit all the remaining pieces onto one large puzzle board that I could keep next to me while I worked. I concentrated less on the sorting at this point and instead just went through the remaining pieces and worked out where they should go. Because the remaining gaps were quite small it was pretty easy to connect obvious loose pieces to the parts I already had in place.

Garden of Sun Signs jigsaw puzzle from Ravensburger nearly complete

I only had one false fit in the puzzle and it confused me for a long time. I could tell that the piece I had fitted wasn't correct, as the image didn't line up properly. But it fitted so perfectly that I thought it might have been a printing error, even though I couldn't understand how it could have happened. 

It wasn't until I was nearly at the end that I found the piece that really belonged there, and I worked out where the original piece actually needed to go. I'm not an expert on how jigsaw puzzles are made but I wonder whether with a larger jigsaw the cut is repeated somehow. It's hard to tell as the puzzle is so large but it does look as though the two sides might be copied.

Ravensburger puzzle false fit example

The most difficult part of the puzzle was definitely the last 50-100 or so pieces - the opposite to what I usually find with a jigsaw puzzle! I had to resort to shape sorting the pieces right up until the last few, and even with just ten pieces left I was convinced that I had missing or extra pieces because I couldn't see how my remaining ones were going to fit. It was so satisfying to place the last piece and see it complete!

Ravensburger Garden of Sun signs puzzle complete detail

I really loved working on this puzzle. It was large, but it didn't feel too overwhelming at any point, and I progressed much faster once I was able to lay the whole thing out on the table. I did have anxiety about missing pieces throughout as I found that many pieces didn't look as I imagined them in my head. I was mentally rehearsing a future conversation with the Amazon chatbot, and deciding whether I would rather have a refund or replacement! But of course the puzzle was complete and I needn't have worried.

Garden of Sun Signs puzzle detail

I can't bear to take the puzzle apart just yet, it's such a gorgeous image that I want to keep looking at it. I'm not one to glue together or frame my photos but this one really would look gorgeous on display and the colours are much clearer and vibrant in reality than a photograph. I'll definitely be giving it another go at some point in the future.

Ravensburger Garden of Sun Signs jigsaw puzzle review

I started the puzzle a couple of days after Christmas and it took me about four weeks to complete. I worked on it most days, although sometimes I only placed a few pieces or did some sorting. 

Now I would love to try an even larger jigsaw puzzle, maybe a 5000 piece, but the main problem is finding somewhere large enough to lay it all out! There also aren't any designs I've seen that really appeal to me, and they are very pricy. In the meantime I received a nice stash of 1000 piece puzzles for Christmas so I'm going to be working on those next. I wonder if I'll find them super easy now!

Friday 26 January 2024

Our first family escape room

At the weekend we treated Harry to an escape room for his birthday treat. This was the first time that we had tried such a thing as a family, although my husband and I had both separately completed an escape room before. A few years ago my parents and I did Time Lock: Mission Berlin in Worthing. We were terrible at it! I don't know if the room was particularly difficult or if we just weren't very good, but we were constantly asking for help, and even then we only just made it out in time!

The escape room that we did at the weekend was another of the three in Worthing, which are all run by the same company. Smugglers Ruin is inspired by local history, as you attempt to retrieve a precious barrel of gin from the town hall. Once booked, all of these escape rooms are exclusive to your group, which was a big plus point for me.

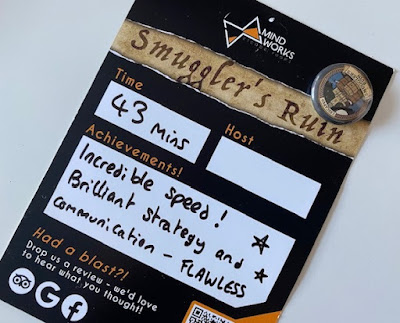
I was a little apprehensive as to how we would get on. Harry can get overwhelmed quite quickly, especially when there is a time pressure, and Mia can get frustrated if she doesn't understand something. I was worried that I'd be spending the whole time trying to keep everyone happy, rather than actually solving puzzles! But in the end I needn't have worried, as we did brilliantly. We solved the room in just 43 minutes, and we didn't need a single hint!

Obviously no spoilers, but we were helped massively by the fact that Harry has a particular knack for a certain type of puzzle that I think would have taken the rest of us much longer to solve. We all worked really well as a team finding all the things that we needed for the puzzles, and we all chipped in with our own ideas which helped us to solve them together. We had an enormous amount of fun, and were talking about it for days afterwards. 

I would love to do a few more escape rooms but unfortunately it's not a cheap hobby. I can understand  why it's expensive - only a few people can take part at a time, it takes a long time to run the room and to set it up each time, and once someone has done a room they won't be coming back even with a different group of people. It was worth it but was definitely a treat rather than something that we'll be able to do regularly, even though we all loved it! There are plenty of others to try locally, so I'm hoping that we will be able to do another one together soon.

Smuggler's Ruin escape room Worthing

Have you ever tried an escape room?

Friday 19 January 2024

Cathy's Flower House miniature craft kit from Rolife review

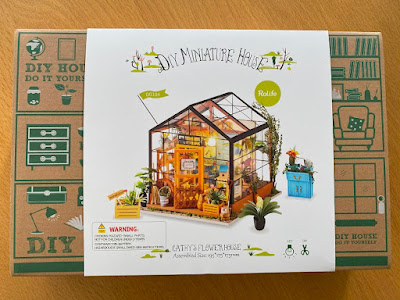
A few months ago I wrote about the latest craft project that my husband and I had embarked on - Cathy's Flower House miniature kit from Rolife. We worked really hard on it, and completed it just before Christmas. I thought I'd write a little review of the kit, just in case you've seen them out and about and wondered what it was like to put one together!

We bought our kit on Amazon and it's worth keeping an eye on prices as they do go up and down. Expect to pay around £40 - £45. Our kit is called Cathy's Flower House (affiliate link) and there are plenty of other kits to choose from. If you want to see an assembled miniature house in person then it might be worth a trip to your local garden centre, ours is a Haskins and currently has several on display including this one.

Cathy's Flower House craft kit from Rolife in box

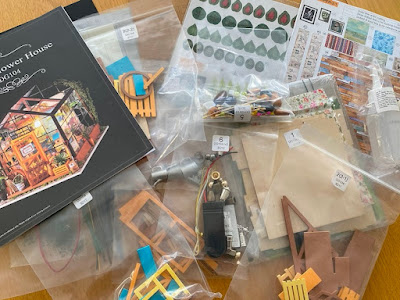
Everything inside the box is sorted into numbered bags, although there wasn't always much logic as to what went where. Our kit included glue and paint but not batteries, I think that the inclusion of batteries (and in some cases the glue and paint) depends on where you buy the kit from. The kit contents are a mixture of small coloured wooden pieces, sheets of paper and tissue paper with both pre-cut and printed parts, the electrical components for making the light and lots of tiny little bits and pieces that fit together in various ways.

Rolife Cathy's Flower House craft kit contents

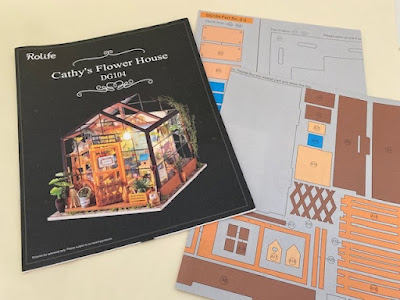
There are some large paper templates which you can use to match up the pieces and make sure that you have the correct part for each section. We did have quite a few bits left over at the end which confused us a bit, but I think they were just spares! The instruction booklet is large and detailed with lots of pictures.

Rolife miniature house kit instruction manual and sheets

We started the kit by painting the large wooden pieces which form the sides and base of the flower house. Then we worked through the instruction book in order to build everything that goes inside. Some of the items were straightforward to put together and others were more fiddly and complicated. Luckily we found that the supplied glue was very good and dried quickly.

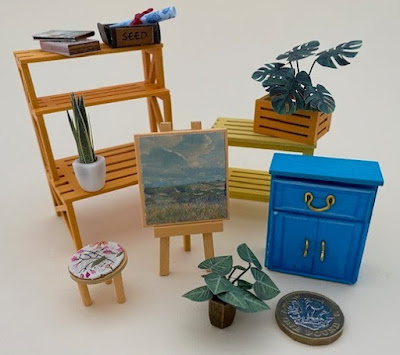
My favourite part of the whole kit is the blue drawer and cupboard piece. The gold coloured wire has to be bent into shape to form the handles. When complete it is filled with flowers and has plants trailing out of it. It's a shame that after all that effort it's tucked away in the back corner!

Some of the plants, like the ones in the photograph below, are made using printed leaves which pop out from a backing sheet and are glued into place on lengths of green wire. It's a bit fiddly, but they look really good when put together. You can see a pound coin in the photo which gives an idea of the scale.

Cathy's Flower House kit from Rolife review

We didn't realise when choosing the set that the plants would be so difficult to make, and this kit has a lot of plants! There are lots of tiny pieces of paper, little bits that need to be rolled up, glued and stuck together, and sometimes the instructions were a bit vague with a few translation errors. But on the whole the instructions were very good and it wasn't too difficult to work out what we needed to do.

Cathy's Flower House from Rolife kit instructions

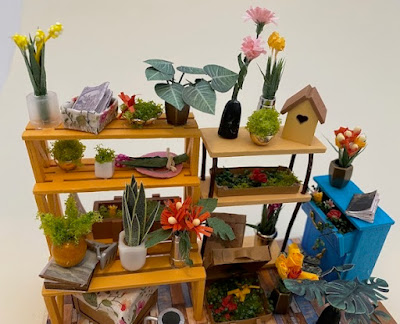
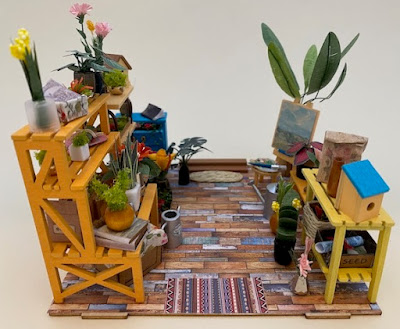
Once all the plants and other accessories have been built then you can position them on the shelves and glue them down, and there are clear diagrams showing where each part goes. Then the shelves are glued to the base piece.

Rolife Greenhouse miniature craft kit review

This is the chance to have a good look at what you've built, because once it's inside the greenhouse part it isn't as easy to see! You need to make sure that everything is glued down firmly because once the roof is on you can't get back inside to make any adjustments.

Cathy's Flower House from Rolife kit during assembly

I love the way that the flowers and plants have turned out. Some of them are so simple, just some green fluff glued inside a large bead, but they look so effective and realistic.

Cathy's Flower House Greenhouse kit review from Rolife

Next it was time to build the plastic outer greenhouse part. This was quite easy to put together. The black frames are already in place, although you glue more black strips on at the end to hide the joins in the plastic and the wiring.

Cathy's Greenhouse section from Rolife kit

The most difficult part of the build was fitting these plastic walls onto the base. I suspect we may have made a mistake somewhere along the line, because our tabs didn't line up correctly with the slots in the base. We had to use a small saw to make the holes larger so that we could fit the top part on properly. It worked out in the end but it was a bit awkward at times.

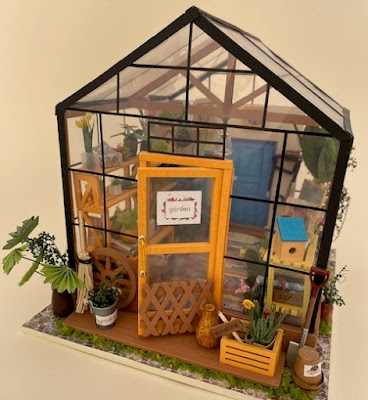
And here's the finished flower house!

Completed Cathy's Flower House kit from Rolife review

We love it and we are so proud of it. It's so detailed and it looks really good from the outside.

Rolife miniature greenhouse kit review

The greenhouse is fitted with a small battery powered light which you need to wire up from scratch, although it's only a simple circuit. Wire cutters and strippers were really helpful here as the wire is very thin and fiddly to work with. You also need to use plastic tubes which are heat shrunk to the wires. This wasn't something that we had done before so we were a bit nervous, but we watched a few YouTube videos and managed to do it quite easily using a lighter. 

The light inside looks really good, I love how it shines out of the plastic panels. It certainly adds some interest to our bookshelves.

Battery powered miniature house kit from Rolife

Before starting the kit I read in an online review that it would take about twenty hours to put together. It's difficult to estimate how long we spent but I'm guessing that it took us at least that long - and that's with two of us working on it at the same time! But once you've got the hang of it I think that subsequent kits would be quicker, and all those plants did take a long time. 

We had a lot of fun putting this kit together, when we got started it could quite easily absorb us both for several hours, even my husband who has a very short attention span. It was lovely to have a project that we could work on together. We are already eyeing up the next one, they do a lovely Book Nook range which would look great on my bookcase!

Thursday 18 January 2024

Ten tips to save for your next holiday

This is a collaborative post

When was the last time you had a holiday? 

If the answer is 'too long' then maybe it's about time you had one!

That is all well and good if you have the money to pay for a trip away. But if you don't then you are going to have to start saving for one. 

If you are dreaming of visiting Paris in the springtime, lazy sunshine days on a Caribbean beach, a canal tour in Bruges or an exciting off-road adventure in the outback of Australia, here are ten ways you can save money to fund your next holiday.

1. Decide where to go

According to the United Nations there are over 250 different countries and territories in the world. Although some of them are off-limits to certain nationalities, essentially, in terms of travel, the world is your oyster.

If you already know where you want to go, you can start to budget for your trip (more on that shortly). However, if you are open to visiting anywhere in the world, one of the best ways to save money on the cost of your next holiday is to be selective about where you want to go.

As a general rule countries like the UK, Japan, Norway, Sweden and Denmark are much more expensive to visit than the likes of Vietnam, Laos and Cambodia. Therefore, if you choose to go somewhere like Hanoi, Vientiane or Phnom Penh, as opposed to London, Tokyo, Oslo, Stockholm or Copenhagen, you could literally save yourself thousands of dollars from that one decision.

Camper van driving through national park
Photo credit Dino Reichmuth via Unsplash

2. Decide how long to go for

If choosing where you want to go is a good way to save money, then so is determining how long you want to go for. It follows that the longer you want to stay in a destination the more money you will spend there on accommodation, food and  other daily costs like sightseeing. 

In this regard, it is important to remember that you are going on holiday to have a good time, relax and refresh your mind from the vigour of your daily life. However, you should also try and strike the balance between visiting a place long enough for you to feel this way and not letting your costs blow out due to holidaying for too long. After all, you probably won't spend as much on a 17 day holiday as you might on a 21 day vacation.

3. Formulate a budget

Once you have decided on where you are going to go on holiday and how long you will go for, the next thing to do is to devise a budget. While this might seem like a drag or extra, unnecessary work, doing this is a crucial step in actually saving money.

It is hard to save without a purpose. So, ostensibly, when you create a budget, you are actually informing yourself of what you are saving for. For this reason, consider all aspects of your trip, from booking insurance, transport and accommodation to the cost of food, admission to certain attractions and spending money at the shops.

For sure, it will require discipline, but if you do this, you’ll soon come up with a figure of the amount of money you need to enjoy your holiday without breaking the bank. 

The prospect of saving money can be daunting. So, once you have settled upon an amount - which must include a contingency sum – you should divide the number of weeks you have before your departure date by that figure, to determine how much you need to save each week on average.

For instance, if you are going on holiday in 50 weeks' time and you need $4000 for your trip, you will need to save on average $80 a week.

4. Open a separate holiday savings account

Knowing how much you need to save and actually doing so are two different things. But a good tactic is to open up a new bank account specifically for your savings.

It is harder to keep track of your savings if they are in an account where money is constantly going in and out of it. Therefore, it is worth opening a separate one to protect every dollar you put away.

You’ll be surprised how motivating it can be to see the balance grow on a regular basis. Moreover, this calculator will help you track and project how much more you will save if you put the money into an account that offers interest.

5. Spend Less Before Holiday

Once your holiday account is up and running, you should make every effort to spend less on a weekly basis before your vacation than you otherwise would do.

Ask yourself if you need to pay for a large latte every day or if you can space out paying for the painting of your nails every six weeks as opposed to four. Equally, is it worth going out and spending money on takeaways and alcohol, or would you rather have that money for your holiday.

This strategy can work pretty well if you plan to go away in only a few week's time, as you might find yourself saving a decent amount that you would have otherwise spent.

However, if your travel date is a longer period away, you will need to balance sacrificing activities, where you would normally spend a sizable amount of money, on your needs, wants and against not being a hermit.

6. Book off-peak

For many people, when they can travel on holiday is dependent on their work, parental or educational commitments. So, they might not have a choice of when they can schedule their holiday.

However, if you have the freedom to determine your preferred period of departure, then it is always worth travelling off peak. Generally speaking, off-peak times are when children are in school and the nearest religious holiday like Christmas or Easter is a reasonable distance away. If you can pick these times - for instance in the winter months like May to August in Australia - you'll find pretty much everything is cheaper at that time of year.

If you are planning to visit overseas, be aware of local religious holidays or major sporting or cultural events that might drive prices up during that time.

7. Use Your Rewards Programme

Are you a member of rewards programmes offered by credit card companies, airlines, hotels or institutions like RACQ?

Well if you are, you can leverage the points you have accrued with them to potentially save money on various aspects of your trip while you are away.

If these programmes are based around credit card usage, just be mindful to pay off the balance of every purchase you make on them straight away.

Two children on a sunny beach
Photo credit Vitolda Klein via Unsplash

8. Save on Transit Costs

For many overseas travellers, the cost of flights will be the biggest single cost of their holiday. However, if you are flexible you should be able to save quite a bit of money.

For instance, travelling first thing in the morning or last thing at night can save a lot of money, as can doing so on a Tuesday or Wednesday and not on the weekends. Additionally, making multiple stops, as opposed to direct flights might not be ideal, but it could help to save you a tidy sum (and reduce jet lag if you do it strategically!)

There are plenty of flight comparison sites you can search to get you to your overseas destination. Moreover, once you are at your holiday destination, you may well find it is cheaper to book internal flights in that country, rather than in your home country, prior to your departure. So, it might be an idea to delay doing that if your plans can be fluid.

9. Reduce Accommodation Costs

After flights, the cost of accommodation is probably the biggest expense you'll face. While you might want to stay in an upscale boutique hotel, to save money, you should consider cheaper options like Airbnb, motels, hostels and campsites. Another terrific option if you own a property is house swapping, which means it won't cost you anything at all.

It is worth noting that accommodation prices in cities, particularly near popular tourist attractions, tend to be much more expensive than those in the suburbs or outskirts of them. Therefore, it might be a good idea to book somewhere a little out of the way, that will require you to commute. (Don't knock doing this, it is a clever way to see places beyond your holiday destination!).

10. Determine Food Options

Food can be another cost that spirals whilst on holiday. For this reason, it is a good idea to eat where locals eat. These places tend to be much cheaper than those that cater to tourists. Often the food is more authentic too!

As a general rule, the cost of breakfasts and lunches are much cheaper than dinners. So, consider having your main meal earlier during the day and self-catering for dinner. If you manage to book accommodation that has cooking facilities then all the better.

Another good way to save money on food is to look for special offers and to check out forums online where other travellers might be able to give good recommendations.

11. Make Extra Money

As well as saving money and spending less, why not try and make more money? That way you will be able to save even more and possibly spend even less as you’ll be too busy working!

If you are handy you can pick up odd jobs such as garden work, washing cars or fixing things around the house. Alternatively, if you have a skill like copywriting or web design you can look for extra work on sites like Upwork. There are also usually plenty of roles delivering leaflets or you can even set yourself up as an Uber Eats delivery driver.

Should you own your property, think about renting it out on platforms like Air bnb. Depending on where you live you can make a good amount of money, particularly if hotels are expensive in the area. Potentially, you might even be able to generate more revenue than you spend whilst you are away!

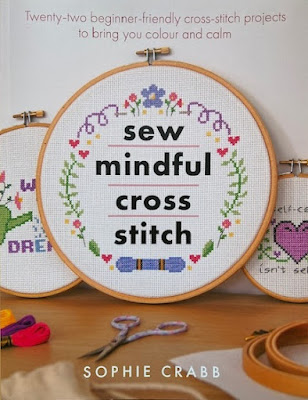
Craft book review - Sew Mindful Cross Stitch

I received a copy of this book in exchange for a review

Today I'm sharing a lovely new craft book - Sew Mindful Cross Stitch by Sophie Crabb. Cross stitch is one of my favourite crafts, and I've shared many of my cross stitch projects here on the blog, as well as some of my own designs. One of the reasons that I enjoy cross stitch is because it's a craft that I can really absorb myself in. The time flies by, and I love the feeling of accomplishment as a project comes together.

Cross stitch is definitely a mindful craft, and so I loved the idea of this book which aims to show the importance of crafting and the impact that it has on our mental wellbeing.

Sew Mindful Cross Stitch by Sophie Crabb book review

The book opens with a comprehensive introduction to cross stitching for beginners. Everything is covered - tools and materials required, the different types of thread and fabric, how to read a pattern, using hoops and frames and different stitching techniques. All the steps are fully illustrated to make it easy for complete beginners.

The book goes on to discuss the act of mindfulness, and some techniques for mindful cross stitching. I loved this section because it really emphasised to me how important it is to find an activity which can help you to switch off from the world and really relax and focus your brain on one thing. The first of the 22 projects in the book are small and ideal for beginners. The patterns are easy to follow, so you can really focus on how you feel as you are stitching, the feel of the fabric and thread and the sound of the thread pulling through the holes.

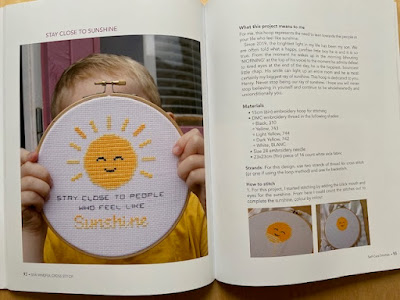
Sew Mindful Cross Stitch book review inside

The remaining projects in the book are grouped by theme - Positive Affirmations, Self-Care Stitches and Mindful Messages. Alongside each project the author has included a short paragraph explaining what the project means to her, which I found really interesting to read. There are so many designs in the book that it's easy to pick the ones which really resonate, and give you something to think about while you are stitching.

Sew Mindful Cross Stitch review

The book finishes with some tutorials for finishing off your cross stitch pieces so that they can be displayed. There were some really helpful tips, especially for when it comes to framing a piece in an embroidery hoop which I sometimes find tricky. 

I really enjoyed the opportunity to think a little more about how the mind and body link, and how mindful crafting can help to have a profound and positive impact on mental wellbeing. The projects in the book are simple yet effective and are perfect for beginners and more experienced cross stitchers alike. Even if, like mine, your cross stitching stash is too full at the moment to start new projects, it's also a really lovely read and gave me lots of things to think about. I'm definitely going to have a go at some of the smaller projects in the book first when I'm looking for a break from a larger piece!

Wednesday 17 January 2024

Top five perks of going to a tech-free summer camp for kids

This is a collaborative post

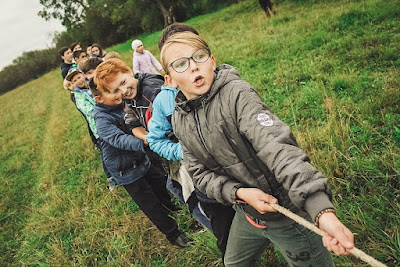
Children playing tug of war in a field
Photo credit Anna Samoylova via Unsplash

Ah, the digital age. It’s as if we’re in an ocean of screens. Kids nowadays are practically born with gadgets in their hands. It’s partly why parents are scratching their heads, wondering how to integrate modern technology with more conventional values. So, they send their kids to tech-free summer camps, where they swap screens for nature and learn valuable life skills.

Now, let’s get into five cool reasons why sending your munchkin to tech-free summer camps is smart. To be precise, we’re talking about a time when “offline” becomes an adventure, and spending time away from screens can cure boredom.

1. Digital Detox: Time to Unplug

Kids today are almost always on their gadgets. It can cause them to be addicted to technology, have shorter attention spans, and not spend enough time with real people. But there's a solution: tech-free summer camps! These camps allow kids to escape all that screen time and return to basics. They can hang out with their friends, relax, and have fun.  

Evaluating how to choose the right summer camp for your child is crucial when considering enrolling them in one of these programs. These camps include hiking, campfire tales, and team games. It allows children to embrace relaxation, unwind, and cultivate a more positive mindset, steering away from constant tech engagement. Picture a day when the harmonious sounds of laughter and chatter replace the usual digital pings and rings. Through this immersive experience, campers gain an appreciation for the natural rhythms of day and night, untouched by the artificial glow of electronic screens.

They experience the world with their senses – feel the coarse tree bark, the coolness of lake water, and the warmth radiating from a campfire under the starry sky. Here, children enjoy making fire and marshmallows while sitting around the winter night to share tales. 

In this technology-free environment, children can engage with their surroundings and each other, a skill often overlooked in our modern world of constant connectivity. This adventure is not just a break from technology; it's a return to the essence of childhood - fun, curious, and freeing.

2. Making Real Friends

The rise of instant messaging and social media has led to a decrease in the quality of friendships based on face-to-face interactions. Unplugged camps offer an opportunity to escape technology and form more meaningful connections. Picture your child swapping tales under the stars or building forts instead of tinkering on their phones. These instances equip them with social traits and make them understand the bliss of real-life relationships.

During camp, children can develop teamwork, communication, and sharing skills. Participating in simple games and activities can teach them the importance of teamwork, tolerance, and building solid relationships beyond the camp experience. These skills are crucial in everyday life, not just during summertime. Kids learn to communicate effectively at camp by listening, laughing, and resolving conflicts without using technology or other mediating devices.

In this environment, free from typical digital distractions, youngsters can develop new passions and learn new things about themselves and their camp friends. By understanding the experiences of others, they learn empathy and realize that each individual has a unique story. They make lifelong friends, united by nature and friendship despite their differences.

3. Unleashing Creativity

Kids today have limited opportunities to exercise their imagination due to structured screen time. Tech-free camps offer creative expression through painting, performing, game creation, and more. These activities teach children they can make amazing things without tech.

These camps provide a space for self-expression not limited to what is downloaded from a screen. Being in a tech-free environment encourages kids to explore new forms of communication through painting, dressing up, or creating their own games. They come to appreciate the thrill of turning their ideas into reality in any form, be it through a colourful painting, an impromptu play, or the beginning of a game based on their own concept.

Children not only learn arts and crafts but also problem-solving and improvisation skills as they develop an unlimited potential mindset. They start to appreciate their unique perspectives and contributions, realizing that creativity is not just about art but also how they approach the world. These moments of unrestricted creativity provide a foundation for creative thinking that will benefit them throughout their lives.

4. Getting Physical and Learning Outdoor Skills

It's a fact that we spend most of our time indoors or in the virtual world. That's why children need to engage in outdoor activities and stay physically active. Tech-free camps are designed to allow kids to be in nature and focus on fitness. They organize various activities like hiking, swimming, and canoeing, which not only help them enjoy themselves but also develop physical strength and appreciation for nature. Your child might even discover a new sport or activity they love, which is all about confidence and exposure to the great outdoors.

Every day at these camps is an exciting adventure. Your child can start their day with a refreshing swim in the lake, then participate in a nature scavenger hunt before spending time outdoors and learning how to set up tents.

It's not just about having fun; it's also about acquiring practical skills that foster a sense of competition and independence. There's no greater sense of accomplishment than reaching the top of a challenging climbing trail or navigating an unexplored river in a kayak. These adventures teach endurance, determination, and resilience.

In the great outdoors, children learn to appreciate the importance of preserving our natural resources, including animals' role in the ecosystem. They develop problem-solving skills and discover hidden strengths they never knew they had. These valuable experiences cannot be replicated through screen time.

5. Growing Independent and Tough

As a parent, you always want your child to be self-sufficient and confident. Tech-free camps offer an excellent opportunity for children to learn how to make their own choices. Children are responsible for their decisions and actions, from selecting the right hiking clothes to resolving conflicts with other campers. This helps them become more independent and learn how to solve problems independently.

Children learn that making mistakes and getting back up is a natural part of life. These lessons prepare them for the real world. In camps, children are exposed to various experiences that may make them uncomfortable. They could be in charge of leading a team, exploring uncharted territory, or facing unknown challenges without a safety net of technology.

This environment motivates campers to engage in reasoning, decision-making, and studying the consequences of their actions, whether positive or negative. The objective is to establish a sense of autonomy that they can carry with them beyond the summer camp. They learn the value of endurance, how to rely on their intuition and the importance of patience.

Moreover, overcoming these challenges in an environment that fosters a sense of togetherness enhances their self-assurance. They start considering themselves as capable individuals who can deal with any obstacle that comes their way. These are the fundamental aspects of resilience and independence - traits that will benefit them in various aspects of their life.

Children in rainwear running down a path
Photo credit Vitolda Klein via Unsplash

Wrapping It Up


It can be genuinely impactful to send your child to a tech-free summer camp. It's about giving them a fun summer experience and preparing them for the future.

At these camps, children get to enjoy a variety of activities that promote digital detox, healthy friendships, and unleashing their creativity. They engage in physical activities and personal development experiences that shape them into well-rounded individuals. Tech-free summer camps are an investment in your child's future, where they learn to balance technology with real-life skills.

Monday 15 January 2024

The things that I need to survive the winter

The weather was quite mild over Christmas, but this week the temperature has definitely gone down. We even had some snow earlier in the week! I don't like it when the weather is cold, all I want to do is to snuggle up under a blanket, but I have discovered a few things over the years that help me to cope!

If I have to go outside, I can't go without my hat. It's only a cheap one from Primark and it's not particularly stylish or flattering but it is very warm and it definitely does the job. When I go out for a run I have a thick running jumper which also has some bright panels for visibility in the dark and I wear a headband that covers my ears. It's difficult to force myself out for a run, but once I get going I warm up quickly.

Around the house I wear an extra pair of thick socks over my normal ones. If I'm sitting in one place then I wear my Oodie which is fantastic, although a little bulky if I actually want to do anything. This year I bought myself a lighter zip up version from Primark which is still really warm but gives me a bit more movement in my arms!

Frosty hedge in front garden

I enjoy a hot drink to warm me up. I'm not a coffee drinker but I do like flavoured tea, especially berry teas which remind me of all the raspberry leaf tea I drank at the end of my pregnancies. I am also partial to a mid-morning hot chocolate, I like the Options range which comes in lots of different flavours. A hot lunch is always nice too, I love my soup maker or even a hot bagel or some cheese on toast. 

Last year we invested in an electric blanket and it was amazing. We use it while snuggled up on the sofa watching television and sometimes put it down on the bed before we go to sleep to make it nice and cosy. I never want to get out from under it!

Finally I like to have some projects to see me through the long dark evenings. At the moment I'm challenging myself to do some cross stitch every day so that I can make a real dent in my latest project. I also have a large jigsaw puzzle on the go, and I often pop up to bed early to read with a hot water bottle before my husband comes up.

I always find winter easier after Christmas, even though it usually gets colder at least there is the promise of warmer weather on the way!

Friday 12 January 2024

A jigsaw challenge for the New Year - the 3000 piece Garden of Sun Signs from Ravensburger

Towards the end of last year I found myself getting back into jigsaw puzzles. I bought a couple of 1000 piece jigsaws with my birthday money, and got out some of my favourites to do again. I also started watching some puzzlers on YouTube, and that made me want to have a go at a larger and more challenging puzzle.

I spent a lot of time researching. I decided to go with a Ravensburger puzzle as I've completed many of their puzzles in the past and always found that they had a good variety of piece shapes that were enjoyable to put together. I settled upon 3000 for the number of pieces, mainly because any larger than that I just don't have the space. 3000 pieces forms a jigsaw that is about the size of my dining table. 

The design that I chose is called Garden of Sun Signs by Ravensburger (affiliate link). I kept a close eye on prices for a few weeks and found it reduced to around £34 on Black Friday which I thought was a good deal. It's an illustration of a garden filled with plants and trees, and contains a representation of each sign of the zodiac. I'm not particularly into astrology, I chose this puzzle because I liked the illustration style, the detail, and I thought that it had several areas which would be easy to separate and work on. There is a border on each side which looks quite distinctive, and plenty of variation in colour and texture.

Ravensburger Garden of Sun Signs 3000 piece jigsaw puzzle

I started the puzzle a couple of days after Christmas with a big sort of the pieces. It took me about two hours, and I made great use of the jigsaw puzzle sorting trays (affiliate link) which I received for Christmas. I sorted into two different types of edge pieces, internal pieces with a border section, pinks and purples, browns, blacks, and other interesting pieces.

Jigsaw pieces sorted into sorting trays

That left me with a lovely big box of other pieces which I put to one side!

Box of unsorted jigsaw puzzle pieces

I decided to start by working on the brown pieces. These are mainly found in the top half of the jigsaw along the top border. There are also some distinctive blue clouds which I had picked out in my initial sort. I soon discovered that most of the brown pieces were also linked to the large trees, so I decided to work on those as well.

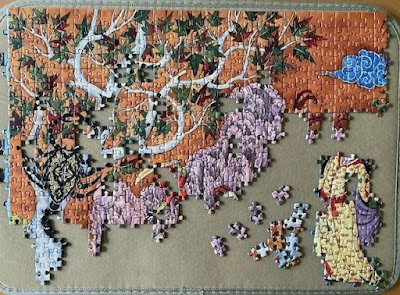
This meant that I had to do another resort of the pieces to pick out all the tree branches. Then as my eye for finding the pieces that I wanted developed I went on to do a third sort through. These pictures show my progress so far after three sorts. As you can see, although I think I'm doing well with putting the pieces together I'm still missing a few pieces!

Garden of Sun Signs jigsaw in progress

These two sections connect together and along with a third smaller section in the bottom right they make up almost the whole top few rows of the jigsaw. For the time being I'm working on the two removable sections from my puzzle mat, as the dining table is currently in use for another project. I'd love to be able to spread it all out, but I know that this is a long term project and I can't justify taking up the whole table for months at a time!

Garden of Sun Signs by Ravensburger jigsaw in progress

I've now started working on the purple and pink rocky areas which mainly connect to what I already have in place. The tree branches were challenging but doable, however the rocky areas are much more difficult. There are very subtle colour and shape variations which help, but I'm mainly working by shape sorting and trial and error. I'm fairly confident that I've pulled out most of the pieces at least, but it's slow going when I'm only placing a few pieces each session. 

This is definitely a project which is going to occupy me for a little while yet!

Thursday 11 January 2024

What to look for in an aesthetic dentistry clinic

This is a collaborative post

When looking for a potential medical practitioner, it’s important to do your research properly. While aesthetic dentistry isn’t always the result of a medical emergency, it’s still crucial that you find a provider with extensive experience in that specific dentistry niche. There are a few things that you should be aware of in your search - here’s what to look out for in an aesthetic dentistry clinic. 

Fully qualified

It should go without saying that all dentists, including those who deal with aesthetic procedures, must be fully qualified. Make sure that the dentist you’re considering has carried out training to an advanced level in the precise procedures you’re having carried out, in addition to a dentistry degree. In some cases, they’ll be operating on your mouth, and they must know exactly what they’re doing. 

Specific experience 

There are a wide range of different aesthetic dentistry procedures that you can have carried out. While a lot of dentists will have a broad level of experience and be able to help you out with whatever it is that you need, it’s important to make sure that they have experience with the exact procedure you’re looking to have carried out. Check on their website, looking at testimonials of people who had similar procedures carried out in the past.

Check out the results of their work

If you want to see what you can expect your work to look like, then take a look at their website. Lots of aesthetic dentists are proud of the work that they carry out, and will post before and after pictures of a range of procedures. Providers such as St Annes Private Dental Centre also often post links to their Google reviews; by taking a good look through some of these, you can get some kind of idea of the overall quality of service you can expect. 

Price

Aesthetic dentistry definitely isn’t something that you want to be cheap with. If these kinds of procedures aren’t done properly, they can weaken your teeth, potentially leading to serious future dental issues. That being said, some clinics can be incredibly expensive - as a result, it’s important to do your research. Be suspicious of particularly cheap service providers, but also make sure that you do enough research to make sure that you’re not being ripped off.

A thorough consultation

While you might know roughly what it is that you want to have done to your teeth, you’ll likely still have a lot of questions. Your dentist should be able to answer these questions and guide you towards appropriate solutions through a thorough consultation process. Be wary of any clinics that try to rush you into a specific procedure without going through your medical history and asking you what you want first - they should be able to address any uncertainties you have and put your mind at rest.

Aesthetic dentistry can have a really positive effect on your life. It’s important that you take the time to research potential clinics properly, so that you end up with a service that has the knowledge and experience to provide you with the results you deserve.

Two smiling women with perfect teeth

Monday 8 January 2024

What is typography and how is it applied in art?

This is a collaborative post

Apart from being an element in other pieces, typography is, itself an art form, much like calligraphy and hand lettering. Like its close cousins, typography also uses the arrangement of text to draw specific emotional responses from readers.

In art, typography can be a foundational element—such as in the case of typographic posters or a supporting component as in illustration art prints and other kinds of art where text isn’t the main focus. Contemporary art and graphic design often features typography as a key ingredient as well, defining the look of everything from corporate logos to album covers.

Unlike many other art forms, however, the value of typography is often tied to functionality, specifically in use of words, letters, and punctuation. While it does explore the artistic possibilities of text, typography remains grounded in the practical aspects of communication, usually emphasising readability and clarity.

But even with its inherent limitations, the dynamism and applications of typography are practically limitless. 

Let’s explore some of the ways typography is used to elevate creative works:

Convey Mood and Emotion

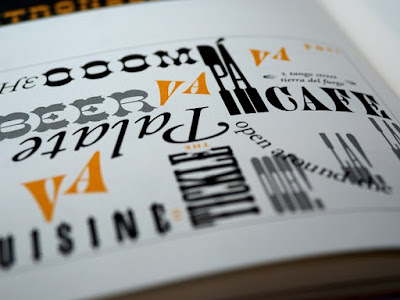
Far from simply presenting written ideas, typography can be used to evoke specific moods and emphasise a full range of emotions. The fonts, styles, sizes, spacing, and colours are just some of the typographic choices an artist can make to add a layer of meaning to a given artwork.

For example, using bold typefaces may convey a sense of urgency or strength, while softer, flowing fonts can evoke a more tranquil mood. In any case, the choices an artist makes can help to further shape the meaning of the written message as well as the overall feel of the art piece.

In essence, typography helps text transcend its functional role, giving artists a powerful means of imbuing emotional resonance in a piece. Through deliberate typography choices, artists can inject more layers of emotion into their work, inviting viewers to not only read plain information but also to experience the piece on a more visceral level.

Typography examples

Enhance Composition and Layout

The physical forms of different fonts can be leveraged to give a composition more coherence and aesthetic appeal. Graphic artists often use typography to balance positive and negative space, integrate text seamlessly with imagery, and create a harmonious visual flow—sometimes even intentionally breaking grammatical rules to provide a stronger overall message. These kinds of thoughtful typographic choices can enhance the overall aesthetic appeal and readability of the art.

To facilitate the use of type in this way, artists will often consider each character to be as much of a visual element as illustrations, logos, and other design components. This holistic approach transforms letters, numbers, and punctuation marks into versatile design tools, each with a potential impact on the overall work.

Notably, typography can be used to help establish a visual hierarchy within an artwork. This use of typography is apparent in a wide range of applications, from movie posters to websites. Working together with other visual elements, well-designed text can be used to guide a viewer’s eye along an intended path, allowing for effective communication. Additionally, through the use of varying font sizes, weights, and styles, an artist can ensure that a viewer looks at certain pieces of information before anything else, thus allowing the entire piece to provide a structured experience.

Provides Cultural, Symbolic, and Historical Context

Typography often reflects different cultural and historical zeitgeists. Even without studying typography or graphic design, many laypeople will tend to associate certain font choices and layouts with certain time periods or cultural movements. By consciously incorporating specific fonts within a given context, artists can anchor their work in a particular era or make statements about contemporary design.

Related to the previous point, the cultural contexts underpinning certain typefaces can even be used to strengthen a piece’s overall thematic composition. For instance, using a blackletter typeface like Fraktur can elevate a piece that is intended to appear pre-modern or Germanic in a way that other widely used fonts like Impact or Times New Roman simply couldn’t.

Lastly, typography can be used as a symbolic element in art, adding layers of meaning to a piece’s message. Letterforms themselves can be manipulated or combined to create visual symbols, logos, or abstract representations. Artists may play with the literal and visual aspects of letters to convey messages that go beyond the literal interpretation of the words.

From Printing Press to Pixels

Typography is not a new art form by any means. Indeed, artists have been consciously using type design to elevate the meaning of both the written word and visual arts for almost as far back as the printing press. In the present day, current generations of artists continue to push against the perceived boundaries of typography to further expand our understanding of its capabilities and, consequently, our collective abilities to express meaning. 

As technology continues to advance and cultural landscapes evolve, the art of typography remains a dynamic force, honouring its historical roots while continuously branching out into uncharted territories. Whichever way our communication norms change, we’ll doubtlessly see typography’s application in art change with it.