Showing posts with label crafts. Show all posts

Tuesday, 2 September 2025

Review - Rolife Miniature Craft Kit - Silent Corner Study from the Book Nook and Wonderland series

I received this miniature craft kit in exchange for a review

A little while ago my husband and I had a lot of enjoyment completing a miniature craft kit from Rolife - Cathy's Flower House. It occupied us happily for quite a while, and I love admiring the finished model sitting on the bookshelf. So I was really pleased to be given the chance to review a couple more miniature kits from Rolife.

I began with the Silent Corner Study, which is part of the Book Nook and Wonderland series. The assembly level is 3 stars which makes it slightly easier and quicker to complete than Cathy's Flower House, which is a more advanced kit with a 4 star rating. The Silent Corner Study kit doesn't even require any glue - all that you need in addition to the kit contents are two AAA batteries for the light.

Silent Corner Study Book Nook from Rolife box

Inside the box are a selection of wooden sheets with press out pieces, a printed cardboard sheet, a printed sticker sheet, a lighting kit and a few other accessories. Then a large instruction book which I found clear and easy to follow. 

The first thing to do is to find some batteries and check that the light works, then you can get started. What I really liked about this kit was that one of the first parts to complete was the battery box and lighting wires - I find this part of the kit a little intimidating so I like to get it out of the way early! It was really easy to install though so I didn't need to worry.

Silent Corner Study book nook from Rolife kit contents

To assemble the kit it's just a case of working through the instructions in order, and pressing out the pieces as you need them. Most of this kit is made using pre-printed and cut wooden pieces, which are really good quality. The finish of the printing is excellent, and all the pieces popped out easily and slotted together well.

Starting a Rolife miniature book nook kit review

When I first saw the picture of the kit I thought that it would take a lot longer as there are so many books to make. But it is deceptive, because many of the books are just printed onto a wooden or cardboard piece which slots into place on the shelf. There are still a few books that need to be assembled individually, and then it's just a case of carefully placing a book cover sticker onto the correct wooden piece. It's easy to reposition a sticker if you get it slightly out of alignment. 

There is never any doubt when it comes to assembly because most of the time pieces can only be placed in one position, and if it's more complicated then there are either guide arrows or extra help in the instructions to make sure that you get it right. 

In progress Rolife miniature Book Nook kit review

I love the bookshelves crammed with not just books but also small paintings, vintage suitcases, a clock and even a cat walking along the shelf! There are so many tiny details. 

Although this kit doesn't require any glue, there is still some sticking to be done with supplied pieces of double sided tape. I did find that I wanted to add a dot of glue on a couple of occasions just to make sure everything was stuck firmly, so it's worth having some on hand just in case.

Rolife Silent Corner Study miniature kit review

As I mentioned above, the lighting for this kit is very simple. There is only one bulb which is positioned outside the window, and the wires run neatly up the back and are later covered by the back panel. The battery box is at the top with a hinged flap which allows you to easily access the batteries. The switch for the light is affixed to the bottom of the wooden floor piece, and when you touch the discrete power symbol it turns the light on.

Installing lighting on a Rolife miniature kit

I found that this kit was a really good level of difficulty - easy enough to not need to worry about getting it wrong, but complicated enough to make for a satisfying craft project that kept me interested and engaged in the process.

Silent Corner Study book nook close up image

I spent about a week working on this kit from time to time. I would imagine that you could probably finish it in a couple of evenings if you sat down to work on it, but I liked taking my time and enjoying the process!

Review - Silent Corner Study book nook kit from Rolife

I've completed a few miniature kits now, and I think that this is definitely my favourite so far. I love the theme - anything to do with books is a winner for me - and it fits beautifully on my bookshelf. The kit was simple to put together but also very satisfying, and I enjoyed every minute working on it. I loved that I could work on it a little bit at a time without having to sit down for hours - it's perfect for busy people that need to snatch some time to themselves when they can. The quality and finish of the kit was excellent and I love admiring the finished product.

If you are interested in trying out a Rolife kit for yourself I have a discount code which will give you 10% off kits from the Rolife website. Just use the code Jennifer10.

Rolife Book Nook kit on book shelf with light

The second kit that I have received to review is a DIY Miniature House called Elsa's Tailoring. The kit is a vintage sewing studio with plenty of tiny details, and I'm really looking forward to making a start. It's a larger kit and a higher difficulty level, so I'm anticipating that it will take me a little longer to complete. I'll be sharing my progress soon!

Rolife Elsa's Tailoring kit box miniature kit

Friday, 22 August 2025

Review - The Cutebee Mrs Hunt Bakery miniature wooden craft kit

I received this craft kit in exchange for a review

Today I'm sharing a review of the Cutebee miniature craft kit Mrs Hunt Bakery. This kit is completed by slotting small wooden components together to produce a sweet little bakery shop filled with breads, cakes and other delicious goods. It's a part of the City Walk series which contains a number of different shops, and the miniature kit is recommended for ages 14+.

Cutebee Mrs Hunt Bakery miniature kit review

The craft kit comes neatly packaged and contains everything that you need apart from glue and batteries. 

Cutebee miniature craft kits review

Inside the box is a selection of wooden sheets with press out parts, as well as some moulded plastic pieces, the electrical components for the lights, a screwdriver and hinges and the instruction booklet.

Cutebee miniature craft dolls house kit contents

The first thing to do is to find some batteries and check that the lights are working, then you can start to work through the instructions. I found them clear and easy to follow, with a logical progression through the kit. You just press out the pieces that you need for each part and slot them together. Some of the pieces require glue so you may need to wait for things to dry, but you can always skip ahead and come back when it's ready.

Cutebee miniature kit in progress

I loved watching the bakery come together. The little pieces are so sweet! The printing on the wooden sheets is really good quality and looks very realistic. I didn't have any problems with pieces not fitting together. There are spares for some of the more fiddly pieces in case you break them, but that wasn't a problem for me.

Cutebee wooden miniature bakery kit in progress

The pieces fit together well and look really good. You can work on the kit a little bit at a time as each section only takes a few minutes to put together, so you can pick it up and put it down as you get chance.

Wooden miniature kit from Cutebee in progress

The finished bakery has a hinged part to the side which can open up to reveal the side wall which I thought was a lovely part of the design. The front door also opens and closes.

Cutebee miniature bakery craft kit review

The bakery is perfect for displaying on a bookcase, and the solid construction and plastic windows keep the inside free from dust. The kit also contains a lighting kit to highlight different parts of the construction which is easily accessed from outside the casing.

Mrs Hunt's Bakery craft kit review from Cutebee

I've put together a few tips in case you are considering working on one of these kits!

Tips for completing a Cutebee wooden miniature craft kit


Before starting, set up your work area. Find a tray or box to keep pieces that aren't needed yet, and make space to spread out all the wooden sheets so you can easily find the one that you need as sometimes a component requires pieces from several different sheets.

Press out the pieces as you need them so that you don't lose track

If a piece doesn't pop out straight away there is a small wooden piece that you can use as a tool to help. As you get going with the kit it becomes easier as you get the hang of it, so don't force it.

You need to provide your own glue, and batteries for the lights.

When slotting pieces together, double check the orientation because some are designed to be viewed from only one angle and you need to make sure the printed side is facing the right way.

Take time to follow the instructions carefully and check the assembly order.

Don't throw anything away until the end as some of the pieces are tiny and easily missed.

Don't rush, take the time to enjoy the process as well as the finished product.

Cutebee Mrs Hunt's Bakery craft kit complete on bookshelf

If you enjoyed this review you might also like to see my review of the Christmas Wish Store Book Nook - Review - The CuteBee Christmas Wish Store Book Nook craft kit.

Friday, 25 April 2025

Using AI to create images for blog posts - an update

A couple of years ago I wrote a blog post about using AI to generate images for blog posts. I had forgotten about it until recently, when I suddenly started getting lots of spam comments on it. It must have ended up being favoured by search engines for some reason!

Things have really moved on when it comes to AI and image generation since I wrote that post. You can now use ChatGPT to generate images, although there is a limit to the number that you can create in a day using a free account - I think it's officially three although I managed to make five in one session.

I was thinking about how much I'm looking forward to sitting in our newly landscaped garden with a book, so I decided to ask it to generate me an image which would be a suitable illustration for a blog post on that subject. And yes I know, being polite to ChatGPT makes it cost more...I just can't help myself!)

My prompts are in italics.

The blog post is about how I'm looking forward to reading in my new garden. I want a landscape image in a photographic style. No text in the image. The image should be of a lovely new garden with clean fencing, patio etc. There should be a comfortable chair which is suitable for using outdoors with lots of cushions, then a small table next to it with a pile of books, a blanket and a hot drink in a mug. No people in the picture.

AI generated image of a chair in a new garden with a pile of books

I was really pleased with this result! The garden looks fairly realistic, the chair and table aren't bad (I think the table might be missing a leg but it's not too obvious) and the pile of books is pretty good without any attempt at text on the spines.

I decided to amend the image to portray a more realistic British summer:

That's perfect! Now can you create the same image but it's raining?

AI generated image of a garden with a chair in the rain

Again it's not bad! It's a little dark, but it's clearly raining. So I decided to cheer things up a bit. I was interested to see whether asking for changes would make them to my first image or to the amended image.

Thank you! Now can you make it a little more colourful, make the blanket striped and add some colourful cushions, make the mug blue 

AI generated image of books and a chair in a bright garden but it's raining

It changed the second image which was what I was expecting. This image is probably my least favourite from the set because the colours are just too bright. But I wanted to see what it would look like on a nicer day.

Can you make it sunny again in the image?

AI generated image of a chair in the garden for a blog post

This image is so colourful that I think it does look very fake. A leg is now visible on the table though, and it's interesting how the length of the blanket has changed. So I wanted something a little more subtle...

Thank you! Can you tone down the colours a little, make them pastel shades


Although I like the colour scheme for this image a lot more, I do feel that the further I went with amending the image the more fake it looks. This time it has randomly added some extras - I quite like the paints on the table and the open book but you don't typically find decorative globes in a garden, and certainly not two of them! And where did the suitcase come from?!

The quality of the images is definitely an improvement on the ones that I created two years ago. I would happily use the first image in a blog post, and I think that it could easily pass for a real image, especially when scrolling quickly. 

I'm starting to notice images like this more and more, both on social media and on business webpages, and I know that it won't be long at all before it's impossible to identify an artificially generated image. It's really important to be aware that you can't trust anything you see!

Tuesday, 18 February 2025

Review - The CuteBee Christmas Wish Store Book Nook craft kit

I received this craft kit in exchange for a review

Earlier this year I shared a preview review for the CuteBee Book Nook craft kit with a Christmas theme, and I'm delighted to say that I have now finished this lovely kit and I can share a full review!

Christmas Wish Store book nook inside view

The Christmas Wish Store Book Nook is designed to sit on a bookshelf and offer a glimpse into a magical world nestled within. This kit has a Christmas theme, and not only does it feature Christmas toys, gifts and decorations it also has interactive elements - there are cleverly positioned lights which can be turned on and off, the Christmas tree can be rotated using a cog at the back, and there is even a music box tucked inside for some Christmas music!

The kit contains almost everything that you need to create the book nook - all that you need to supply is some glue and batteries. The kit is very well packaged in a handy box which you can use to keep everything together while you are working on it. 

CuteBee Book Nook craft kit review

You complete the kit by carefully working through the instruction booklet. Most of the elements that you need for the construction are small wooden pieces which are pressed out from clearly labelled wooden sheets. It's best to pop them out as you need them, otherwise you would easily get into a muddle! I found that all the pieces were easy to remove from the backing. Some of the very tiny or fragile parts have a spare in case you have any problems with removal or build.

CuteBee book nook kit contents

I found it very straightforward to work through the instructions and assemble each component at a time. Some of the parts aren't needed until later on, so it's helpful to have a box or somewhere to keep pieces as you build them, and make sure that you don't miss the step to add them later on! You do need to be quite firm when it comes to pressing the pieces out and slotting them together, sometimes I was a little timid but you do need to use a small amount of force. 

I didn't add much extra glue apart from where it was recommended, but if a piece felt a little loose I added a small amount just to make sure it remained sturdy. You need to make sure to follow the instructions very carefully - for example the pieces are printed on one side and you need to make sure that the printed side will be the one facing outwards when complete.

CuteBee wooden press out components

There are several lightbulbs that need to be secured in the correct places. There is no wiring involved but you do need to be careful to make sure that you are working with the right piece of wire as they are all different lengths. This was a little fiddy in places but not too complicated.

CuteBee book nook in progress showing wiring

When finished the book nook forms a sealed unit with a plastic sheet at the front to keep it dust free. I did have to make one modification, because I found that the sensor for the lights didn't work through the wood as it is supposed to. I ended up cutting a small corner from the top of the box and posting the wires through so that the switch is accessible from the outside. It's not the prettiest solution, but it's much easier than having to remove the front each time to turn the lights on and off.

Finished Christmas book nook craft

Below is a photograph with the plastic front removed so that you can see the inside fully without reflectio. There is a lot of detail inside, and I love the bright colours and cute elements. The printing on the pieces is really clear. There are also some plastic pieces which are glued in place, like the tree and snowman at the front. Several of the elements are accessorised with shiny tinsel, for some sparkle when the lights are turned on.

Christmas book nook from CuteBee on display

I really enjoyed putting this kit together - it was complicated enough to be challenging but still fun to put together. I assembled it over several evenings and I found it an absorbing craft that I wanted to keep working on. I loved clipping together all the tiny pieces and seeing how it all fitted together so beautifully to make a really sweet little festive decoration.

Christmas bookstore book nook on shelf with books

There are lots more of these craft kits in the series and they would make a great gift for the crafty person in your life.

Thursday, 16 January 2025

Review preview - CuteBee Book Nook Kit with a Christmas theme

I received this kit in exchange for a review

Readers of this blog will know that I love crafting and I love reading, so what could be better than a craft which makes a lovely addition to a bookshelf! I have just made a start on this Book Nook craft kit from CuteBee, and so I'm sharing my first impressions before I begin to work on the kit and can share the finished product.
The Book Nook kit is a 3D wooden puzzle with lots of tiny pieces which are slotted together to form a Book Nook - a miniature world which can be displayed on your bookshelf. This kit is called the Christmas Wish Store and features all sorts of sweet little Christmas themed items, including a tree, a train and all sorts of toys and decorations.

CuteBee Christmas Book Nook kit

The kit is very well packaged with everything fitted neatly inside. Most of the kit is wooden sheets with coloured shapes to press out, there are also some small plastic decorations along with the equipment to add lighting and music. It was very easy to check through the instructions and make sure that everything was included, and all the parts are clearly labelled.

Christmas Book Nook craft kit from CuteBee

You need a firm hand to push out the wooden pieces, but they are sturdy and I wasn't worried about breaking them. There are some spares for the very fiddly parts, for example the top of the train roof which needs to be curved slightly. It's important to only press out the pieces as you need them as you would very quickly get muddled!

CuteBee Christmas Book Nook contents

Unused pieces can be stored in the original box, but I found it helpful to have a separate tray to keep the components that are assembled so that they don't get lost or damaged. So far I've built a storage box and a tiny train, and I found putting the pieces together to be really fun and absorbing. 

The kit is mainly assembled without glue, and the parts that need glue (not included) are clearly marked. You can also add a bit of glue if you are concerned that the pieces are too loose, but I found that wasn't usually necessary.

I'm really looking forward to working on this kit, I can see it being something that I work on from time to time when I have a few minutes to craft, as it can easily be picked up and put down and it doesn't need too much space to work on.

I will share the Book Nook when it's complete!

Tuesday, 31 December 2024

Reasons to start a journal in the New Year

With a fresh new year around the corner, it's the perfect time to start a regular journalling habit! I've written many times on this blog about how I love writing in my journals - I use a bullet style journal to plan my week and a blank journal which I fill with my thoughts, ephemera and simple sketches. I find that journalling is a great way to keep those superfluous thoughts from running around inside my head, and it's also a way of bringing a dose of creativity to my daily life.

Why start a journal in the New Year?

It's a great time to start a journal. When a new year begins it's natural to want to reflect on the year just gone and to plan the year ahead. Everyone else is doing the same thing so there is plenty of motivation, and after the excess of Christmas you are in the mood to clear some space both physically and mentally. 

What do you need to get started?

Recently I wrote an article on how to journal when you don't know where to start and it contains plenty of advice to help you get over any block you might have to starting. All you need is something to write on and something to write with, and you don't need any expensive supplies. You probably already have a blank notebook around that has been waiting for a purpose! 

When it comes to physically putting pen to paper, I always start a new journal a few pages in. Then I can come back and fill the first couple of pages at a later date, or else I fill them with stickers and ephemera as time goes on. 

Starting a journal in the new year
Photo credit Daria Shevtsova via Unsplash

What are the benefits of a regular journalling habit?

I find writing in my journal an enormous help to my wellbeing. When I have too many things running through my head, writing them down helps to clear my mind and organise my thoughts. It helps my anxiety to get things down on paper, and it's also really relaxing. 

Journalling helps me to work through and solve problems, for example a tricky decision that needs to be made. Often writing out a pros and cons list can help to find the answer that I'm looking for.  

In the new year I like to think about the things that I want to work on and achieve. For example changes that I want to make to my lifestyle, or things that I want to do. A journal can help to keep a record and track progress, or be a list of places to visit, recipes to make, activities to try. 

Recently on social media I've been seeing examples of dopamine menus. I don't like the name but I do like the concept - it's basically just a list of things that you enjoy doing. I had a similar list in my first bullet journal and I'm definitely going to create a new one for my next journal. 

Writing regularly can create a lovely record of things that you've done, especially when going through a life event that you will want to look back on. For example I've been journalling about the building of our house extension, both a factual account of what has been happening and also how I've been feeling about it at the time. 

Keeping a journal and pen handy is a great way to reduce screen time. You can fill a few minutes by jotting down some thoughts, or else settle down for a longer session away from the screen with a hot drink and a good view. 

Journalling is also a great way to improve creativity. I like to try out different layouts and styles, accessorise pages with stickers and washi tape, or try some simple sketches and start an illustrated journal

Finally...

One important thing that I want to mention is a reminder that your journal is personal to you. Don't feel the pressure to share it on social media - when you see beautiful journal pages online they have been created for that purpose and are designed to gather views and interaction. They can be great for inspiration, but can also make you feel inadequate and feel like stopping when you've barely begun.

Start with some cheap supplies so that you aren't intimidated by a beautiful journal that you don't want to ruin, and just take it from there!

Friday, 20 December 2024

An update on my Nutcracker Christmas cross stitch project

Around this time last year I wrote about my currently incomplete cross stitch projects. There were quite a few! I've made progress on several of them, but the one that I'm most proud of is The Christmas Nutcracker from Bothy Threads. Here's how it was looking last Christmas, with just the shoulders of the Nutcracker stitched.

Nutcracker cross stitch by Bothy Threads

I worked on it quite a lot in the early part of the year, then I put it aside for a few months. When I fancied doing some cross stitch over the summer I picked up another neglected cross stitch project, as it felt strange to be working on a Christmas project when it was warm and light outside!

But as the cold and dark have returned I've found myself called back to the Nutcracker, and I'm really pleased with how it's getting on. The pattern is in two parts, the first sheet is a layer of cross stitch and then the second sheet is a layer of more intricate embroidery stitches. I don't want to confuse myself, so I'm going to complete all of the cross stitch first before I move on to the second layer.

I would say that I'm definitely halfway through the first layer, so a quarter of the way through the project!

Nutcracker cross stitch by Bothy Threads in progress

It's quite simple to stitch, there are some mirrored areas and it is mainly worked in blocks of colour with no shading. The pattern is easy to follow, and by working on a colour at a time you can make a lot of progress quite quickly. 

I'm going to be making this my main project over the Christmas period and I'm hoping to get lots done, maybe by the New Year I'll even be able to complete the cross stitch layer!

Monday, 16 December 2024

Some simple felt crafts for Christmas

I love crafting with felt at Christmas. Felt is so versatile - it comes in a huge range of colours, you can cut it easily into all sorts of simple shapes without needing to worry about hemming it, you can sew it or even just glue it easily, and the soft texture feels really cosy.

I've shared lots of festive felt crafts on my blog over the last few years - here are some of my favourites.

My Embroidered felt Christmas bunting is once again hanging up over our mantlepiece like it does every year. It's just large triangles of felt with a simple border using the sewing machine. Then I alternated embroidered stars and snowflakes. This was a lot easier to do than it looks - I used an outline drawn on tissue paper which I sewed through and then removed, it worked really well! 

Embroidered felt Christmas pendant bunting

This year I made a really simple felt Christmas garland using some leftover felt pieces. All you need to do is to cut out some simple shapes from the felt and then sew them together using a sewing machine. It's a bit fiddly at first but sews up quickly and the garland is perfect for hanging on the Christmas tree or around the house.

Simple felt Christmas garland with coloured shapes

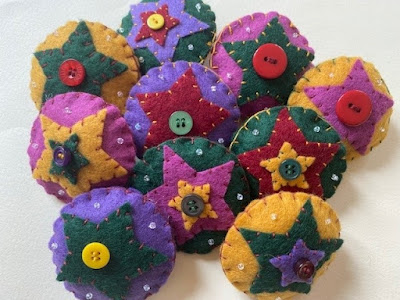
My Felt star Christmas ornaments were made to use up some scraps of felt in different colours that I had leftover in my felt box. I tried to pick colours that went well together, even if they weren't all traditional Christmas colours. The colours remind me of the Three Kings and their gifts! They are finished with a contrasting button. I display them in a bowl on the sideboard, but they can also be made into hanging decorations with some simple coloured thread.

Felt star Christmas ornaments

This Cross stitch snowflake felt bunting is a way of displaying the tiny snowflake cross stitch patterns that I designed - you can find them here free simple snowflake cross stitch patterns. You can use odd scraps of Aida fabric to sew the snowflakes, then turn them into bunting with some felt circle frames and ribbon. They would also make lovely hanging ornaments. 

Simple cross stitch snowflake and felt Christmas bunting

Another stash busting project is this Felt Christmas tree and bauble bunting. Not just to use up scraps of felt but also ric rac, ribbon, beads and sequins. They have a small amount of padding and are double sided so they can be hung across a window.

Felt Christmas bunting with trees and baubles

Finally, my favourite Christmas felt craft is these Felt Christmas stocking decorations. They are nostalgic for me for two reasons - firstly because I remember my Mum making them when I was little and secondly because they were the very first Christmas decoration that I made when I was decorating my own home. It was so long ago that I didn't even had a craft stash - I had to go out and buy the felt and beads specially for the project!

They are designed to hold a small bar of funsize chocolate and to be hung on the tree as an alternative to the chocolate foil ornaments that you can buy. When my children were little they used them as mini stockings for their favourite teddies!

Felt Christmas stocking ornaments

I hope that you have fun crafting this Christmas!

Friday, 13 December 2024

Hama bead Christmas kit inspiration for adults

This post contains Amazon affiliate links

I love a festive craft project, even better if it's something that I can display in my home as I celebrate the Christmas season. At this busy time of year sometimes you just want a simple project that you can work on when you have some quiet time, and Hama beads are the perfect craft that's both relaxing and satisfying. Working from a kit means that you have everything you need in one place without having to spend time gathering materials from around the house, and I've hunted down some gorgeous Hama bead Christmas crafting kits which would be fun to work on during those long dark evenings.

You'll notice that they are all official Hama bead branded items. While they can be a little more expensive than the cheaper options, I've learned the hard way that the imitation beads are just not as good!

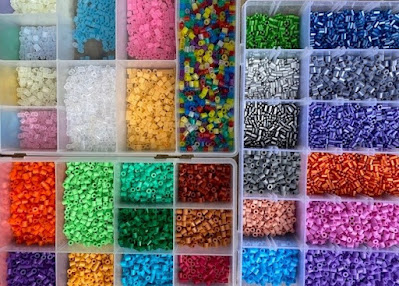
Box of Hama beads organised by colour

First up is something that you can get a start on ready for next year! The Hama bead Advent Calendar (affiliate link) is a really fun Advent craft, and then when it's finished it can be re-used year after year. The kit contains 24 festive designs and shaped pegboards which can be kept for future Christmas projects.

If you want to make something simple which you can use to decorate your home then the simple Hama bead ornaments (affiliate link) or simple Hama bead decorations (affiliate link) are perfect. The designs are quick and easy to make, and can also be worked on together with small children for some family crafting fun.

I love these Hama bead Christmas trees (affiliate link) because once you have the included small Christmas tree pegboard you can really get creative with different designs. You could even make the trees in different colours to match your festive decor, for example in red/white or purple/silver. Then the completed trees can be used as Christmas tree decorations or turned into bunting.

Finally this Hama bead Santa Claus pegboard (affiliate link) is really fun, and again could be customised to suit your own decor. You could mount him on a stick to prop up in a flower pot, hang him inside a wreath, or prop him up on the mantlepiece.

Alternatively, you could just treat yourself to a big bucket of coloured Hama beads (affiliate link) or a selection of mini Hama beads (affiliate link) and browse my Hama bead Christmas crafts and projects which is packed with ideas for both simple and more complex Hama bead crafts which are perfect for this time of year!

Hama bead fairy light bunting craft for Christmas
Hama bead fairy light bunting

Wednesday, 11 December 2024

Simple Christmas felt garland craft

I love crafting with felt, it's so easy to work with and I love the soft texture and bright colours. This Christmas I made a really simple felt Christmas garland to add to my collection of homemade Christmas decorations.

I the same method that has worked well for two previous projects - my simple felt heart garland and my Halloween themed felt bunting. Using scraps of felt and a sewing machine it's a quick way to make some simple bunting that can be switched out according to season. 

This was a stash buster project for me, so I was limited by the felt colours in my stash. I've run out of red which is a bit of a disaster for Christmas crafting! But I had some pre-cut red circles left over from another project which worked perfectly, and I chose shapes based on the colours that I had available. 

I ended up with a red circle, a green Christmas tree, a golden bell and a brown gingerbread man, with each shape measuring around 4cm in height. I cut 10 of each shape and for this project I attempted to keep the shapes in the same pattern throughout. 

Tips for cutting out the shapes - I made a paper pattern for each shape which I pinned to the felt while cutting. Use small, sharp scissors, and don't worry too much about perfection!

Small felt shapes for Christmas garland

When all the pieces are cut then I sewed them together. If you want to keep to an order make sure you know what you are doing, as once you start sewing it's easier if you can have the next one ready to go at all times. Before starting to sew, make sure to pull out a decent length of thread and then again at the end so that the felt garland will be easy to hang. 

Then just line up the shapes and sew them together! It's a bit of a fiddly job but it gets easier as you go along, I had several false starts! Just get the next piece ready to sew before you've finished the previous one, and squish them together a little bit as you sew each end.

Simple Christmas felt garland with festive shapes sewn together

The finished garland adds a lovely Christmas hint to the festive decorations, whether hung on the tree or elsewhere around the house!

Felt Christmas garland hanging on Christmas tree

Simple felt Christmas garland