Showing posts with label dollshouse. Show all posts

Wednesday, 8 July 2026

Review - Rolife Super Creator kit - Pop Bubble Bathroom and lighting kit setup

I received these items in exchange for a review

A few months ago I shared my review of some new kits from Rolife in the Super Creator series. These miniature house kits are part of a modular series that can be completed as individual rooms and then stacked together to create a larger miniature world. The kits can be stacked together in a variety of ways, and you can use the roof accessory kit to add ceiling lighting.

These kits are quite simple kits and they don't take very long to build, so they are ideal for beginners or younger miniature crafters. My daughter is 15, and she loved the Lovely Pink Bedroom kit, so she was delighted to be able to work on the Pop Bubble Bathroom and connect it to the bedroom.

Rolife Pop Bubble Bathroom kit review

This gorgeous bathroom features a free standing bath with bath shelf for decor and a book - a perfect fantasy bathroom! There's a shelf unit with toiletries and other bits and pieces and a lovely raised sink. There are gold fittings, a little mirror, and all sorts of other tiny details. The kit is mainly assembled by slotting together the plastic accessories. All the sticking is done using tiny double sided adhesive dots, or you can use glue for smaller areas to give a neater finish.

Rolife Pop Bubble Bathroom detail

I love the tiny hair dryer that sits on top of the laundry basket, and the little toilet roll perched on top of the opening and closing toilet. Although the kit suggests how the accessories could be positioned you are of course free to arrange the room exactly as you would like it. If you chose not to stick everything in place then it would be sturdy enough for an older child to play with.

The Pop Bubble Bathroom comes with a side light which is powered by a USB-C power cable (not supplied). This is great because you don't need to worry about supplying and replacing batteries.

If you would like to install the ceiling light then you will either need the separate roof accessory kit, or you can install the light on the bottom of another room kit which is positioned above. We used the roof accessory kit to add the ceiling light. 

Rolife roof accessory kit

The roof accessory is pre-built and is very easy to slot onto the room kit. The ceiling light and wiring box is supplied with the individual room kit. The light slots underneath with the cable running down the outside of the house to a small wiring box attached to the outside.

First we added a roof and ceiling light to the Lovely Pink Bedroom and she was so pleased with how it looks.

Rolife Lovely Pink Bedroom with ceiling light installed

Then we installed the roof and lighting kit to the bathroom. As you can see, this kit has two lights - one on the ceiling and also a wall light. The side light can be used without requiring the separate roof kit.

Rolife Pop Bubble Bathroom with lighting kit installed

Then we joined the two kits together so that the bedroom now has an en-suite bathroom! You will need to supply power to the lights using a USB-C cable which is not supplied. However the kits do come supplied with a short USB-C to USB-C cable to connect two or more rooms together. So you only need to supply one power cable which can be used to power lighting to several kits that are joined together.

For now we have chosen a side by side connecting option, but it is would be very easy to rearrange the kits so that they are the other way around, or one sits above the other.

Two Rolife Super Creator kits attached together in modular system

We love the kits in this series, they are simple to put together but have lots of detail and they look lovely when out on display. You can see the full range here - Rolife Super Creator kits.

Monday, 22 September 2025

Review - Rolife miniature kit Elsa's Tailoring - a progress post

I received this miniature craft kit in exchange for a review

A couple of weeks ago I shared my review of the Rolife Miniature Kit Silent Corner Study. I loved putting this kit together, it didn't take too long but it was complicated enough to keep my interested and the finished miniature book nook is gorgeous. 

Now I'm moving on to the second kit which I received to review - Elsa's Tailoring.  

Elsa's Tailoring miniature house kit from Rolife

The Elsa's Tailoring kit is graded with a five star difficulty level. This means that it is more intricate and will take a little longer to complete. Opening the kit I could see that it contained a wider range of materials - as well as the wooden pieces, stickers, card cutouts and plastic accessories there is also ribbon and fabric pieces. The wooden sheets are thinner and the pieces are finer and more delicate.

Elsa's Tailoring miniature kit review contents of box

This kit begins with the assembly of many small components. I just love all the tiny details! My favourite part so far is the little ribbon spool holder which you can see on the left of the white display case in the photograph below. It's so tiny and perfect! The display case and the dresser will be filled with accessories when the kit is completed.

There is definitely more work required when assembling this kit. All of the fabric pieces need to be cut to size, so I needed to make a template using a ruler before cutting. It requires a bit more thought and concentration than just slotting together wooden pieces.

The instructions are easy to follow and comprehensive, but you do often need to pay attention to the direction a piece is facing or the order in which to put parts together. No glue is required for this kit as pieces are stuck together using the supplied double sided tape.

Elsa's Tailoring kit components assembled ready to build

My favourite part when putting together a miniature house kit is getting the main structure together! You can see that the light fixture is in place on the left side wall, this was really easy to assemble. The battery box is hidden at the back, it cleverly slots inside the base of the dresser. You need to provide two AAA batteries and there is a very small amount of simple wiring to do, just connecting two sets of wires and threading it through at the back to keep it secure.

Rolife Elsa's Tailoring kit main structure assembled

The next steps are to build lots more tiny components, and then it's a case of putting everything in the correct place and making sure that it is all firmly stuck together ready for display.

I love that these Rolife kits are broken down into many small sections, so as long as you have some space to leave everything out you can come easily back to it after a break and add a little more. It's perfect for people that don't have the chance to sit down with a craft for hours, but have odd moments throughout the day when they can spend a few minutes working on it.

I will share a full update and review when I've completed the kit!

Tuesday, 2 September 2025

Review - Rolife Miniature Craft Kit - Silent Corner Study from the Book Nook and Wonderland series

I received this miniature craft kit in exchange for a review

A little while ago my husband and I had a lot of enjoyment completing a miniature craft kit from Rolife - Cathy's Flower House. It occupied us happily for quite a while, and I love admiring the finished model sitting on the bookshelf. So I was really pleased to be given the chance to review a couple more miniature kits from Rolife.

I began with the Silent Corner Study, which is part of the Book Nook and Wonderland series. The assembly level is 3 stars which makes it slightly easier and quicker to complete than Cathy's Flower House, which is a more advanced kit with a 4 star rating. The Silent Corner Study kit doesn't even require any glue - all that you need in addition to the kit contents are two AAA batteries for the light.

Silent Corner Study Book Nook from Rolife box

Inside the box are a selection of wooden sheets with press out pieces, a printed cardboard sheet, a printed sticker sheet, a lighting kit and a few other accessories. Then a large instruction book which I found clear and easy to follow. 

The first thing to do is to find some batteries and check that the light works, then you can get started. What I really liked about this kit was that one of the first parts to complete was the battery box and lighting wires - I find this part of the kit a little intimidating so I like to get it out of the way early! It was really easy to install though so I didn't need to worry.

Silent Corner Study book nook from Rolife kit contents

To assemble the kit it's just a case of working through the instructions in order, and pressing out the pieces as you need them. Most of this kit is made using pre-printed and cut wooden pieces, which are really good quality. The finish of the printing is excellent, and all the pieces popped out easily and slotted together well.

Starting a Rolife miniature book nook kit review

When I first saw the picture of the kit I thought that it would take a lot longer as there are so many books to make. But it is deceptive, because many of the books are just printed onto a wooden or cardboard piece which slots into place on the shelf. There are still a few books that need to be assembled individually, and then it's just a case of carefully placing a book cover sticker onto the correct wooden piece. It's easy to reposition a sticker if you get it slightly out of alignment. 

There is never any doubt when it comes to assembly because most of the time pieces can only be placed in one position, and if it's more complicated then there are either guide arrows or extra help in the instructions to make sure that you get it right. 

In progress Rolife miniature Book Nook kit review

I love the bookshelves crammed with not just books but also small paintings, vintage suitcases, a clock and even a cat walking along the shelf! There are so many tiny details. 

Although this kit doesn't require any glue, there is still some sticking to be done with supplied pieces of double sided tape. I did find that I wanted to add a dot of glue on a couple of occasions just to make sure everything was stuck firmly, so it's worth having some on hand just in case.

Rolife Silent Corner Study miniature kit review

As I mentioned above, the lighting for this kit is very simple. There is only one bulb which is positioned outside the window, and the wires run neatly up the back and are later covered by the back panel. The battery box is at the top with a hinged flap which allows you to easily access the batteries. The switch for the light is affixed to the bottom of the wooden floor piece, and when you touch the discrete power symbol it turns the light on.

Installing lighting on a Rolife miniature kit

I found that this kit was a really good level of difficulty - easy enough to not need to worry about getting it wrong, but complicated enough to make for a satisfying craft project that kept me interested and engaged in the process.

Silent Corner Study book nook close up image

I spent about a week working on this kit from time to time. I would imagine that you could probably finish it in a couple of evenings if you sat down to work on it, but I liked taking my time and enjoying the process!

Review - Silent Corner Study book nook kit from Rolife

I've completed a few miniature kits now, and I think that this is definitely my favourite so far. I love the theme - anything to do with books is a winner for me - and it fits beautifully on my bookshelf. The kit was simple to put together but also very satisfying, and I enjoyed every minute working on it. I loved that I could work on it a little bit at a time without having to sit down for hours - it's perfect for busy people that need to snatch some time to themselves when they can. The quality and finish of the kit was excellent and I love admiring the finished product.

If you are interested in trying out a Rolife kit for yourself I have a discount code which will give you 10% off kits from the Rolife website. Just use the code Jennifer10.

Rolife Book Nook kit on book shelf with light

The second kit that I have received to review is a DIY Miniature House called Elsa's Tailoring. The kit is a vintage sewing studio with plenty of tiny details, and I'm really looking forward to making a start. It's a larger kit and a higher difficulty level, so I'm anticipating that it will take me a little longer to complete. I'll be sharing my progress soon!

Rolife Elsa's Tailoring kit box miniature kit

Wednesday, 6 December 2023

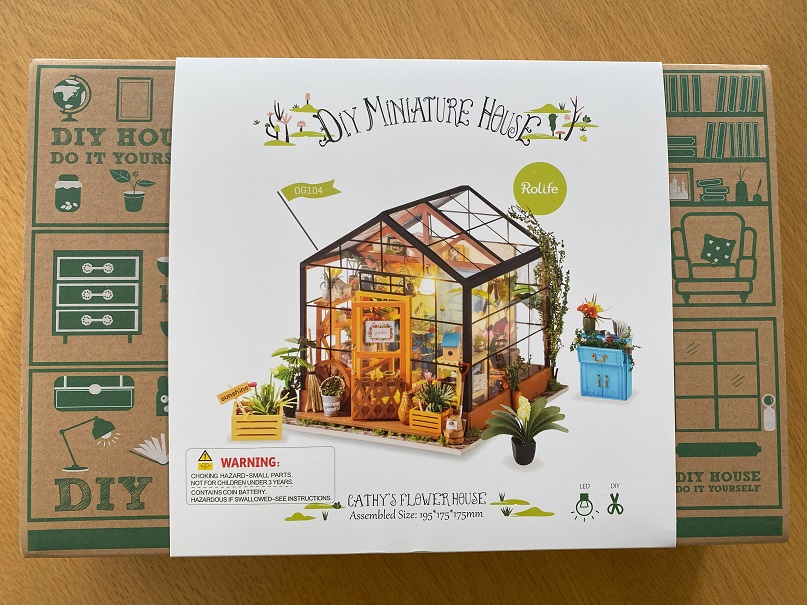
Our new project - Cathy's Flower House kit from Rolife

A few months ago while out shopping we spotted these miniature kits from Rolife. We spent ages admiring all the different tiny model kits and wondering what they would be like to have a go at. A few days later I was having a browse on Amazon and I added a couple to my wish list so that I could check the prices. When the one that we were most interested in came on special offer a few weeks later it felt like fate, and so we bought one as something that my husband and I could work on together.

The price of this kit is around £40, and when you realise what's included it's not a bad price at all. I don't even want to think about how long it's going to occupy us for, but we've spent at least 10 hours on it already and aren't even a third of the way through, and that's with two of us working on it! I thought I'd share our progress so far, in case you've also seen these kits out and about and are wondering what they are like and what's involved in building one.

Rolife Cathy's Flower Garden miniature kit review

The kit includes a decent glue, paint, tweezers and all the materials that you need. We are also using our own wire cutters, pliers (small nosed ones are best if you have them), a scalpel and cutting mat and a ruler. I think we may need other tools like a screwdriver later on. It's a good idea to have a box or tray ready to store the finished pieces while you work your way through the instructions.

Rolife Cathy's Flower Garden kit contents

When we visited our local garden centre the other day I found a completed version of the kit on display. It's a little faded but I was able to have a good look at it and see what we are aiming for!

Rolife greenhouse kit model completed

The first step was to paint some of the larger wooden pieces that form the base of the greenhouse. Then you start by building the the items of furniture, shelves, boxes and so on. This is followed by the smaller accessories, like the bird houses, plant pots, books and baskets.

The instructions are pretty good with clear step-by-step pictures. There are some translation errors and a couple of items in the wrong numbered bags, but with a bit of common sense it's easy enough to work out. Sometimes you do need to use your initiative a little bit, and I'm expecting that when we get to putting all the pieces together there may be some room for personalising it.

Rolife review Cathy's greenhouse pieces completed

Currently we are working on the plants, and there are so many of them in this kit! They are made in various different ways. Some like the plants below have pre-cut leaves which are pressed out and then glued to green wire before being fixed into a large plant pot shaped bead. There are some made from thinner tissue paper that needs to be folded, cut and positioned before being glued down. These plants have been very fiddly to make and the glue goes everywhere. We've been sitting down together for a couple of hours and managing to produce just five or six between the two of us!

Rolife greenhouse kit flowers and plants

When we've worked our way through the plants then we can start to assemble the greenhouse and arrange everything inside it, which I think will be the most fun part. I'm hoping that the electrical wiring part of the greenhouse isn't too tricky, and we'll need to make sure that everything is firmly glued into place, as once the walls are in place I don't think we'll easily be able to open it up again to make adjustments!

It's been a really fun project for my husband and I to work on together and we are already thinking about our next kit! There are some lovely pieces in a 'Book Nook' range which are designed to fit between books on a bookshelf, they have a cleverly angled mirror to make it look as though they extend back further than the shelf. Watch this space!