Showing posts with label kit. Show all posts

Tuesday, 14 July 2026

Batch prepping craft projects like you do meals

Recently this video ended up in my feed and I really enjoyed it, so I thought that I would share it:


It's all about batch prepping crafts in advance, so that when you have some time for a crafty project you have everything that you need all in one place to get started. The video shares a few examples of simple craft kits that the creator has put together, including a cross stitch embroidered journal and a paper garland kit. 

I remember a similar idea from back when I used to lurk on scrapbooking forums - people would discuss preparing their pages in advance by gathering together photographs and co-ordinating supplies in a plastic sleeve, ready to put a page together when they had some spare time. 

I thought this was such a great idea! But for me, it's not so much about preparing some new crafts that I want to try, but rather using this technique as a way to use up some of the craft supplies that I have lying around. 

I have my craft supplies stored in various locations around the house - fabric in drawers in my wardrobe, beads in little wooden drawers in my study, patterned papers in the toy cupboard and so on. As well as various unfinished craft projects, mainly cross stitch kits, that are waiting to be continued. When I want to do something I often need to gather things from all over the house, and then return the leftovers once I'm done. 

Box with different supplies for beading craft projects
Photo credit Eric Prouzet via Unsplash

I've been having a think about the craft supplies that I have in my stash, and brainstorming some projects that I can work on to use them up. Some ideas that I have so far - bracelet making using my enormous bead stash, some kind of project that will use up tiny scrap pieces of fabric, finding a use for my patterned paper and collage supplies. 

I'm going to challenge myself to bag up five craft projects, as far as possible using only supplies that I already own, and then complete them by the end of the year. I'll include all the materials that I'll need, as well as any printed instructions or templates. As we head towards Christmas I'll try for some seasonal theming, and I'll attempt to choose projects that will leave a noticeable dent in my crafting stash. 

Watch this space to see what I come up with!

Thursday, 18 June 2026

Review - Rolife Miniature House Kit - Corner Bookstore

I was sent this kit in exchange for a review

I love working on Rolife miniature kits, and when I was given the chance to choose another kit to complete I knew straightaway which one I would like to try. The Corner Bookstore miniature house kit is a tiny bookstore, crammed with books and other knick-knacks along with cosy corners and intriguing little nooks. 

This kit is perfect for book lovers, and just like the Silent Corner Study it's a great model to display on a bookshelf. I really like the muted colours, and I love the piles of books and plants.  

Rolife Corner Bookstore kit review

The miniature kit comes with everything that you need for assembly, you just need to add two AAA batteries for the lighting kit. Small strips of double sided tape are provided, but I found that it was helpful to have glue on hand, just to make sure that everything was stuck down firmly enough to withstand slight knocks. 

DIY Miniature House Corner Bookstore from Rolife review

The Corner Bookstore kit has a difficulty rating of 2 1/2 stars and I assembled it in a few hours over about a week. It's always worth checking the difficulty rating of Rolife kits as they do vary, and this is a medium difficulty kit. There are a lot of tiny wooden and cardboard components to slot together and some gentle force was required to get everything into place, there is also a small amount of measuring and modification of parts.

I felt that this was one of the more open-ended kits that I've worked on - you can move away from the instructions a little and really make it your own by arranging the pieces to suit you. Although there is some plastic in the kit, many of the components are made with more natural materials like wood and paper.

Rolife miniature craft kit contents

The first step is to lay out all the pieces, but don't remove items from the bags as you will use the bag number to find a piece. If you do this by accident there is a materials list and part guide to identify similar looking pieces.

The instructions are really easy to follow and guide you through the assembly process. Each section has a clearly labelled list of the parts required and step-by-step directions. I found it helpful to set aside an area for components after I had finished them - the box works well for this. I also removed rubbish as I went along to keep my workspace clear.

Rolife miniature Corner Bookstore kit in progress

With these kits I try to make sure that I don't rush, I slow down and enjoy the process of putting them together. It's a very meditative activity, and a wonderful way to switch off as you concentrate on what you are doing.

Rolife Corner Bookstore Kit review

It's a great moment when you can fix the walls in place and the whole thing begins to take its final shape. I really like the way that this kit fits into a corner, and all the tiny props are really imaginative and full of detail.

Rolife kit small components created

As you would expect, even a miniature bookstore is going to be filled with books, and I had a lot of fun making the heaps of tiny books to stock the store. This is just a handful of them! They are made by covering a tiny wooden piece with a printed sticker - these books each measure around 1cm across. There are many familiar titles - Pride and Prejudice, Jane Eyre and The Old Man and the Sea - as well as non-fiction books and a variety of interesting and attractive covers. It seems such a shame that when assembled many of the covers are hidden! 

Miniature books from Rolife bookstore kit

There is a suggested way to arrange the books, but I found it much easier to just work it out for myself, especially making sure that my favourite books had more prominent positions. But one tip for this kit in particular - take care to keep the different sized books separately as they can appear quite similar.

Review of Rolife Corner Bookstore kit

When the assembly is complete, it's lovely to take a step back and have a proper look at what you've just built - sometimes it's difficult to appreciate the whole when you've been concentrating hard on all the tiny details! I loved assembling the Corner Bookstore kit, and it is a wonderful addition to my miniature house kit collection.

Friday, 21 November 2025

Review - Miniature Gingerbread House craft kit from Rolife

I received this kit in exchange for a review

Last week I shared some gorgeous Christmas themed miniature craft kits from Rolife, and today I'm featuring another miniature craft kit from the Christmas collection, the Gingerbread House

Rolife Gingerbread House miniature Christmas craft kit review

With this kit you can assemble a Gingerbread House bakery, filled with festive treats that include gingerbread men, candy canes, cocoa and chocolate boxes. It's a 3 star kit which means that it isn't too difficult, but it will take a little more time than the basic kits. Suggested assembly time is around six hours, and I would say that is about right.

Rolife Gingerbread House craft kit review

The kit contains everything that you need apart from two AAA batteries for the lighting kit, however I did find it useful to have some glue on hand just to make sure that everything is firmly stuck together. Inside the kit you will find plain and coloured wooden boards with snap out pieces, paper cuts and stickers, tiny plastic components, a lighting kit, screwdriver, tweezers, double sided adhesive strips and of course full instructions.

Rolife Gingerbread House contents of the kit

I have to say that I really loved assembling this kit, and I think that it may be my favourite Rolife kit so far. I really enjoyed the festive vibes, and all of the miniature components were really sweet.

Rolife Gingerbread House first components assembled

One thing that I particularly enjoyed about this kit was that I felt the assembly order worked really well. First you assemble the larger pieces that fit inside the bakery - the dresser, cupboards and so on. I found it a good idea to use one the box lid to store the pieces as I finished them.

Rolife Gingerbread House pieces assembled stored in box
 
Then you assemble the structure of the house, putting the walls and door in place (this was a bit like building a real gingerbread house!) and installing the simple lighting kit. Finally you put together the very small pieces and glue them into place on and around the furniture to complete the bakery.

Rolife Gingerbread house halfway through assembly

I found the assembly of the kit straightforward and the instructions easy and logical to follow. There were a few times when I felt that I needed some extra glue, although the adhesive strips provided are very sticky. The instructions lead you clearly through each step, and this kit didn't require any measuring or cutting pieces to size which you find in some of the more difficult kits.

Rolife Gingerbread House kit interior close up

I loved all the tiny details in the kit. The little coffee machine with a mug of hot chocolate to go, the tiny cakes and biscuits, the miniature boxes of chocolates in all shapes and sizes. It takes time to spot everything that is packed inside the shop as there is so much attention to detail.

Rolife Gingerbread House with lighting kit turned on

The kit includes a lighting kit which lights up the inside of the shop. The battery box and on/off switch is accessed from the back of the house, it cleverly slots inside one of the cupboards. It looks so good when the light is on, especially on a dark winter's evening when you need a bit of festive cheer.

Rolife Gingerbread House kit review completed

I can see this Gingerbread House being part of a larger Christmas village, which is something that I've always wanted. You could buy and assemble a kit each year as a festive tradition that builds up into something really spectacular that is much more personal than buying the pieces readymade. There are a few other kits which would fit the theme really well, like the Christmas Candy Stand or the Honey Dessert Talk Miniature House.

Rolife Gingerbread House kit displayed on sideboard with poinsettia

I know that this Gingerbread House is going to be a part of our Christmas decor tradition for a long while to come!

Wednesday, 22 October 2025

A look at some Christmas themed kits from Rolife

I received these kits in exchange for a review

I love crafting for Christmas - mainly for the enjoyment of completing a craft project but also having some unique finished festive decor that I can bring out every Christmas and admire for many years.

I've been sent some gorgeous miniature crafting kits from Rolife to try this Christmas, and so I'm going to share a quick preview before I start my crafting and share the finished results!

First is this DIY Miniature House - Gingerbread House. This lovely kit comes with all sorts of tiny accessories to build a light-up Gingerbread Bakery shop filled with delicious Christmas goodies. I've always wanted a miniature Christmas village and this looks like it could be the perfect start - I can't wait to begin putting it all together! This kit is a 3 star kit so I'm expecting it to be a little more complex than the basic sets, and I know that I'm going to really enjoy assembling it.

Rolife miniature Gingerbread house craft kit

Secondly I will be working on these two kits from the Story Frames Series - Christmas Eve Party and Santa's Toy Shop. These two kits are built inside a deep plastic frame which holds the contents and also a lighting kit. Christmas Eve Party features a lovely little Christmas themed interior with a table set with treats, a Christmas tree, and lots of tiny festive decorations. Santa's Toy Shop is the exterior of a toy shop filled with Christmas treasures including decor and toys.

Rolife miniature house frame kits for Christmas

These Christmas frame kits are both 2 star difficulty kits with an estimated build time of two hours, so I could probably complete these in one sitting. But I'll be working on them a little slower because I want to enjoy every minute of the build process! 

Rolife miniature Christmas frame kit review

I'll be sharing a full review of the kits when I've completed them, but in the meantime I've made a start on the Christmas Eve Party frame kit. I just love the idea of these frames which can be hung on the wall or displayed standing as part of your Christmas decor. They are packed with tiny details, just look at all these sweet little accessories that will be carefully placed into position. I expecially love the tiny gingerbread house!

Rolife Christmas Eve party accessories and instructions

Assembling the kit is straightforward with clear instructions to follow. The assembly is broken down into individual stages for each component, so you need to gather everything that you need for that step and then carefully follow the guidance to put it together. The kit is designed to be assembled without glue, with the pieces being adhered using small strips of double sided tape. However I liked to keep some glue handy as I wanted the extra security of knowing that things were firmly glued together.

So far I've build a little display case filled with festive plates, a corner display shelf, a chair holding a wooden teddy and a couple of small gifts. The thing I love about these kits is that you can work on them when you have time available, as the short steps mean that you can stop and start at any point. I like to keep everything ready, and then when I have a few spare minutes I can put a few pieces together ready to be placed inside the main frame.

Rolife miniature Christmas frame kit under construction

I'm going to be very busy working on these kits, ready to have them on display as part of my Christmas decor!

Monday, 29 September 2025

Review - Rolife miniature kit - Elsa's Tailoring

I received this miniature kit in exchange for a review

Last week I shared an in progress look at the Rolife miniature kit Elsa's Tailoring, and this week I am delighted to share a full review of the completed kit! Elsa's Tailoring is graded with a five star difficulty level, meaning that it is one of the more complex kits available from Rolife. It takes around 8-10 hours to complete, but because it is assembled in small sections you can work on it in short or longer crafting sessions.

The kit contains everything that you need, apart from two AAA batteries. There is no painting and no glue required, as all pieces are adhered using small double sided sticky tape. A display box is available to purchase to keep your creation dust free, and detailed instructions are included.

Rolife Elsa's Tailoring kit contents in box

This is what you receive in the box. As a more advanced kit, I noticed that the wooden pieces are thinner. This makes them a little more delicate when putting them together, but it also means that the overall impression of the finished build becomes more detailed and lifelike. 

Elsa's Tailoring kit in progress with components built

Most of the work involves building is all the tiny bits and pieces that are put together to form the complete sewing shop. It's a combination of wooden pieces which are slotted together, cardboard pieces to press out and stick together, stickers, fabric and ribbon pieces to cut to size and some clear plastic windows.

Elsa's Tailoring kit from Rolife complete

There is a light in the shop which has some simple wiring to a battery box which is hidden in the bottom of the dresser and accessed from the back. 

Rolife Elsa's Tailoring kit clear instructions

I found the assembly instructions very clear and easy to follow. The assembly is broken down into lots of small sections, and each part is identified using labelled wooden sheets or stickered plastic bags. I had no problems working out which piece to use, and no missing pieces. 

Some of the assembly in this kit is a little more complicated than the simpler kits that I've worked on. For example this kit has a lot of fabric pieces which need to be cut to size. The size is given in the instructions, and in some cases I found it easier to create a cardboard template which I could use to cut the fabric. It's important to be accurate because the pieces need to fit together exactly.

Review of the Rolife kit Elsa's Tailoring

Although no glue is needed to assemble the kit, I did use some of my own glue. Sometimes just to make sure that pieces were stuck firmly together, sometimes because I just found it easier as the little strips of tape can be a little fiddly. The tape was however excellent for sticking together any fabric pieces, for example the display dress on the stand which has ribbon around the base. The included tweezers were also very helpful, especially for the final positioning of pieces.

Elsa's Tailoring miniature kit review

I love all the tiny details in the kit. I think that my favourite accessory is the ribbon holder display with miniature rolls of ribbon. I also love the little sewing machine and tiny scissors. Some elements are put together yourself, like the rolls of ribbon and the bundles of fabric, others are provided readymade, like the scissors and the necklace. The gold accent pieces really make the kit sparkle.

Rolife kit miniature sewing shop Elsa's Tailoring

I loved completing this kit. Like all the Rolife kits, it's a really relaxing activity that you can work on whenever you have a few moments to sit down at it, and when complete it looks great on display.

If you are interested in trying a Rolife kit for yourself, you can receive a 10% discount on the Rolife website by using my code Jennifer10.

Monday, 22 September 2025

Review - Rolife miniature kit Elsa's Tailoring - a progress post

I received this miniature craft kit in exchange for a review

A couple of weeks ago I shared my review of the Rolife Miniature Kit Silent Corner Study. I loved putting this kit together, it didn't take too long but it was complicated enough to keep my interested and the finished miniature book nook is gorgeous. 

Now I'm moving on to the second kit which I received to review - Elsa's Tailoring.  

Elsa's Tailoring miniature house kit from Rolife

The Elsa's Tailoring kit is graded with a five star difficulty level. This means that it is more intricate and will take a little longer to complete. Opening the kit I could see that it contained a wider range of materials - as well as the wooden pieces, stickers, card cutouts and plastic accessories there is also ribbon and fabric pieces. The wooden sheets are thinner and the pieces are finer and more delicate.

Elsa's Tailoring miniature kit review contents of box

This kit begins with the assembly of many small components. I just love all the tiny details! My favourite part so far is the little ribbon spool holder which you can see on the left of the white display case in the photograph below. It's so tiny and perfect! The display case and the dresser will be filled with accessories when the kit is completed.

There is definitely more work required when assembling this kit. All of the fabric pieces need to be cut to size, so I needed to make a template using a ruler before cutting. It requires a bit more thought and concentration than just slotting together wooden pieces.

The instructions are easy to follow and comprehensive, but you do often need to pay attention to the direction a piece is facing or the order in which to put parts together. No glue is required for this kit as pieces are stuck together using the supplied double sided tape.

Elsa's Tailoring kit components assembled ready to build

My favourite part when putting together a miniature house kit is getting the main structure together! You can see that the light fixture is in place on the left side wall, this was really easy to assemble. The battery box is hidden at the back, it cleverly slots inside the base of the dresser. You need to provide two AAA batteries and there is a very small amount of simple wiring to do, just connecting two sets of wires and threading it through at the back to keep it secure.

Rolife Elsa's Tailoring kit main structure assembled

The next steps are to build lots more tiny components, and then it's a case of putting everything in the correct place and making sure that it is all firmly stuck together ready for display.

I love that these Rolife kits are broken down into many small sections, so as long as you have some space to leave everything out you can come easily back to it after a break and add a little more. It's perfect for people that don't have the chance to sit down with a craft for hours, but have odd moments throughout the day when they can spend a few minutes working on it.

I will share a full update and review when I've completed the kit!

Tuesday, 2 September 2025

Review - Rolife Miniature Craft Kit - Silent Corner Study from the Book Nook and Wonderland series

I received this miniature craft kit in exchange for a review

A little while ago my husband and I had a lot of enjoyment completing a miniature craft kit from Rolife - Cathy's Flower House. It occupied us happily for quite a while, and I love admiring the finished model sitting on the bookshelf. So I was really pleased to be given the chance to review a couple more miniature kits from Rolife.

I began with the Silent Corner Study, which is part of the Book Nook and Wonderland series. The assembly level is 3 stars which makes it slightly easier and quicker to complete than Cathy's Flower House, which is a more advanced kit with a 4 star rating. The Silent Corner Study kit doesn't even require any glue - all that you need in addition to the kit contents are two AAA batteries for the light.

Silent Corner Study Book Nook from Rolife box

Inside the box are a selection of wooden sheets with press out pieces, a printed cardboard sheet, a printed sticker sheet, a lighting kit and a few other accessories. Then a large instruction book which I found clear and easy to follow. 

The first thing to do is to find some batteries and check that the light works, then you can get started. What I really liked about this kit was that one of the first parts to complete was the battery box and lighting wires - I find this part of the kit a little intimidating so I like to get it out of the way early! It was really easy to install though so I didn't need to worry.

Silent Corner Study book nook from Rolife kit contents

To assemble the kit it's just a case of working through the instructions in order, and pressing out the pieces as you need them. Most of this kit is made using pre-printed and cut wooden pieces, which are really good quality. The finish of the printing is excellent, and all the pieces popped out easily and slotted together well.

Starting a Rolife miniature book nook kit review

When I first saw the picture of the kit I thought that it would take a lot longer as there are so many books to make. But it is deceptive, because many of the books are just printed onto a wooden or cardboard piece which slots into place on the shelf. There are still a few books that need to be assembled individually, and then it's just a case of carefully placing a book cover sticker onto the correct wooden piece. It's easy to reposition a sticker if you get it slightly out of alignment. 

There is never any doubt when it comes to assembly because most of the time pieces can only be placed in one position, and if it's more complicated then there are either guide arrows or extra help in the instructions to make sure that you get it right. 

In progress Rolife miniature Book Nook kit review

I love the bookshelves crammed with not just books but also small paintings, vintage suitcases, a clock and even a cat walking along the shelf! There are so many tiny details. 

Although this kit doesn't require any glue, there is still some sticking to be done with supplied pieces of double sided tape. I did find that I wanted to add a dot of glue on a couple of occasions just to make sure everything was stuck firmly, so it's worth having some on hand just in case.

Rolife Silent Corner Study miniature kit review

As I mentioned above, the lighting for this kit is very simple. There is only one bulb which is positioned outside the window, and the wires run neatly up the back and are later covered by the back panel. The battery box is at the top with a hinged flap which allows you to easily access the batteries. The switch for the light is affixed to the bottom of the wooden floor piece, and when you touch the discrete power symbol it turns the light on.

Installing lighting on a Rolife miniature kit

I found that this kit was a really good level of difficulty - easy enough to not need to worry about getting it wrong, but complicated enough to make for a satisfying craft project that kept me interested and engaged in the process.

Silent Corner Study book nook close up image

I spent about a week working on this kit from time to time. I would imagine that you could probably finish it in a couple of evenings if you sat down to work on it, but I liked taking my time and enjoying the process!

Review - Silent Corner Study book nook kit from Rolife

I've completed a few miniature kits now, and I think that this is definitely my favourite so far. I love the theme - anything to do with books is a winner for me - and it fits beautifully on my bookshelf. The kit was simple to put together but also very satisfying, and I enjoyed every minute working on it. I loved that I could work on it a little bit at a time without having to sit down for hours - it's perfect for busy people that need to snatch some time to themselves when they can. The quality and finish of the kit was excellent and I love admiring the finished product.

If you are interested in trying out a Rolife kit for yourself I have a discount code which will give you 10% off kits from the Rolife website. Just use the code Jennifer10.

Rolife Book Nook kit on book shelf with light

The second kit that I have received to review is a DIY Miniature House called Elsa's Tailoring. The kit is a vintage sewing studio with plenty of tiny details, and I'm really looking forward to making a start. It's a larger kit and a higher difficulty level, so I'm anticipating that it will take me a little longer to complete. I'll be sharing my progress soon!

Rolife Elsa's Tailoring kit box miniature kit

Thursday, 16 January 2025

Review preview - CuteBee Book Nook Kit with a Christmas theme

I received this kit in exchange for a review

Readers of this blog will know that I love crafting and I love reading, so what could be better than a craft which makes a lovely addition to a bookshelf! I have just made a start on this Book Nook craft kit from CuteBee, and so I'm sharing my first impressions before I begin to work on the kit and can share the finished product.

The Book Nook kit is a 3D wooden puzzle with lots of tiny pieces which are slotted together to form a Book Nook - a miniature world which can be displayed on your bookshelf. This kit is called the Christmas Wish Store and features all sorts of sweet little Christmas themed items, including a tree, a train and all sorts of toys and decorations.

CuteBee Christmas Book Nook kit

The kit is very well packaged with everything fitted neatly inside. Most of the kit is wooden sheets with coloured shapes to press out, there are also some small plastic decorations along with the equipment to add lighting and music. It was very easy to check through the instructions and make sure that everything was included, and all the parts are clearly labelled.

Christmas Book Nook craft kit from CuteBee

You need a firm hand to push out the wooden pieces, but they are sturdy and I wasn't worried about breaking them. There are some spares for the very fiddly parts, for example the top of the train roof which needs to be curved slightly. It's important to only press out the pieces as you need them as you would very quickly get muddled!

CuteBee Christmas Book Nook contents

Unused pieces can be stored in the original box, but I found it helpful to have a separate tray to keep the components that are assembled so that they don't get lost or damaged. So far I've built a storage box and a tiny train, and I found putting the pieces together to be really fun and absorbing. 

The kit is mainly assembled without glue, and the parts that need glue (not included) are clearly marked. You can also add a bit of glue if you are concerned that the pieces are too loose, but I found that wasn't usually necessary.

I'm really looking forward to working on this kit, I can see it being something that I work on from time to time when I have a few minutes to craft, as it can easily be picked up and put down and it doesn't need too much space to work on.

I will share the Book Nook when it's complete!

Wednesday, 6 December 2023

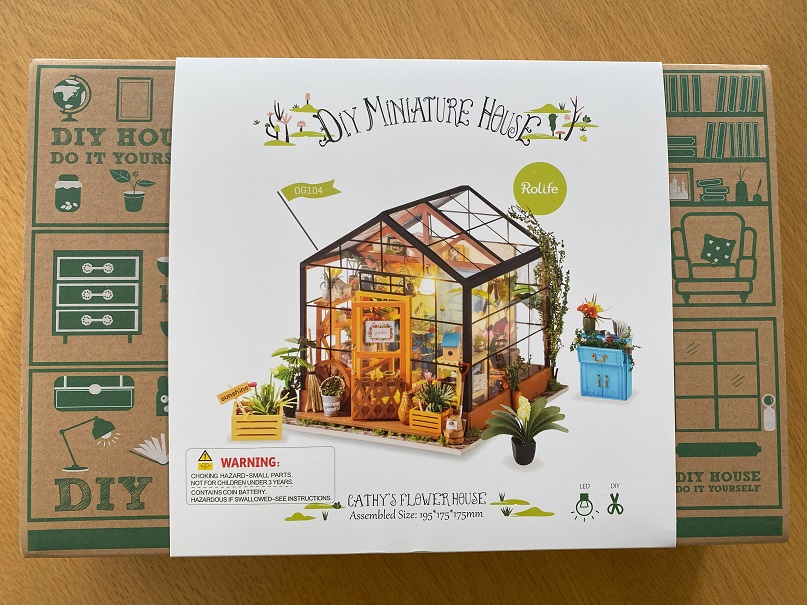
Our new project - Cathy's Flower House kit from Rolife

A few months ago while out shopping we spotted these miniature kits from Rolife. We spent ages admiring all the different tiny model kits and wondering what they would be like to have a go at. A few days later I was having a browse on Amazon and I added a couple to my wish list so that I could check the prices. When the one that we were most interested in came on special offer a few weeks later it felt like fate, and so we bought one as something that my husband and I could work on together.

The price of this kit is around £40, and when you realise what's included it's not a bad price at all. I don't even want to think about how long it's going to occupy us for, but we've spent at least 10 hours on it already and aren't even a third of the way through, and that's with two of us working on it! I thought I'd share our progress so far, in case you've also seen these kits out and about and are wondering what they are like and what's involved in building one.

Rolife Cathy's Flower Garden miniature kit review

The kit includes a decent glue, paint, tweezers and all the materials that you need. We are also using our own wire cutters, pliers (small nosed ones are best if you have them), a scalpel and cutting mat and a ruler. I think we may need other tools like a screwdriver later on. It's a good idea to have a box or tray ready to store the finished pieces while you work your way through the instructions.

Rolife Cathy's Flower Garden kit contents

When we visited our local garden centre the other day I found a completed version of the kit on display. It's a little faded but I was able to have a good look at it and see what we are aiming for!

Rolife greenhouse kit model completed

The first step was to paint some of the larger wooden pieces that form the base of the greenhouse. Then you start by building the the items of furniture, shelves, boxes and so on. This is followed by the smaller accessories, like the bird houses, plant pots, books and baskets.

The instructions are pretty good with clear step-by-step pictures. There are some translation errors and a couple of items in the wrong numbered bags, but with a bit of common sense it's easy enough to work out. Sometimes you do need to use your initiative a little bit, and I'm expecting that when we get to putting all the pieces together there may be some room for personalising it.

Rolife review Cathy's greenhouse pieces completed

Currently we are working on the plants, and there are so many of them in this kit! They are made in various different ways. Some like the plants below have pre-cut leaves which are pressed out and then glued to green wire before being fixed into a large plant pot shaped bead. There are some made from thinner tissue paper that needs to be folded, cut and positioned before being glued down. These plants have been very fiddly to make and the glue goes everywhere. We've been sitting down together for a couple of hours and managing to produce just five or six between the two of us!

Rolife greenhouse kit flowers and plants

When we've worked our way through the plants then we can start to assemble the greenhouse and arrange everything inside it, which I think will be the most fun part. I'm hoping that the electrical wiring part of the greenhouse isn't too tricky, and we'll need to make sure that everything is firmly glued into place, as once the walls are in place I don't think we'll easily be able to open it up again to make adjustments!

It's been a really fun project for my husband and I to work on together and we are already thinking about our next kit! There are some lovely pieces in a 'Book Nook' range which are designed to fit between books on a bookshelf, they have a cleverly angled mirror to make it look as though they extend back further than the shelf. Watch this space!