Later this year we will be setting off on our fourth Disney cruise and I can't wait! Each time we've cruised with Disney we have taken part in a little more of the magic on board, and now for the first time I've signed us up for a Fish Extender gift exchange as well as a couple of other exchanges. As part of a Fish Extender gift exchange you swap small gifts as part of an organised group. The gifts can be bought or homemade, Disney themed or not, and are a way of adding a little extra magic to your cruise.
Related post - Our Disney cruise - Adding some magical extras
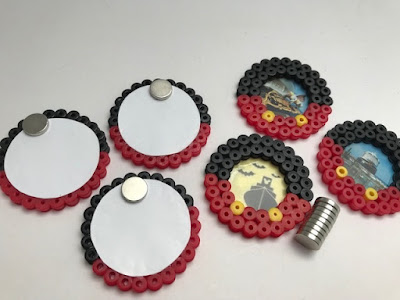
I designed some Hama or Perler bead magnets to use as part of a cabin gift, or they could also be used for a dedicated magnet exchange. They are really easy to make! I made them with three different designs, two are my own photos from a previous cruise on this ship and the third is the Halloween on the High Seas logo, as we are cruising on a Halloween sailing.
If you want to take part in a similar exchange on your Disney cruise you can find the details on your dedicated cruise Facebook page - just search for your ship name and dates and ask to join. Read on to see how I made these simple Fish Extender magnets!
Related post - A Disney Cruise Fish Extender with a Moana theme
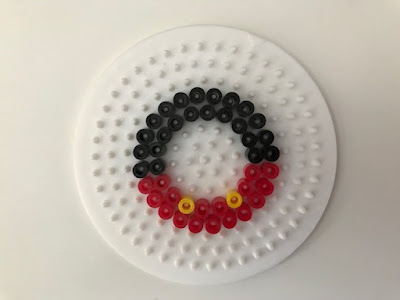
To make these Disney themed Hama bead magnets you need a circular Hama bead pegboard (either the small board or the large board will work) and a selection of Hama beads. My design uses 23 black beads, 17 red beads and 2 yellow beads. You also need a picture to use for the frame, printed on sturdy paper or card if possible, as well as some magnets for the back.
When placing the beads on the circular pegboard make sure to line the beads up correctly - you want to position the board so that the centre line of pegs is horizontal, and it's easiest to start by placing the black Hama beads along that line.
Here is the design that I used:
Iron the beads on both sides so that you have a nice solid frame. Of course you can adjust the size of the frame if you want to make them a little larger - these measure about 4.5 cm in total diameter and the inner circle has a diameter of about 2.5 cm. It might be nice to make one larger frame which the recipient could use to display their own photo.
Related post - Hama bead ironing tips
Cut out your printed inner design so that it is slightly larger than the hole in the middle of the frame.
Then glue the picture to the back of the frame. It's worth having a quick look at each frame and deciding on the side that you want to face outwards, as sometimes the ironing process can distort the beads. Leave the magnets to dry fully.
Then you can apply a magnet to the back of each frame. I bought some strong small magnets
These magnets will form part of a cabin gift for each stateroom taking part in our Fish Extender exchange. Each cabin will receive one each of the three different designs, along with a Disney themed Christmas ornament.
Related post - Disney Cruise Ornament Exchange idea - Felt Christmas stockings
I really enjoyed making these magnets and I think they turned out well! It's making me even more excited for our cruise, even though we still have several months to go yet - it's definitely a way of making that Disney magic stretch a little bit further as the anticipation builds!
Related post - Disney Cruise craft ideas
I hope that the recipients like them!


No comments:
Post a Comment
I love reading your comments!