A couple of years ago for Christmas we bought Mia a doll. It was a fancy one with batteries, she sucked from a bottle and cried with real tears. We thought that she'd love it, as she's always shown motherly tendencies, but after the initial excitement she didn't show much interest.
It turned out that she would rather demonstrate her maternal instincts towards her ever increasing collection of stuffed animals. We have them stored in a drawer in her wardrobe, in a cardboard zoo themed box on her bookshelf, and alongside her in her bed. She has so many there that when I go to tuck her in at night she has often half fallen out, evicted from her own bed by a huge pile of cuddlies.
She has a stuffed toy to represent animals from across the animal kingdom, which comes in very handy on school dress up days when a particular creature is needed to supplement a costume. She has also adopted my own remaining stuffed toys, including some Beanie Babies that I collected at a time when we all thought they'd be worth something someday. I hope they won't be, because they are certainly no longer in mint condition!
Occasionally when I'm having a sort out I skim a few off that I've not seen her play with for a while and hide them in my wardrobe. Generally she's asked for them back within days. She maintains an encyclopedic knowledge of her collection, she can remember where they came from or who gave them to her, their names, and also their likes and dislikes.
It wasn't until this summer that we introduced her to Build a Bear, and I'm not quite sure how we managed to keep her away for so long. She spent some of her own pocket money on her first bear, and then she acquired a second on a more recent trip with Ram (who having seen her devotion towards the first, spoiled her with a second).
This new bear ('Fluffy') has become her constant companion, and in lieu of receiving the class bear to bring home she has been taking photographs of Fluffy around the house, printing them out, and writing about him in a notebook.
She has also encouraged Harry to appreciate and grow his own collection. Previously he was content with just Giraffe, now he also has his own small band of furry friends that accompany him to bed at night. Counted among their number are two large fluffy slippers, that he would rather cuddle at night than wear on his feet.
I love seeing Mia's devotion to her little animal friends, and the imaginative games that she plays with them. I'll be very sad indeed when this stage of her childhood is over, although I'm sure she'll continue to treasure them all for some time yet!
Thursday, 12 October 2017
Tuesday, 10 October 2017
Firework crafts for Bonfire Night
Remember remember the fifth of November, gunpowder, treason and plot....
Are you looking for some firework crafts to entertain the children while you wait until the evening fireworks, or prefer a warmer and quieter alternative to hanging around to watch a display? You are in the right place! Here's a selection of simple firework crafts and activities that you can do with young children.
First up, why not make your very own Fireworks display in a box. The fireworks will last a lot longer than when they are in the sky, and you can get really creative with different sparkly materials to make your own display.
Very young children might be too little to take out to watch fireworks, but you can still have fun at home with a Firework themed sensory tub. All you need is a base material - I used dyed black rice - and some sparkly and fun accessories. Add a couple of spoons and some divided containers and the children will be kept busy for ages. Just remember to pop down an old table cloth or similar to try and contain the mess!
A slightly messier craft, but a lot of fun, are these Paper plate glitter fireworks paper plate glitter fireworks. Paint the paper plates black to make a background and add some coloured sparkly glue. Then drip white glue onto the plate to form a firework shape, and sprinkle liberally with glitter to make your fireworks. They look great hung up on a wall or window!
I hope I've inspired you to get crafting this Bonfire Night!
Are you looking for some firework crafts to entertain the children while you wait until the evening fireworks, or prefer a warmer and quieter alternative to hanging around to watch a display? You are in the right place! Here's a selection of simple firework crafts and activities that you can do with young children.
First up, why not make your very own Fireworks display in a box. The fireworks will last a lot longer than when they are in the sky, and you can get really creative with different sparkly materials to make your own display.
Very young children might be too little to take out to watch fireworks, but you can still have fun at home with a Firework themed sensory tub. All you need is a base material - I used dyed black rice - and some sparkly and fun accessories. Add a couple of spoons and some divided containers and the children will be kept busy for ages. Just remember to pop down an old table cloth or similar to try and contain the mess!
A slightly messier craft, but a lot of fun, are these Paper plate glitter fireworks paper plate glitter fireworks. Paint the paper plates black to make a background and add some coloured sparkly glue. Then drip white glue onto the plate to form a firework shape, and sprinkle liberally with glitter to make your fireworks. They look great hung up on a wall or window!
Finally, you could make some cardboard tube fireworks. Cover some old cardboard tubes with black paper and fill with some pipe cleaner fireworks for a brilliant table centrepiece or decoration. It's really easy to make, and children can have lots of fun customising their fireworks.
I hope I've inspired you to get crafting this Bonfire Night!
Monday, 9 October 2017
Cardboard tube firework craft
I decided that with Bonfire Night not too far away I'd use some glittery cardboard, foam stars and sequins to make a simple firework craft.
You need:
Cardboard tubes
Black paper, even better if it has sparkly bits in it!
Coloured pipe cleaners
Star foam stickers, or you can make your own cutouts from coloured cardboard
Sequins
Black tissue paper
Bostik White Glu
Bostik Glu Dots
Instructions:
First cover your cardboard tubes in black paper. Cut a piece of the paper to size then glue firmly in place with the Bostik White Glu. As the paper that I used to cover the tubes was quite thick, I also secured the ends in place with a couple of staples to make sure that it was held in place. You might want to use paper clips around the top and bottom while the glue dries to keep it all in place.
Then prepare your fireworks. I found that a length of pipe cleaner about 15cm long worked well for each firework. I used pipe cleaners in red, orange and yellow but any colours would do, and sparkly ones would look fantastic! Use a Bostik Glu Dot to firmly stick the foam stars to the ends of the pipe cleaners. I find that the Glu Dots work really well on the pipe cleaners as they stick firmly to the textured surface.
Then use some tape to secure your pipe cleaner fireworks inside the cardboard tube. Try and position them at different intervals and heights to add a bit of interest. Then scrumple up some black tissue paper and stuff it into the top of the tube to hide the ends of the pipe cleaners. Finally finish off your firework craft with some sequins glued to the outside of the tube with some White Glu.
These cardboard tube fireworks make a great Bonfire Night decoration, and you could use them as a fantastic table centerpiece for your Bonfire Night party!
If you are looking for firework crafts, you might enjoy some of my other crafts:
Fireworks display in a box
Paper plate firework craft
Firework themed sensory tub
The box of craft materials was provided to me free of charge by Bostik as part of the Tots100/Bostik Craft Bloggers Club.
You need:
Cardboard tubes
Black paper, even better if it has sparkly bits in it!
Coloured pipe cleaners
Star foam stickers, or you can make your own cutouts from coloured cardboard
Sequins
Black tissue paper
Bostik White Glu
Bostik Glu Dots
Instructions:
First cover your cardboard tubes in black paper. Cut a piece of the paper to size then glue firmly in place with the Bostik White Glu. As the paper that I used to cover the tubes was quite thick, I also secured the ends in place with a couple of staples to make sure that it was held in place. You might want to use paper clips around the top and bottom while the glue dries to keep it all in place.
Then prepare your fireworks. I found that a length of pipe cleaner about 15cm long worked well for each firework. I used pipe cleaners in red, orange and yellow but any colours would do, and sparkly ones would look fantastic! Use a Bostik Glu Dot to firmly stick the foam stars to the ends of the pipe cleaners. I find that the Glu Dots work really well on the pipe cleaners as they stick firmly to the textured surface.
Then use some tape to secure your pipe cleaner fireworks inside the cardboard tube. Try and position them at different intervals and heights to add a bit of interest. Then scrumple up some black tissue paper and stuff it into the top of the tube to hide the ends of the pipe cleaners. Finally finish off your firework craft with some sequins glued to the outside of the tube with some White Glu.
These cardboard tube fireworks make a great Bonfire Night decoration, and you could use them as a fantastic table centerpiece for your Bonfire Night party!
If you are looking for firework crafts, you might enjoy some of my other crafts:
Fireworks display in a box
Paper plate firework craft
Firework themed sensory tub
The box of craft materials was provided to me free of charge by Bostik as part of the Tots100/Bostik Craft Bloggers Club.
Saturday, 7 October 2017
BritMums Live 2017 #BML17
At the weekend I attended the BritMums Live blogging conference, marking the fifth time that I've attended. I've always enjoyed myself and found the conference really helpful and inspiring, so I was very excited to be able to come along again. This year there were some significant changes to the event, with a new date and a new venue on the Southbank and with a much smaller and more intimate feel. It was also the first time that I didn't stay overnight - with Ram's birthday the next day I didn't really feel able to, so I just travelled up for the day - made much easier by the fact that Waterloo station is a much more straightforward train journey for me!
As part of the BritMums team I helped out with registration, which was fun as I was able to see people arriving and match some faces to names. There was a full breakfast spread on offer, and plenty of mingling.
For the last few years I've spent most of my BritMums Live time chatting, and then ending up forgetting to attend any of the sessions. With a smaller event and a smaller brand hub there was less to distract me, and so I made much better use of my time.
After arrival it was straight into the sessions. I started with the 'YouTube Deep Dive'. The session was in two parts, with a more general first half and then the second more specifically aimed at parent YouTubers. There were lots of really good examples with different ways of using YouTube, and I picked up some useful tips. Mainly that I need to get more consistent! Jules Fournier said that if you have a schedule then your viewers will always know that there is new content, and although they may not look for it as soon as it is published they'll remember it when they are next on YouTube, and that made a lot of sense to me. My YouTube use has been a bit sporadic of late and I don't plan my content at all, so I need to come up with a more consistent schedule.
After the break I attended 'Smash your goals with focussed blogging' with Aby Moore from You Baby Me Mummy. Aby definitely knows her stuff, and she covered a great deal. She talked about the importance of first setting goals and then drilling down on the individual tasks which will help you to accomplish them. I don't have any blogging goals set, apart from vague ones like 'get more people to read it' so I could definitely do with sitting down for a good thinking and planning session. Aby also talked about how much time we waste when we hop about from task to task, something that I'm definitely very guilty of!
Next I went to 'Instagram & Instagram Stories: How to maximise, what to avoid & top-notch storytelling'. The session was a chat with Alice Judge-Talbot and Harriet Shearsmith about how they use Instagram and what they've found works for them. I do love Instagram but I'm sometimes a bit hesitant to post as I feel that I want my images to be perfect and I'm not the best photographer. I've never dived into Instagram Stories and this session has given me the push to give it a go, I just need to make the leap to getting started!
Lunch was very nice with a good selection of hot and cold food which you could help yourself to. There were also some delicious cakes and other snacks throughout the day!
I mentioned that the brand hub was much smaller, and I must admit that none of the brands that were present really interested me. There were travel brands, and of course I do write about travel, but I don't have enough of a travel niche that I felt they would be interested in me. There was quite a long time set aside for brand presentations, and I didn't go to any of them as I didn't really want to be sold to. But I did discover the fantastic Jennie Maizels and her Sketchbook Club table, and I spent a happy hour or so sitting here working on a water colour bird picture.
In the afternoon I attended 'Understanding and using Google Analytics'. This was quite a basic session, but as I'm pretty hopeless at using Google Analytics I found it really helpful. I came home with a few things to try. For example I've found out how to find my most popular posts, not just overall but also from past seasons, so I can see which types of seasonal posts have done well in the past and use that to influence future content.
Unfortunately I wasn't able to stay for the BiBs Awards party with City Cruises as I needed to get back home, but to be honest I was exhausted at this point anyway as I always find blogging conferences very draining! So I grabbed my goody bag and headed home before it got too late, with my head spinning and full of new ideas!
As part of the BritMums team I helped out with registration, which was fun as I was able to see people arriving and match some faces to names. There was a full breakfast spread on offer, and plenty of mingling.
For the last few years I've spent most of my BritMums Live time chatting, and then ending up forgetting to attend any of the sessions. With a smaller event and a smaller brand hub there was less to distract me, and so I made much better use of my time.
After arrival it was straight into the sessions. I started with the 'YouTube Deep Dive'. The session was in two parts, with a more general first half and then the second more specifically aimed at parent YouTubers. There were lots of really good examples with different ways of using YouTube, and I picked up some useful tips. Mainly that I need to get more consistent! Jules Fournier said that if you have a schedule then your viewers will always know that there is new content, and although they may not look for it as soon as it is published they'll remember it when they are next on YouTube, and that made a lot of sense to me. My YouTube use has been a bit sporadic of late and I don't plan my content at all, so I need to come up with a more consistent schedule.
After the break I attended 'Smash your goals with focussed blogging' with Aby Moore from You Baby Me Mummy. Aby definitely knows her stuff, and she covered a great deal. She talked about the importance of first setting goals and then drilling down on the individual tasks which will help you to accomplish them. I don't have any blogging goals set, apart from vague ones like 'get more people to read it' so I could definitely do with sitting down for a good thinking and planning session. Aby also talked about how much time we waste when we hop about from task to task, something that I'm definitely very guilty of!
Next I went to 'Instagram & Instagram Stories: How to maximise, what to avoid & top-notch storytelling'. The session was a chat with Alice Judge-Talbot and Harriet Shearsmith about how they use Instagram and what they've found works for them. I do love Instagram but I'm sometimes a bit hesitant to post as I feel that I want my images to be perfect and I'm not the best photographer. I've never dived into Instagram Stories and this session has given me the push to give it a go, I just need to make the leap to getting started!
Lunch was very nice with a good selection of hot and cold food which you could help yourself to. There were also some delicious cakes and other snacks throughout the day!
I mentioned that the brand hub was much smaller, and I must admit that none of the brands that were present really interested me. There were travel brands, and of course I do write about travel, but I don't have enough of a travel niche that I felt they would be interested in me. There was quite a long time set aside for brand presentations, and I didn't go to any of them as I didn't really want to be sold to. But I did discover the fantastic Jennie Maizels and her Sketchbook Club table, and I spent a happy hour or so sitting here working on a water colour bird picture.
Jennie uses a technique with pencil to transfer pre-printed images into your sketchbook, which you can then colour with watercolour or pencil and embellish with ink or gel pen. I loved using the watercolours, I've not done proper painting for years and it was really relaxing.
I was very proud of my finished bird! I took him home to show Mia and she was impressed too, she was inspired to add a few decorations of her own to my page so I have designated it a shared sketchbook with pages that we can work on together.
In the afternoon I attended 'Understanding and using Google Analytics'. This was quite a basic session, but as I'm pretty hopeless at using Google Analytics I found it really helpful. I came home with a few things to try. For example I've found out how to find my most popular posts, not just overall but also from past seasons, so I can see which types of seasonal posts have done well in the past and use that to influence future content.
Finally I stayed for 'Do's and Don'ts of Working with Brands' with BritMums co-founders Susanna Scott and Jennifer Howze. There was some really useful information about the things that they are looking for when they choose bloggers for campaigns, for example engagement, original content and the overall look and feel of your blog.
Unfortunately I wasn't able to stay for the BiBs Awards party with City Cruises as I needed to get back home, but to be honest I was exhausted at this point anyway as I always find blogging conferences very draining! So I grabbed my goody bag and headed home before it got too late, with my head spinning and full of new ideas!
Thursday, 5 October 2017
Dressing up your Elf on the Shelf this Christmas
Unfortunately the patterns for these items are no longer available. I have kept this post up for Elf on the Shelf knitting inspiration.
A few years ago we started the Elf on the Shelf tradition in our household - a small Elf that joins our family in the run up to Christmas and has fun around the house overnight. Last year our original Elf was joined by a lady Elf friend, and the two children delighted in running downstairs every morning to see what they had been up to!
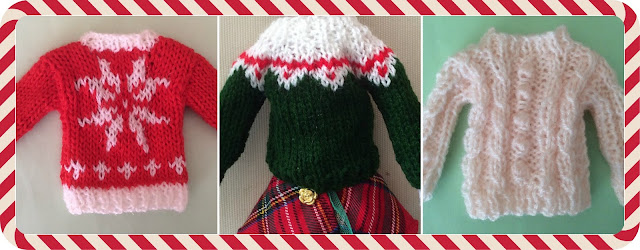
Our Elf is always very well dressed, thanks to my Mum. She has been creating knitting patterns for her knitted Elf sweaters for a couple of years now. She made three different designs and they are all lovely.

I think that her designs are so lovely that I thought I would share them! Below is the ballerina outfit, complete with a wrap around sweater and legwarmers! It would be fantastic to impress any little ballerinas that you have in your house.
Below you can see the knitted bag, swimming costume and skirt. I'm planning on having our Elf appear in the morning in her swimming costume on the day that my children have their swimming lessons, I think they'll love that!
Finally I quite fancy one of these cosy onesies myself! And the little doll is really sweet, you could customise it to match a doll that your child has.
Here are some of the other outfits that she has designed. I think it would be lovely to knit the soccer outfit in your team's colours!
The sweater and trousers look really comfy and you could make them in all different colours, perhaps making an outfit to match with one of your child's!
How to Customise your Elf on the Shelf
Knitted Sweaters for your Elf on the Shelf
Wednesday, 4 October 2017
A flight on the British Airways i360 observation tower in Brighton
At the weekend it was Ram's birthday, and as part of a day out in Brighton we were welcomed aboard the British Airways i360 observation tower to enjoy a flight above the city.
The British Airways i360 opened in August 2016, and the 138 metre high observation tower has quickly become a distinctive and popular landmark attraction on the seafront. The observation tower raises visitors above the city in a fully enclosed and spacious glass viewing pod, with plenty of space to walk around and enjoy views across Brighton, out to sea, and over the South Downs.
You need to arrive for your flight about 20 minutes beforehand to pass through security. In the waiting area there is a really interesting video showing the tower's construction, and plenty of information about the tower. You can watch the pod as it descends from the previous flight, and then it's a smooth process to board.
The pod inside is really big, with plenty of space to make sure that everyone can enjoy the views. There's also a bar on board - it would be lovely to enjoy a celebration with a glass of champagne.
We are quite familiar with Brighton seafront from the ground but it was fascinating to see it from above, it's surprising how compact Brighton is and how high rise some of the buildings are. The ride is really smooth, and it's not in the least claustrophobic because the pod is so roomy.
It was really interesting to be able to see so far out to sea. We had a good view of the Rampion Wind Farm which is currently under construction, a much better look at it than you can see from the beach.
We downloaded the free app for our phones which Harry loved using. There's a viewing guide which you can match up to your surroundings to help you spot the landmarks, and a treasure hunt with different things to spot and photograph around the pod.
I loved how some of the buildings like the Brighton Metropole hotel close by had decorated their roof - I'd definitely do that if I owned a roof nearby!
The ride lasted just over 20 minutes, with a long stop at the top giving you plenty of time to enjoy the highest view in all directions. There was a member of staff on board to point out landmarks and answer any questions. When you leave the tower you have the chance to buy photographs of your group, and there's a souvenir shop with some lovely Brighton and beach themed gifts. We really enjoyed our trip and I'd definitely recommend it, whether you are local to Brighton or travelling from further afield!
We received complimentary tickets to the attraction in exchange for this review.
The British Airways i360 opened in August 2016, and the 138 metre high observation tower has quickly become a distinctive and popular landmark attraction on the seafront. The observation tower raises visitors above the city in a fully enclosed and spacious glass viewing pod, with plenty of space to walk around and enjoy views across Brighton, out to sea, and over the South Downs.
You need to arrive for your flight about 20 minutes beforehand to pass through security. In the waiting area there is a really interesting video showing the tower's construction, and plenty of information about the tower. You can watch the pod as it descends from the previous flight, and then it's a smooth process to board.
The pod inside is really big, with plenty of space to make sure that everyone can enjoy the views. There's also a bar on board - it would be lovely to enjoy a celebration with a glass of champagne.
It was a bit of a gloomy day when we visited so I was a bit apprehensive about what we'd be able to see, but it wasn't a problem at all and we still had a brilliant view.
We are quite familiar with Brighton seafront from the ground but it was fascinating to see it from above, it's surprising how compact Brighton is and how high rise some of the buildings are. The ride is really smooth, and it's not in the least claustrophobic because the pod is so roomy.
It was really interesting to be able to see so far out to sea. We had a good view of the Rampion Wind Farm which is currently under construction, a much better look at it than you can see from the beach.
We downloaded the free app for our phones which Harry loved using. There's a viewing guide which you can match up to your surroundings to help you spot the landmarks, and a treasure hunt with different things to spot and photograph around the pod.
I loved how some of the buildings like the Brighton Metropole hotel close by had decorated their roof - I'd definitely do that if I owned a roof nearby!
The ride lasted just over 20 minutes, with a long stop at the top giving you plenty of time to enjoy the highest view in all directions. There was a member of staff on board to point out landmarks and answer any questions. When you leave the tower you have the chance to buy photographs of your group, and there's a souvenir shop with some lovely Brighton and beach themed gifts. We really enjoyed our trip and I'd definitely recommend it, whether you are local to Brighton or travelling from further afield!
We received complimentary tickets to the attraction in exchange for this review.
Monday, 2 October 2017
How I use Trello as a blogger
I've been using Trello to organise my blog for well over a year now, and I love it! After trying out a few different systems based on those used by other bloggers I found my own that worked for me, so I thought I'd share how I use Trello, both as an editorial calendar for my blog and as a blog post catalogue to keep track of my published posts.
Trello is an online organisational tool that uses cards, lists and boards to keep track of your tasks and projects. I use the free version, which is more than enough for my needs. I use Trello by myself, but it's also great for collaborative projects - for example, if you are running a blog with several contributors you can keep track of the work that others have done and see where you are up to.
In my system, each Card represents an individual blog post. I use Lists to categorise and organise my cards, and then these lists are stored on Boards.
I use three boards for my blog - Jennifer's Little World Editorial Calendar, JLW Post Catalogue and JLW Post Catalogue not to be reshared.
* Using Trello as an Editorial Calendar for my blog
My editorial calendar board deals with blog post creation, following them from vague post ideas through to published posts. It allows me to see at a glance which posts I have written, which posts I need to write, and to fill any gaps in content.
Each card in my Trello system represents a blog post, whether it's just an idea or a finished and published post. I have the following five lists in my Editorial Calendar board - Seasonal Ideas, General Ideas, To Write, Finished and Scheduled, and Published. This board has the Calendar Power-Up enabled. This means that when I have set a due date for the post it will be displayed in the calendar view.
I begin planning blog posts by writing down potential titles on separate cards under Seasonal Ideas or General Ideas. The Seasonal Ideas board is useful if I have an idea for a blog post in a different season, then when that season approaches I have a small bank of ideas to start with. If I have any additional notes they can be added to the card, for example previous blog posts of mine that I want to link back to, any credits for inspiration, and any other notes that came to mind when I thought of the blog post idea. Then I flick over to the Calendar view so that I can see where my gaps are and I schedule in blog posts for the next couple of weeks, setting a due date for the post.
In the screen shot below you can see the first few weeks of September 2017. Some of the posts have final titles, others are just ideas. When a post has been written and scheduled I change the label to green. The cards without a label are the posts that I need to get on and write. If I want to make changes I can easily drop and drag the cards around in this view and the due date will change automatically.
Back in the list view for the board, when I've written a post I drag it over to the Finished and Scheduled list, then when it has been published I drag it to the Published list. I also add the link of the final published post to the card.
* Using Trello as a blog post catalogue for my blog
Every week or so I move the cards in my Published list from the Editorial Calendar board to one of my Post Catalogue boards.
I have two Post Catalogue boards, as my original board was starting to become too full. I have one board for blog posts that I don't intend to re-share. These are update blog posts that I've written, family and parenting posts, that sort of thing. I really enjoy looking back over them but they are probably not going to be relevant to future readers.
My main Post Catalogue board holds all the blog posts that I will want to re-share. I make sure that each card has a link to the published blog post and any other information, for example the Twitter handle of any contributor or inspiration. Then they are sorted into quite detailed lists. So for example I have a list for each season - Halloween, Christmas, Valentine's Day and so on - as well as lists for the different types of post - for example General Travel, Worldwide Travel, Accommodation Reviews and Blogging, Food, Parenting.
I use a variety of different coloured labels to further categorise the posts in a way that makes sense to me. For example, if I'm going through and updating all the posts in a list I'll use a coloured label to show which ones I've done. I also use a * to mark my most popular posts. I'll move the posts around in the list by dragging and dropping, and when I've shared a post I'll move it to the bottom of the list so I know to start by sharing the posts at the top. I also use stickers to draw attention to particular posts.
The blog posts in the screenshot below with a red date on are ones that have been published since I started using Trello to organise. I have too many posts to go back and add the published date for older ones at the moment, so it's a good way of spotting my most recent posts.
I find this post catalogue really useful, as it means that when I'm looking for blog posts on a particular topic I can easily find them. It's great for creating round up posts, for example Hama bead crafts for Halloween, as I know I've not missed any posts that fit the topic. It also helps me to spark ideas for new blog posts as I consider new angles on a theme. If someone is looking for blog posts on a particular subject I can easily find all the ones that I've written to share.
I use these lists for scheduling posts for my Facebook page, sharing on Twitter, and to plan my Pinterest pinning. It was also really helpful when I recently had to sort out all the images on my blog!
I hope that my system makes sense, and has perhaps inspired you to have a think about using Trello for your blog! It has certainly helped me to become more organised in my blog planning.
If you'd like to see how other bloggers are using Trello in different ways you might enjoy these posts:
You Baby Me Mummy - How to Exploit Trello: Killing it as a Blogger
If you are looking for inspiration to fill your editorial calendar, you might find these posts helpful:
Blog post ideas for Craft Bloggers
Blog post ideas for Travel Bloggers
Summer blog post ideas
Autumn blog post ideas
And finally, if you want to see how I use Trello for other purposes you might enjoy these posts:
How I use Trello to plan a holiday
How I use Trello to organise my life

Trello is an online organisational tool that uses cards, lists and boards to keep track of your tasks and projects. I use the free version, which is more than enough for my needs. I use Trello by myself, but it's also great for collaborative projects - for example, if you are running a blog with several contributors you can keep track of the work that others have done and see where you are up to.
In my system, each Card represents an individual blog post. I use Lists to categorise and organise my cards, and then these lists are stored on Boards.
I use three boards for my blog - Jennifer's Little World Editorial Calendar, JLW Post Catalogue and JLW Post Catalogue not to be reshared.
* Using Trello as an Editorial Calendar for my blog
My editorial calendar board deals with blog post creation, following them from vague post ideas through to published posts. It allows me to see at a glance which posts I have written, which posts I need to write, and to fill any gaps in content.
Each card in my Trello system represents a blog post, whether it's just an idea or a finished and published post. I have the following five lists in my Editorial Calendar board - Seasonal Ideas, General Ideas, To Write, Finished and Scheduled, and Published. This board has the Calendar Power-Up enabled. This means that when I have set a due date for the post it will be displayed in the calendar view.
I begin planning blog posts by writing down potential titles on separate cards under Seasonal Ideas or General Ideas. The Seasonal Ideas board is useful if I have an idea for a blog post in a different season, then when that season approaches I have a small bank of ideas to start with. If I have any additional notes they can be added to the card, for example previous blog posts of mine that I want to link back to, any credits for inspiration, and any other notes that came to mind when I thought of the blog post idea. Then I flick over to the Calendar view so that I can see where my gaps are and I schedule in blog posts for the next couple of weeks, setting a due date for the post.
In the screen shot below you can see the first few weeks of September 2017. Some of the posts have final titles, others are just ideas. When a post has been written and scheduled I change the label to green. The cards without a label are the posts that I need to get on and write. If I want to make changes I can easily drop and drag the cards around in this view and the due date will change automatically.
Back in the list view for the board, when I've written a post I drag it over to the Finished and Scheduled list, then when it has been published I drag it to the Published list. I also add the link of the final published post to the card.
* Using Trello as a blog post catalogue for my blog
Every week or so I move the cards in my Published list from the Editorial Calendar board to one of my Post Catalogue boards.
I have two Post Catalogue boards, as my original board was starting to become too full. I have one board for blog posts that I don't intend to re-share. These are update blog posts that I've written, family and parenting posts, that sort of thing. I really enjoy looking back over them but they are probably not going to be relevant to future readers.
My main Post Catalogue board holds all the blog posts that I will want to re-share. I make sure that each card has a link to the published blog post and any other information, for example the Twitter handle of any contributor or inspiration. Then they are sorted into quite detailed lists. So for example I have a list for each season - Halloween, Christmas, Valentine's Day and so on - as well as lists for the different types of post - for example General Travel, Worldwide Travel, Accommodation Reviews and Blogging, Food, Parenting.
I use a variety of different coloured labels to further categorise the posts in a way that makes sense to me. For example, if I'm going through and updating all the posts in a list I'll use a coloured label to show which ones I've done. I also use a * to mark my most popular posts. I'll move the posts around in the list by dragging and dropping, and when I've shared a post I'll move it to the bottom of the list so I know to start by sharing the posts at the top. I also use stickers to draw attention to particular posts.
The blog posts in the screenshot below with a red date on are ones that have been published since I started using Trello to organise. I have too many posts to go back and add the published date for older ones at the moment, so it's a good way of spotting my most recent posts.
I find this post catalogue really useful, as it means that when I'm looking for blog posts on a particular topic I can easily find them. It's great for creating round up posts, for example Hama bead crafts for Halloween, as I know I've not missed any posts that fit the topic. It also helps me to spark ideas for new blog posts as I consider new angles on a theme. If someone is looking for blog posts on a particular subject I can easily find all the ones that I've written to share.
I use these lists for scheduling posts for my Facebook page, sharing on Twitter, and to plan my Pinterest pinning. It was also really helpful when I recently had to sort out all the images on my blog!
I hope that my system makes sense, and has perhaps inspired you to have a think about using Trello for your blog! It has certainly helped me to become more organised in my blog planning.
If you'd like to see how other bloggers are using Trello in different ways you might enjoy these posts:
You Baby Me Mummy - How to Exploit Trello: Killing it as a Blogger
If you are looking for inspiration to fill your editorial calendar, you might find these posts helpful:
Blog post ideas for Craft Bloggers
Blog post ideas for Travel Bloggers
Summer blog post ideas
Autumn blog post ideas
And finally, if you want to see how I use Trello for other purposes you might enjoy these posts:
How I use Trello to plan a holiday
How I use Trello to organise my life
Subscribe to:
Posts (Atom)