Wednesday 30 September 2015

Four weeks in to a term with both children at school

I can't believe that it has been almost four weeks since Mia started school! It has definitely been an adjustment for us all. Mia has settled into school beautifully. She accepted it completely, trots off happily every morning, and settles herself down in the classroom with some colouring without a backward glance. Harry is doing well too, he has settled well into Year 2 and is enjoying his new topics.

Mia in particular finds the time after school a bit of a struggle. I try to console myself with the thought that she's been behaving all day at school (or at least we've not heard anything to suggest otherwise!) but when she's back at home with me she can release a full day of pent up emotions in a safe environment. That doesn't always help when that couple of hours before tea can feel like a bit of a shouty battleground when they can't settle to anything. I try to have a couple of activities on hand so that they've got something to get on with, and I've also restocked and rearranged our after school busy boxes, which keeps them entertained for a little while at least.

I've been very much enjoying my new freedom, even if it does feel a little self-indulgent at times. I've been tidying and cleaning around the house, without small children assuming that I've left home and abandoned them if I move more than two rooms away. I've been decluttering like mad, and have taken bags and bags of outgrown books and toys to the charity shop. I've cleared out and swept the garage and packed all the summer things away for the winter.

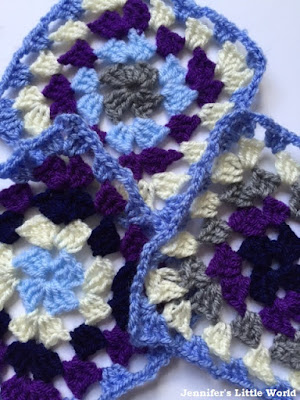
I've also been out for coffee with friends and had grown up conversations that lasted for a good couple of hours without any interruptions. I've even managed to teach myself to crochet, and I visited my Mum by myself and we crocheted together for a whole morning without any distractions!

Granny squares in progress

At my desk, I've been writing and planning blog posts, and managed to earn a little bit of money by doing so. I'm also saving up cardboard boxes for an eBay selling spree, and of course many times I just sit quietly for a few minutes with a hot chocolate, enjoying the silence in the house.

I do miss the children when they are at school , and sometimes I feel quite lost. But of course there is still plenty of looking-after-children to be done, with homework and reading, lunchboxes, making dinner, tidying and general entertainment and amusement. I'm also going to be helping out with swimming and reading at the school in their respective classes. It will just take me a bit of time to adjust!

Tuesday 29 September 2015

Review - The Yvolution Y Velo Junior Toddler Bike

This post contains Amazon affiliate links.

Just a couple of weeks ago I published a blog post about baby and toddler things that I wish we'd bought, and high up on the list was a balance bike. I've been trying to teach Harry to ride a bike over the summer but he still only has a small bike with stabilisers and he just can't get the hang of it. But I've seen lots of small children zipping about on balance bikes, and then suddenly they are riding a real bike, without stabilisers, and they seem to transition instantly.

So with Mia approaching the age when she really ought to be thinking about learning to ride a bike, I was delighted when Yvolution offered me the chance to review the YVelo Balance Bike.

Review - The YVelo Balance Bike from YVolution

The balance bike arrived while the children were at school. Normally I leave the building of such things to my husband, but he was away so I thought I'd have a go myself, and to my relief I managed it pretty quickly without any problems. There weren't that many pieces to put together, and the instructions were very clear.

Review - The YVelo Balance Bike from YVolution

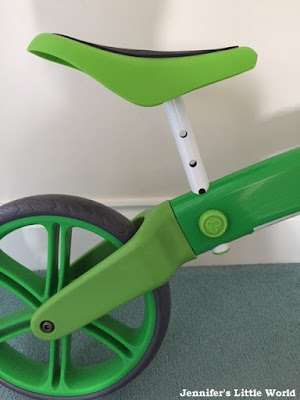
Then once built, it's really easy to adjust the saddle and the handlebars so it can grow with your child.

Review - The YVelo Balance Bike from YVolution

Mia was expecting a bike with stabilisers like Harry's, and when she first got on the bike she wasn't sure how to approach it. I found that the best way to get her used to using it was to actually let her ride it around the house (fortunately the layout of our house means that she can go around the rooms in a circle!), and she quickly worked out what she was doing after a bit of practice. But once she'd built up her confidence, she was flying about the house in no time and loving it.

Review - The YVelo Balance Bike from YVolution

We ordered her a cycle helmet which arrived a couple of days later, and so we ventured outside and she was flying off in no time.

Review - The YVelo Balance Bike from YVolution

She was absolutely thrilled with how fast she could go, much faster than Harry stuck behind with his little bike! She was getting on so well that we ventured further out down the road...

Review - The YVelo Balance Bike from YVolution

I was amazed at how quickly Mia picked up how to ride the balance bike. After just a few minutes of using it properly outside she'd learned to coast along without her feet touching the ground, and it was brilliant to see how well she was working out the best way to balance while riding. It's definitely going to make the transition to a real bike much quicker.

The YVelo balance bike is very light when you need to carry it around to put it away. Mia has toppled off a couple of times but that's to be expected when learning to ride a bike and it feels safe and sturdy. I like that the bike was so easy to put together, simple to adjust the height settings and it's going to be easy to clean when it gets dirty. The hand grips are padded and the seat looks really comfortable, it also has a built in steering limiter so that the child can control how much they turn.

It's especially noticeable to compare it to Harry on his first bike, it's going to be a lot more difficult to get him to take the stabilisers off as he doesn't have the balancing instinct that the balance bike helps to build - I'm going to have to let him have a sneaky practice on the balance bike when Mia's not looking. I really wish that we'd had one sooner, I would definitely recommend getting one for toddlers and pre-schoolers!

I received the YVelo Balance Bike in exchange for this review. The YVelo Balance bike is suitable for children aged 3+ with a maximum weight of 25kg.

Monday 28 September 2015

Sew Over It Knicker Kit from White Tree Fabrics

Recently I was very pleased to be invited to join the Blog Team at WhiteTree Fabrics. I was asked to choose a project to have a go with, and as I'm still quite a beginner when it comes to sewing I decided to choose a kit. After much deliberation I chose the Sew Over It - Knicker Kit (£12.50), because I thought that it looked like quite a quick and simple project.

Sew Over It knicker making kit from White Tree Fabrics

The kit contains everything that you need to make your own knickers - a pattern, fabric, elastic, cotton and full instructions. You do also need a sewing machine to sew up the kit. I've never made anything using a sewing pattern before so it was great to have something simple to start with.

Sew Over It knicker making kit from White Tree Fabrics

I managed to cut out the pieces successfully - I wasn't sure what size to make so I went with Medium and they were just right (I'm a dress size 10-12 on the bottom). There is quite a bit of leeway though in the sizing I should think, as long as you measure the elastic correctly when you come to finish them.

Sew Over It knicker making kit from White Tree Fabrics

Cutting out the pieces was the easy part! It took me a few read throughs of the instructions before I felt confident to begin sewing the pieces together, but I made sure that I wasn't disturbed and I took it slowly, and I was really pleased with myself when I was able to assemble the bits into something that resembled a massive pair of knickers! Sewing in the crotch lining was a little tricky and it took me a while to get my head around it as you needed to kind of twist it, but the instructions did make sense and if you had a little more experience in following a sewing pattern I don't think it would cause any trouble.

Sew Over It knicker making kit from White Tree Fabrics

The next part called for a zig zag stitch on the sewing machine to go all the way around the edges. I struggled with this a little bit as my sewing machine kept rolling up the fabric, even when I managed to change the foot to the special zig zag foot. So at this point I called in reinforcement and asked my Mum, very experienced with a sewing machine, to come and give me a hand. She was much speedier and more confident than me and she managed it without any trouble.

The last step is to sew in the elastic, again with the zig zag stitch. The instructions were clear but it was helpful to have my Mum there to show me how to stretch the elastic and keep the fabric taut while guiding it through the machine. Although I would have managed by myself, I'm not sure that they would have turned out so well!

Sew Over It knicker making kit from White Tree Fabrics

I'm very pleased with my frilly knickers! They fit well and they are very comfortable. It's a great little kit, very quick to make up if you know what you are doing, so probably best suited to someone with a little sewing experience. You could also reuse the pattern to make yourself a whole drawer full of knickers!

Sew Over It knicker making kit from White Tree Fabrics

I received the knicker kit in exchange for this review.

Thursday 24 September 2015

Stepping up our pizza making game with the G3 Ferrari Delizia Pizza Oven

If you are interested in making pizza outdoors you might also like my review of the Ooni Koda outdoor pizza oven!


Ram and I do love pizza. We've been making our own pizza for years - beginning with basic pre-made bases, moving on to making our own dough from mixes, then from scratch, both by hand and using the dough hook on my Kenwood mixer. We've even had great success with making pizzas on the barbecue.

Ultimately though our quest has all been about trying to replicate the most delicious pizzas that we've ever eaten, which we discovered on a trip to Naples some years ago and enjoyed again a few months back on our recent visit. This is the place to get them - L'Antica Pizzeria - and if you appreciate good pizza and are visiting Naples it's a must!

But with our recent purchase of a pizza oven, we have come very close to achieving pizza perfection, and it's been so successful that I had to share it here!

Ferrari Delizia Pizza Oven review

Ram spotted the G3 Ferrari G10006 Delizia Pizza Oven on special offer a couple of months ago, and it didn't take much consideration before we bought it. We actually bought ours directly from Amazon Italy for around £64 as that was the cheapest at the time. This does mean that it has a continental plug on it, but we picked up a socket adaptor very cheaply.

Pre-heating the pizza oven takes about ten minutes, so you can turn it on while you are preparing your pizzas. We find it best to make all the pizzas in advance and so we've bought a couple of these
pizza paddles so we can get a production line going. The pizza oven itself comes with a divided pizza paddle which is makes it easy to drop the pizzas into place for cooking but is a little awkward to prepare the dough on as it comes apart when you are trying to stretch the dough into shape. This is the divided pizza paddle in action as Ram gingerly places our very first pizza into the oven (it took a bit of practice to make round pizzas!)

Ferrari Delizia Pizza Oven review

When the pizza is in position you close the lid, and it takes about four minutes to cook the pizza. You don't use oil or anything, just flour, and it's very easy to take the pizza out using one of the pizza paddles, or just a wooden spatula. Here's the same pizza as it comes to the end of cooking:

Ferrari Delizia Pizza Oven review

And here it is ready to eat! Yes it's a bit misshapen, but you'll have to take my word for it that it really is delicious!

Ferrari Delizia Pizza Oven review

Ram discovered the pizza oven on the Hot UK Deals website (which he stalks), and the original post has developed into a brilliant thread which shows some of the ways that people have been using the ovens that they've bought. There are also some great tips on how to use it, for example different dough recipes and the sorts of things that you can use it to cook. You can see the post here (be warned, there's a very good chance that after reading it through you'll want one too!)

If you enjoy making your own pizzas I'd really recommend getting one of these. We haven't bought a takeaway pizza since we purchased it, so that alone has made us back the money that we spent on it!

Amazon links are affiliate, but we bought the pizza oven ourselves.

Wednesday 23 September 2015

Pom Pom Pig Keyrings

The theme for this months' Bostik Bloggers craft box was 'Back to School' and once again we received a lovely box of craft materials to inspire us.

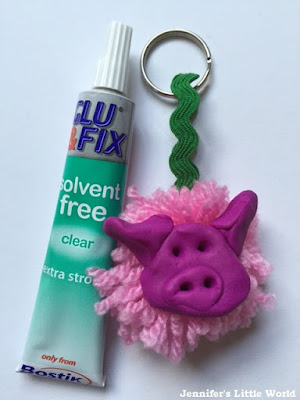
Fimo and pink pom pom pig keyring

With Harry I learned fairly early on that a keyring attached to his book bag was a great way to help both him and me identify it among the big pile in the box. I saw these really sweet Fimo and pom pom sheep keyrings, and so I decided that we'd change the idea slightly to make pom pom pig keyrings for our first craft.

Fimo and pink pom pom pig keyring

To make the pom poms we used a pom pom maker set which has plastic templates to use for making the pom poms. It's not really necessary as you can just use cardboard rings, but it's quicker and less fiddly to get started and it makes the whole thing sturdier as you're working on it. We used the medium size template and some pink yarn to make the pom poms. I made sure that the yarn I used to tie up the pom pom was quite long and I left the long ends hanging so that I could use them to attach the keyring later on.

Then we used some pink and purple Fimo to make pigs heads. Mia needed a little bit of help but Harry was happy to make his own. When they had cooled down I used some Bostik Glue & Fix to attach the Fimo head to the pom pom. I was really impressed with this glue, it stuck the Fimo to the yarn brilliantly and dried quickly to a clear finish.

Fimo and pink pom pom pig keyring

To make it into a keyring I cut a piece of coloured ric rac and made it into a loop which I secured tightly with a few stitches. I threaded a split ring through the ric rac to make the hanging part of the keyring, then used the long lengths of wool to tie firmly around the other end of the ric rac loop. Then I used another dollop of the Glue & Fix to make sure that the sewn part of the ric rac was fully covered by the yarn.

Fimo and pink pom pom pig keyring

Mia is so proud of her keyring hanging on her new book bag!

Fimo and pink pom pom pig keyring

The box of craft materials was provided to me free of charge by Bostik as part of the Tots100/Bostik Craft Bloggers Club. Amazon links are affiliate.

Monday 21 September 2015

Pinterest wins! When Pinterest inspiration was a success.

I love reading posts like this one - 31 Horrendous Pinterest Fail Monstrosities. But I also love seeing the fantastic things that people have made when inspired by something that they've seen on Pinterest. It's not just filled with unachievable examples of crafting excellence, there are some fabulous ideas out there and Pinterest has definitely been a huge inspiration to me over the last few years. You can see some of my own Pinterest wins here - My Pinterest Wins, and I asked around for other people to share some of the things that they have made, inspired by Pinterest, that turned out really well.

Pinterest wins - successful projects inspired by Pinterest

I've discovered some fantastic cake ideas thanks to Pinterest, like my rainbow cake and piñata cake. Sonia at Mummy Constant spotted some carrot shaped carrot cake slices and made these fantastic cakes, based on the design but using her own recipe.

Pinterest wins - successful projects inspired by Pinterest

Kath at Dreaming of a Craft Room made a fantastic birthday cake. Inspired by a pin she created this awesome birthday cake with a rabbit popping out of a hat!

Pinterest wins - successful projects inspired by Pinterest

Debbie at An Organised Mess also turned to Pinterest for birthday party inspiration when she was organising a Lego Ninjago party. Even though the original pin only provided a photograph she was able to recreate the design and make her own fantastic invitations:

Pinterest wins - successful projects inspired by Pinterest

Pinterest is great for home decor ideas. Jenny at The Gingerbread House was inspired by a Playmobil Clock and made her own brilliant version using vintage Playmobil figures:

Pinterest wins - successful projects inspired by Pinterest

Kath at Dreaming of a Craft room used Pinterest for ideas when decorating her daughter's room, and found some fabric wall decors. She recreated the method on her daughter's walls, and it looks wonderful!

Pinterest wins - successful projects inspired by Pinterest

Rachel at The Ordinary Lovely was inspired by decorative pinboards to create her own simple and lovely pinboard:

Pinterest wins - successful projects inspired by Pinterest

My friend Cherry also turned to Pinterest for organisational ideas and saw a kitchen command centre. She made her own version which is perfectly adapted to her family's needs, and I love the jam jars attached to the walls to hold pens and pencils!

Pinterest wins - successful projects inspired by Pinterest

 Pinterest is filled with ideas for things that you can make for your children. My friend Debbie pinned these lovely ruffle skirts and used the tutorial to make some gorgeous matching skirts for her daughters.

Pinterest wins - successful projects inspired by Pinterest

Cerys from Rainy Day Mum pinned a tutorial for repairing a broken pushchair seat and used the instructions to make a replacement seat that looks much prettier than the original!

Pinterest wins - successful projects inspired by Pinterest

Finally, Pinterest isn't just about arts and crafts. Joanne from Kids Days Out Reviews used Pinterest to plan a trip to the Lake District, and discovered Aira Force Falls. They had a great visit, and her daughters were able to see their first waterfall.

Pinterest wins - successful projects inspired by Pinterest

You can see some of my own Pinterest wins here - My own Pinterest wins

You might also like to read about how Pinterest has changed my life!

Thursday 17 September 2015

Sorting out for September and continuing the #minsgame

The children have been at school now for a couple of weeks, and I've been trying to use my new found time productively. I've been spending time working on my blog, and I've also been trying to get the house in order.

I mentioned before that I've been decluttering for a while now, and something that particularly motivates me is playing the #minsgame, where each day you declutter the same number of items as days in the month. I've picked it up again in September, although as I keep playing I'm finding it harder and harder!

I am terrible for hoarding craft things, especially odd bits and pieces that I'm sure I'll find a crafty use for someday. Like this ribbon, salvaged from clothes, gifts, boxes of chocolates and stuffed into a drawer. I also collect pretty patterned paper, buttons, beads and sequins.

Sorting out my house and playing the #minsgame

An area that I don't have too much of a problem with is clothes. I decluttered clothes again when I was packing for our holiday in August. I always find packing for a holiday is a great way to declutter clothing because you can see what you've got and you get to the back of drawers to find the things that are outgrown.

I've also been taking advantage of the children being out of the house to go through their toys and books and remove all the things that they've grown out of. I did choose Mia's first day at school to go through their baby board books which with hindsight wasn't the best idea, I did find myself shedding a tear or two as I packed up some of their well loved board books. But the local charity shop had a bumper day when I turned up with all my bags (and I kept plenty of favourites)!

I've also been trying to organise their toys a little better. I recently bought this pocket organiser for the back of a door to go inside their toy cupboard and it's been brilliant, it's a great place to stash all the odd little bits and pieces that go with toys and keep them all together. I'm particularly pleased with how well it stores the Barbie type dolls, which along with a few of my old ones Mia is accumulating at an alarming rate.

Sorting out my house and playing the #minsgame

I spent a happy evening brushing their hair and dressing them in different outfits. Mia was delighted to come down in the morning and see them - she thought that they were all new dolls! It's amazing how they don't notice the things that they see every day, and it made me realise the importance of toy rotation and putting things away for a while so that they feel new when they come back out.

I've found that taking part in the #minsgame has made a huge difference to my decluttering, it's a system that really works for me. I'd definitely recommend giving it a go if you are trying to declutter! You can find out more information here - #minsgame

Amazon link is affiliate.

Wednesday 16 September 2015

How to make a simple Halloween tree

Recently we were making some hanging Halloween decorations, and I was trying to think of somewhere that they could be hung for display. Then I remembered the simple homemade Easter tree that I made earlier in the year, and how it's a shame that it spends most of the year packed away. So I decided to bring it out and see what I could do to make it look a little more spooky for Halloween!

How to make a simple Halloween tree


You can find the instructions for making the basic Halloween tree here - how to make a wire tree for displaying ornaments. All you need is some sturdy wire and tissue paper, white paint, a small flower pot for the stand and any other decorations that you have around to make your tree look nice and spooky.

I found some thin black netting which I wrapped around the flower pot base, then I covered the Easter straw inside with some dyed orange rice and pumpkin seeds. This is actually part of our Halloween sensory tub, which I made a few years back and is still looking good!

Halloween tree base with pumpkin seeds

We are still building our collection of hanging Halloween decorations, something that I need to get on with! The colourful skulls are from a Baker Ross kit, and the other hanging black spider decoration was from Asda last year.

How to make a Halloween tree

At the base of the tree is a small plastic pumpkin, and the pumpkin gift bag was a simple craft that I created using orange and black felt tied with ribbon for holding small Halloween treats.

Halloween tree base with toys

It will be set out on the sideboard in our house and I'm sure it will be added to as the season progresses!

Tuesday 15 September 2015

An afternoon crafting with Hillarys

On Sunday, I was invited to spend some time crafting with Hillary's, using some of the fabrics from their new Autumn/Winter Jewel collection. The collection consists of four gorgeous colour palettes - Sapphire, Jade, Amber and Ruby - striking colours that will fill your home with richness and warmth.

Along with a group of other bloggers, I spent the afternoon at The Marwood in Brighton, enjoying a break from the little ones to cover a jewellery box and make a Suffolk Puff keyring.

A crafty afternoon with Hillarys

Our crafting was led by The Crafty Hen, a company that organises crafty workshop sessions for a whole range of celebrations. I wish I'd heard of them when I was thinking about my hen do all those years ago, it would have been perfect! They gave us a quick demo of what we needed to do, handed out detailed instruction sheets, and were on hand to help us if we had any problems.

A crafty afternoon with Hillarys

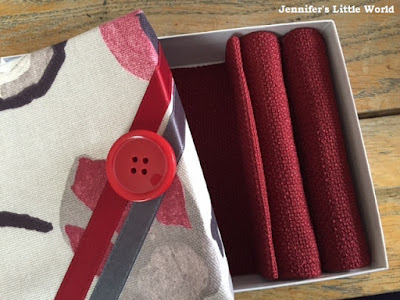
We started by covering a jewellery box. We used double sided tape to secure the fabric in place, and decorated with ribbons and buttons. Then we made an insert for the box, and used rolled up wadding to create a ring holder. I've never made anything like this before and it was great to have someone to show us exactly how to do it!

A crafty afternoon with Hillarys

For our second craft, we made Suffolk puffs, which we could use to decorate a range of accessories, from headbands to brooches. I chose to make a simple keyring and used the same fabrics as before. I loved making the Suffolk puffs, and I can't believe I've not tried them before, I'm definitely going to be looking for a project which involves using them! 

You just need to cut a circle of your fabric, then use a running stitch to sew around the outside edge. When you've finished you pull the thread tightly to gather the circle until the gathers meet in the centre, then secure it with a few stitches.

I made a larger puff in the patterned fabric and a slightly smaller one in the red, with a large button sewn on the front to hide gathered stitching. I'm so pleased with it!

A crafty afternoon with Hillarys

I had a great afternoon, and I love the bits that I made, thank you very much to Hillary's for inviting me!

Monday 14 September 2015

Baby and toddler things that I wish we'd bought

Baby and toddler things that I wish we'd bought

I often see lists that people have made of all the unnecessary things that they purchased for their babies and toddlers. It made me think of the things we didn't buy that, with the benefit of hindsight, we really should have done! We either didn't think were necessary at the time, or else I didn't consider them until it was too late to justify the purchase.

So here is my list of things that I really wish we'd had!

Top of the list is a video monitor. We ended up buying quite a pricy monitor anyway, so it wasn't the cost that put me off, I was just worried that I'd end up obsessed with watching the baby. But I think that we would have found one really useful, and would probably still be using it now. All those times in the middle of the night when I was woken up by a whimper and didn't know if the baby had gone back to sleep or whether it was the prelude to a two hour screaming marathon. Those occasions when I'd put a small toddler down for a nap, and I wanted to check if they were still asleep or up to mischief. Those very infrequent mornings when a small child actually slept past 6am, and I started to worry, but didn't dare go in to check in case they woke up.

On a similar note, I think that a two way baby monitor would also have been a good investment. We still use monitors for the children (I know, they are too old really, but we have a large house and we like to watch the television loudly downstairs in the evening while they are sleeping) and it would be nice in the mornings when they wake up and shout for us to call back and tell them to go back to sleep (ha!).

We definitely should have bought a decent buggy board. Harry was never a particularly good walker, and I used to push Mia around in her car seat on wheels because that configuration on our travel system created a sort of step that Harry could stand on. A proper buggy board would have had lots of use and been far more comfortable for all of us to use.

Also when it comes to being out and about, I'm sure that Harry would be much better on his bike now if we'd bought them a balance bike. I've seen tiny toddlers whizzing about on them, and they progress brilliantly to proper bikes. Harry is still riding about on a toddler bike with stabilisers which I'm a bit embarrassed about, and Mia has never even ridden a bike on my watch. We didn't get them one because they already had a Scuttlebug and scooters which they've had loads of use out of, and it just seemed a bit excessive to get them that as well.

Finally I also really wish that I'd invested in a nice change bag right from the start, instead of using the one that I got free when I joined the Boots Baby Club. To be fair it did the job, fitted well in the pushchair, has lasted incredibly well and is still in use packed up with spare clothes in the boot of the car. But I spent so much time carting it about, it would have been lovely to have a pretty one, not to mention a baby purchase that was something for me out of all the money we spent on things for the children.

I suppose in the end that's not a huge list (and probably not nearly as long as the list of things that we bought and didn't actually need, which I don't dare to make).

What would you add? I'd love to know!