Friday, 9 August 2013

Dinosaur Day

So last week we had a Space Day, and this week it was Dinosaur Day! As before, I set up the kitchen table. I don't have a photo unfortunately, but I used an upturned bowl with a cup on top as the basis for a volcano which was covered in a dark red shawl with some of Ram's pink and red ties coming out of the top to represent lava. Then I set up all our plastic dinosaurs around the base. It was rather good, if I say so myself.

How to hold a dinosaur themed day for children

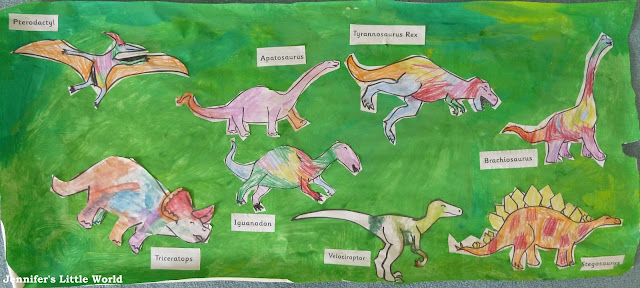
We began Dinosaur Day with another poster making activity as this was so popular last time. The children painted a large piece of paper in different shades of green and yellow, then Harry coloured in some printable dinosaur colouring sheets (free download), again from the fantastic Twinkl. I told him that no-one really knows what colour dinosaurs were, although we can make a good guess, so he took me at my word and produced some fantastically bright dinosaurs. He cut them out and we stuck them on with a name label.

How to hold a dinosaur themed day for children

How to hold a dinosaur themed day for children

It wouldn't be a themed day without a special cake to celebrate, so we made a huge dinosaur cake. It came from a recipe in a cookery book that I had when I was little. The book is out of print now, but the photograph below shows how you can cut a circular cake into a dinosaur shape. It wasn't quite as easy as it looks and I did have to improvise a bit, but I think we made a passable dinosaur.

How to hold a dinosaur themed day for children

We iced him and decorated with smarties and chocolate drops. The original dinosaur in the book has marzipan spikes too but I didn't have anything to improvise with.

How to hold a dinosaur themed day for children

Then we made some salt dough dinosaur fossils. I used my standard salt dough recipe - 2 cups flour, 1 cup salt and 1 cup water - and we rolled out some rough circles. Then we pressed in plastic dinosaurs, shells and stones to make imprints. The 'fossils' were baked in the oven for about half an hour then left out for a few days to air dry. I'll be hiding them in the sand pit for the children to excavate! You can find full instructions for the dinosaur fossils here.

How to hold a dinosaur themed day for children

We finished with some dinosaur pencil control worksheets (Twinkl subscriber resource). Harry really likes pencil control activities at the moment so I'm doing everything that I can to encourage him in preparation for starting school.

Another dinosaur activity that would have fitted in well is a sensory tub like our Dinosaur Island which Harry had a lot of fun with.

How to hold a dinosaur themed day for children

Again, we had a huge amount of fun with our themed dinosaur day.

If you feel inspired, here you can find the posts about our other themed days:

Space Day
Antarctic Day
Under the Sea Day
Transport Day
Australia Day
Roman Day
Disney Frozen Day Beach Day

And some tips on how to hold a themed day at home for children.

Wednesday, 7 August 2013

Worthing Playday 2013

The 7th August 2013 was Playday. Playday is the national day for play in the UK, and as well as a celebration of children's right to play, Playday is a campaign that highlights the importance of play in children's lives. Every year, across the UK all sorts of organisations host Playday celebration events. I first encountered Playday the summer after Harry was born, when I met a group of friends at Broadwater Green in Worthing to see what was going on. Our babies were too small to appreciate it, but I remember thinking that it would be wonderful to go along when they were older.

We didn't make it for the next few years, but this year I was much more aware of the campaign, and with two children that are now the perfect ages I took us along. Worthing really does make a good effort. There were lots of stalls with friendly people to chat to, including some of the staff from Harry's old nursery and some ladies that I have chatted to recently on Twitter under my alter ego @worthingmums.

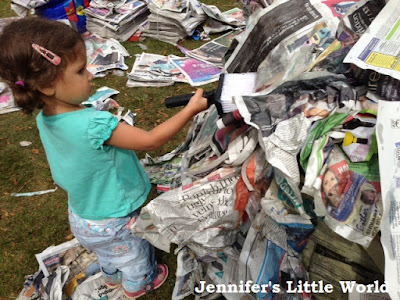
Harry and Mia were most fascinated by two old cars, which were available for the children to decorate with felt pens and plenty of newspaper and wallpaper paste. Harry didn't want to get messy so he wouldn't touch the brushes, but Mia got stuck right in, quite literally!

Worthing Playday 2013

Next door was a massive collection of cardboard boxes, cardboard tubes, tape and large pieces of fabric for the children to create with. Harry demanded a pirate ship, but when I stalled creatively he got on with it by himself. He was also fascinated by another little boy dressed up as a robot, although he wasn't too keen when I tried to replicate the look and sellotaped him up inside a cardboard box.

Worthing Playday 2013

Finally, the activity which held their interest for the longest was a huge water play area, with long stretches of raised guttering, buckets of water and an assortment of jugs, ducks and balls. We saved this until last because I could see myself going home with two drenched children. They escaped quite lightly in the end, but only because I narrowly managed to save Mia from a face plant into a water filled tuff spot.

Worthing Playday 2013

There was plenty of other messy play going on as well, with paddling pools filled with shaving foam and a soapy waterslide. There were also quieter activities, with areas for babies to play, ball pits, play dough and crafts, as well as a bouncy castle and face painting.

Tuesday, 6 August 2013

Review - DollyMix Design craft kits

My blogging friend Kaz from Bubba Babble has recently started a new business - DollyMix Design. Having fallen in love with washi tape like many of us crafters, Kaz has begun putting together some starter kits so that people can try it out for themselves, as well as sharing some ideas and inspiration. I was delighted when she asked me to try out one of the kits and see what ideas I could come up with. I received the Masking Tape Sticker Craft Starter Kit, with contents as shown below.

DollyMix Design craft kits review

Here's what was in my box - five large wooden clothes pegs and ten mini pegs. A pack of washi style masking stickers with 27 sheets of gorgeous designs, a mini canvas, cocktail sticks, a full roll of twine, blank cards and envelopes, mini heart cutouts and plenty of tissue paper. It was packaged to fit neatly through the letter box, and there were also some handy tips for ways to use the different materials.

I decided to start with the mini canvas. Each sticker sheet is divided into strips of different widths with circular stickers at the bottom. They were the perfect width to make a frame for the mini canvas, and I used some scraps of felt and fabric to make a little bird motif for the centre.

DollyMix Design craft kits review

The sticker strips were also just the right size to cover the wooden clothes pegs. I used a glue gun to stick three to the side of our noticeboard in the kitchen to hold odd scraps of paper and photos that Harry brings back from nursery.

DollyMix Design craft kits review

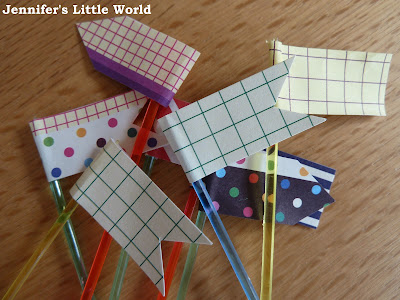
I also used the sticker strips to make little flags from the cocktail sticks. They could be used to decorate cupcakes or party sandwiches, and I expect some of them will end up in the sandpit for sandcastles!

DollyMix Design craft kits review

Next I enlisted the children and we all had a go at some tissue paper flowers. We made them very simply - cut the tissue paper into squares about 8cm wide then layer up five or six sheets of alternating colours. Scrunch them up around a central point, and if you like you can secure them with a staple or tape before stringing them up on the twine to make bunting. They would be a lovely party decoration, and there is plenty of tissue paper and twine to be able to make several strings.

DollyMix Design craft kits review

Finally I tried out card making. It's not something that I've really done much of before, so I kept it simple with some twine and mini pegs and hung up some of the heart cut outs. You could also cut out letters to spell a name or peg up pictures which mean something to the recipient.

DollyMix Design craft kits review

All this crafting, and I still have plenty left in the box!

Disclaimer - I was sent the kit to review.

Monday, 5 August 2013

Weaving with a cardboard box loom

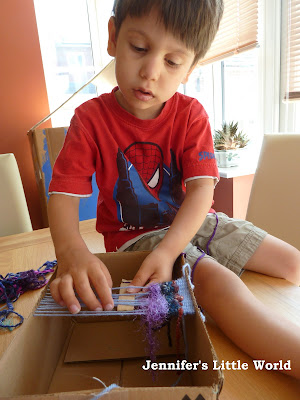
I used to love weaving when I was little. It's easy to do, very satisfying, and you are left with something useful at the end. I'm not sure what put it in my head the other day, but we had a sturdy cardboard box and some wool lying about, and so I made a simple loom for Harry to try out.

Weaving with children on a cardboard box loom

All you need is a strong cardboard box and some wool. Cut the top flaps off the box and make some notches down each side about half a centimetre apart. The size of your finished weaving will be determined by the width of your box and the number of notches that you make. Then thread the wool between the notches to form the warp threads. Knot firmly to secure. Use some of the cardboard from the box flaps to make a comb for pushing down the wool and a shuttle to thread the wool through.

Weaving with children on a cardboard box loom

Then choose the wool that you would like to use for weaving. It's good if you can find a selection of different colours and textures to keep your child's interest, and you can also use ribbon which will make the process quicker as it is thicker. Tie firmly to the shuttle and weave in and out, leaving a thread hanging out at the beginning. Make sure that you don't pull the weaving too tight, and every few rows use the comb to push the threads neatly together.

Weaving with children on a cardboard box loom

When you have finished you can either sew in all the loose ends, or just knot them together and cut them off. Once knotted you can also leave them there to make a fringe. It's best to start small so that your child is able to complete a whole piece in one go. Younger children will need some supervision to make sure that they remember to alternate going over and under between the rows and don't get in a tangle, but older children will soon be able to manage by themselves.

Weaving with children on a cardboard box loom

The finished piece of weaving can be used as a bookmark, or as a little mat for a dolls house or play set. If you really get into it you could turn them into gifts for adoring relatives like mats, or sew them in half to make phone or glasses cases. You could also weave in beads for some extra texture. It's a great activity for developing fine motor skills, and also for learning a little bit about how fabric and clothes are made.

If you look on YouTube there are pleny of videos showing weaving in action that you can watch with your child, both mechanical and by hand. We watched a few and I found this one particularly good as the loom is just a slightly advanced version of the one that we made:

Saturday, 3 August 2013

Sewing a simple doll's dress

This simple doll's dress was another craft inspired by Pinterest! This month I finally made something which I planned quite a while ago - a little dress for Mia's doll. The original dress could be found at The Blueberry Moon (sorry, the link is no longer available) as part of a series of doll's clothes. I used a free pattern that the designer had made available, it's  reversible, and it really is very simple to make. I'm not that great at sewing and I managed it without a sewing machine.

How to sew a simple doll's dress

The spotty fabric is from a pillowcase that I bought in Asda (a great source for cheap, colourful fabric!), the flowery fabric is a piece from a fat quarter that I had in my stash. It doesn't take very much fabric to make, and this is the finished dress all sewn up:

How to sew a simple doll's dress

And here it is being modelled by dolly. She is only a small doll (My First Baby Annabell) but I think it may be stretching it a bit to call it a dress as it doesn't offer much in the way of cover! Fortunately we have some trousers for her to wear too so I've been calling it a top!

How to sew a simple doll's dress

If you'd like to follow me on Pinterest, you can find all my Pinterest boards here.

Thursday, 1 August 2013

Space Day

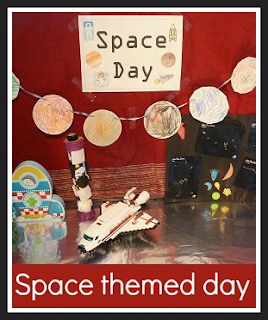
We are counting down the days now until Harry starts school, and I'm trying hard to make them memorable. It's getting a lot easier as Mia gets older, I have struggled in the past to come up with things that entertain them both at the same time. I thought it would be really fun to have a whole day themed around a particular topic. Pinterest is the place to go for amazing crafts and activities, and a space rocket I saw made from toilet rolls inspired me to come up with 'Space Day'.

How to hold a space themed day for children

I did some planning the day before, and enlisted Harry to help me. We made some planet bunting by cutting out and colouring in circles of card to string up, and also built our own rocket from things in the recycling box. We even made a space themed cake, which was iced with black icing and decorated with lots of chocolate stars. Once the children were asleep, I covered the kitchen table with tin foil and collected together some of his space themed toys. Then I came up with a list of activities ready for the next day.

How to hold a space themed day for children

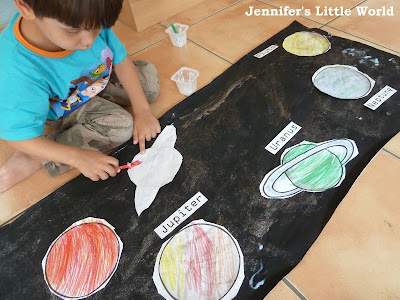
Our first activity was making a Solar System wall chart. I used a long roll of paper that I bought from Ikea, painting first with black paint and then over with glittery paint. Fortunately it was nice enough to paint outside, and yes, they are still in pajamas, I know from experience that black paint is very messy! They both loved the painting.

How to hold a space themed day for children

Then I used some free planets colouring posters (free download) which I found on the Twinkl website. Harry coloured them in according to colours which I found on-line, cut them out and then stuck them on to the background. I made him some name labels to go with them. You will notice that our Solar System includes Pluto, which is technically not a planet, but I'm afraid that I couldn't bear to leave it out!

How to hold a space themed day for children

We've stuck it up in Harry's bedroom, which will be looking like a classroom before long!

How to hold a space themed day for children

We also did some baking. As well as the space cake we made planet biscuits - circular shortbread recipes with a mixture of green and blue icing and melted chocolate drizzled over the top - delicious!

How to hold a space themed day for children

For some educational activities for Harry I found some more resources on the Twinkl website. We used the space themed pencil control worksheets (Platinum resource) and a space word mat (Platinum resource). I also printed out a split pin astronaut (free download) to make that is really sweet and that Harry has been playing with a lot. There were lots of other space themed resources over there too, we just didn't have the time to get to them all!

As a final craft, we made alien masks from paper plates. They are very easy, just paint a paper plate green and when it's dry decorate with various bits and pieces. Cut eye holes, add a pipe cleaner for antennae and knot in some elastic. If you don't have any elastic you can just use a stick or wooden spoon to hold it in front of the face. They both made these and ran around with them on.

How to hold a space themed day for children

I really, really enjoyed our space themed day. It was great to have a whole day's worth of activities planned in advance, and no-one got bored. I'm now planning plenty more themed days!

If you feel inspired, here you can find the posts about our other themed days:

Antarctic Day
Under the Sea Day
Dinosaur Day
Transport Day
Australia Day
Roman Day
Disney Frozen Day Beach Day

And some tips on how to hold a themed day at home for children.

Wednesday, 31 July 2013

A day at Portsmouth Historic Dockyard with young children

Last year, we were sent some Epic Straws to play with and review. They were, and still are, a huge hit in this household. I'm afraid that I have to hide them, otherwise Harry would be playing with them all the time and we would have constant puddles all over the floor! With my post, I was lucky enough to be chosen as the winner in the competition hosted by BritMums, and I received a fantastic £200 of Virgin Experience vouchers. We deliberated for a long time over how to spend them, and this month we finally exchanged them for some days out vouchers. The first one was for Portsmouth Historic Dockyard, and we visited on a lovely hot day last week.

Portsmouth Historic Dockyard is made up of three large historic ships - HMS Victory, The Mary Rose and HMS Warrior. Your site ticket also includes a Harbour Tour and entry into several other museums and attractions. There's definitely enough there to fill up your day.

The new Mary Rose museum only opened a couple of months ago, and as it's popular you must choose a time slot to visit when you buy your tickets, it's definitely worth making sure that you arrive early. Once in you can spend as long as you like there. It's incredible really, the Mary Rose was built in 1510, sank in 1545, was rediscovered in 1971 and salvaged in 1982. The museum is very dark inside, and you view the ship through small windows in a corridor down one side. This makes it a little difficult to get a sense of the scale of the ship, although this is only a temporary measure to dry out the ship before it is opened up in five years time. The most impressive part of the visit is towards the end of the tour, when you ascend the height of the ship in a glass sided lift and can really appreciate the sheer size. Among the accompanying exhibits, faces of some of the crew members have been reconstructed and they are presented alongside the items with which they were found - identifying among others a carpenter and archer. It's all fascinating.

Portsmouth Historic Dockyard visit

Next door is HMS Victory, Nelson's flagship and site of his death in the Battle of Trafalgar in 1805. She has been restored as she was then, and you can take a self-guided tour around the ship. Pushchairs can't be taken on board, so you'll need to carry little ones (and in our case also bigger ones) up and down lots of flights of narrow stairs! There is lots to see, and the children loved exploring the ship. Harry in particular was very taken with the cannons, and spent quite some time pretending to load and fire them.

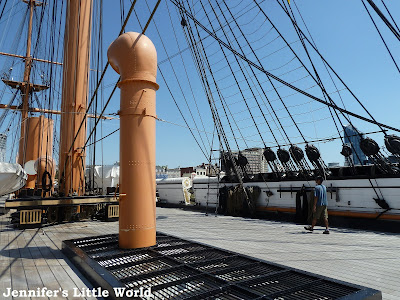
HMS Warrior was launched in 1860, and was the world's first iron-hulled and armoured warship powered by steam as well as sail. Again, you are free to take yourself around. It's very spacious inside and you can roam across four decks, although it's a bit scary and dark down at the bottom and Harry made me turn back!

Portsmouth Historic Dockyard visit

We found a nice spot inside the National Museum of the Royal Navy, where there is a lovely enclosed area set aside for young children, including toy ships, books and jigsaws. We spent quite a while here enjoying some chill out time, and it's well worth looking for if you are visiting with little ones. We also spent quite a bit of time in the Action Stations attraction. Although at first glance it seems more suited for older children, on the first floor there are some nice interactive exhibits. We didn't manage the Harbour Tour on this occasion as it was very hot and a long day, but as all tickets are valid for a year after purchase we'll definitely be fitting in another trip or two before they expire!

We used the rest of my winnings on tickets to Whipsnade Zoo, and Ram and I are also going to enjoy a chocolate making workshop. Look out for how we get on with those!