Wednesday 30 November 2011

Mealtimes with a baby and a toddler

The thing about babies is that they change so quickly. It means that you are constantly kept on your toes with a routine that changes every couple of weeks, but it also means that, especially second time round, you realise that each stage is only a passing phase and soon you'll be worrying about something completely different.

We're in a transition phase with mealtimes at the moment. I like us all to eat dinner early at 6pm, because Harry isn't the best of eaters and it helps if he sees us all eating together. For the first few months Mia slept through dinnertime. Then she was too awake to want to sleep, but was getting tired and so she would scream at the top of her lungs. That wasn't a fun phase. Now she is old enough to be eating dinner herself, but because she is still spoon fed, it's easier if I can feed her separately.

So I now give her a puree at about 5pm (in the hope that she will still be hungry enough at bedtime for her milk) and then sit her in her highchair at the table with us while we eat with a few toys, so that she can watch us and get used to it. I've tried giving her little bits to try, but she hasn't got the hand eye co-ordination yet for finger foods.

Hopefully this will just be a short phase, and it won't be long before she can actually eat with us as well. I say hopefully, because this is currently how we now spend our dinner:

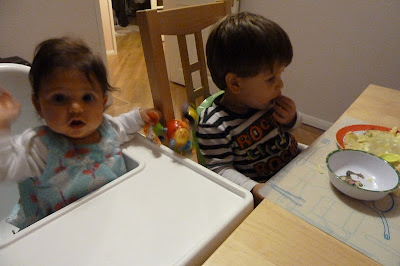
Mia throwing her toys on the floor and me picking them up.

Mealtimes with a baby and a toddler

Harry wondering what Mia has got that he hasn't.

Mealtimes with a baby and a toddler

Harry appropriating the toy that he likes the look of best and preferring it to his dinner.

Mealtimes with a baby and a toddler

At least I know that this is only another phase, and it won't be too long before we can all eat together in a civilised manner!

The Tell Me About Yourself Award

So I finally got around to coming up with some fascinating things about myself to share for the Versatile Blogger Award, and now I've been tagged with another award and I need to think of some more interesting things! I hope that they are interesting enough, you may notice that most of these things relate to my life pre-children, perhaps I was more exciting then!

I have kindly been tagged by Trouble Doubled, so I would like to say thank you very much, it still surprises me that people other than my Mum and immediate family are looking at my blog! I need to reveal seven things about myself and then pass the award on to another fifteen bloggers. So without further ado:

1 - I love painting my nails, although these days I don't have the time to sit around and wait for them to dry. When I was a teenager I had such a large collection of colours that I could paint half of each fingernail a different colour and still have some left over.

2 - I studied German at university and spent a year living in Germany. I still never fully got to grips with those adjective endings though.

3 - Most of the books on my bookshelf are childrens' books that I've read so many times I practically know them by heart. Enid Blyton features heavily, also the What Katy Did books and the Blue Door Theatre books.

4 - Although I now have a smartphone, I still feel a bit of nostalgia for my old pink Motorola phone. Things were so much simpler then. Also no-one would ever have tried to steal it.

5 - I can play music by ear well enough that I can pick out simple tunes on childrens' toys. When Harry was a baby I borrowed for him an Octotunes from the toy library and entertained him by playing songs from In The Night Garden on it. (Search for Octotunes on YouTube and you will see that I am not alone).

6 - At school, I won a prize for RE. This was less due to my interest in the subject and more down to my ability to memorise facts and regurgitate them into an essay during an exam. In this case, a long forgotten yet extensive knowledge of the rituals and stages of the Hajj pilgrimage.

7 - I can touch type at about 85 words per minute. This is how I have time to write a blog.

I'm not very good at tagging anyone in these things. So I will say what I usually say, if you would like to take part then please consider yourself tagged!

Tuesday 29 November 2011

10 activities to do with toddlers and bubblewrap

When we last moved house, the price that we paid for removals included all packaging materials. Imagine my delight when we were presented with not one but two giant rolls of bubblewrap. Of course some of it was used to package our precious possesions, but we had a good amount left over. Not to mention the fact that along with jiffy bags and nice cardboard boxes it is something which I hoard anyway, so I always have a generous amount hanging around.

Bubblewrap activities for toddlers

So I've put together ten crafts and activities for toddlers using bubblewrap.

  • The most obvious thing to do - pop the bubbles. My toddler couldn't manage it with his fingers, but if you put it on the floor and jump on it you can make some satisfying pops! Or you could try hitting it with a toy hammer or pricking with a cocktail stick.

  • Make an aquarium picture. Use the bubble side of bubblewrap to print with blue paint onto blue paper or card. For ours we glued on fish cut out from silver paper, and used shredded green paper for plants.

bubblewrap print aquarium craft


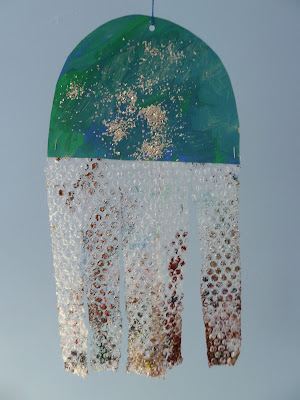
  • Make a hanging jellyfish with bubblewrap tentacles. 

bubblewrap jellyfish


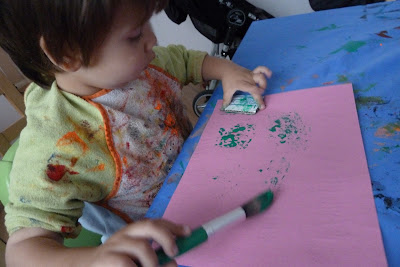
  • Make printing blocks with shapes cut from thick cardboad and covered in bubblewrap. This is a great idea for themed wrapping paper. You can also take a cardboard tube (a thicker one is best, like from cling film or tin foil) or an old rolling pin and cover with bubblewrap, paint, and roll over the paper.

bubblewrap printing


  • Paint and collage onto it. If you press tissue paper over the painted bubblewrap, the coloured circles will show through and make a really colourful piece of art work.

bubblewrap collage craft


  • Make a popping game to teach numbers, letters, shapes...anything really! You just write onto or behind the bubbles and then get your toddler to pop them as you name them. This is a good activity for the bubblewrap that has larger bubbles.

  • Cut the bubblewrap into strips and use it to decorate a carwash. You can go small, and make walls out of Duplo, or go large and use a big cardboard box. Just fasten long strips over one side so that they hang down for the cars/trains/people to go through. You can use bubblewrap on the floor of the carwash too to represent the bubbles.

  • For an unusual edible craft - use bubblewrap to make toppers for fairy cakes. Such a simple idea, and they look so good!

Children should always be supervised when playing with bubblewrap.

Monday 28 November 2011

The Versatile Blogger Award

As part of this award, I've been asked to come up with some facts about myself. So here goes!

1 - I had two weddings (to the same person!)

2 - I hate having my hair cut. I pretend that it is because of the cost, but actually I just hate having it done. I then spend a lot of time complaining that my hair is too long and sheds everywhere.

3 - I dream of a minimalistic lifestyle living on a canal boat, but I'm too much of a hoarder.

4 - I like collecting things, but they have to be free. Examples - shells, sea glass, promotional postcards, stickers, confetti and bubbles from weddings.

5 - I am quite well travelled, in my life pre-children that is. In 2007 I visited nearly every continent -  Europe (Belgium), Africa (Egypt), Asia (Singapore), Australia (all over) and America (Chicago).

6 - My first job was in a library and I loved it. I wouldn't be surprised if I find myself working in a library again at some point in the future.

7 - I can count to ten in Japanese


Sunday 27 November 2011

The end of touch typing?

When I was 16, I had a lovely long summer break after finishing my GCSEs. I wasn't a typical teenager, because in a rather geeky fashion I chose to spend some of my free time teaching myself to touch type. Back in 1996 there were not nearly as many home computers around as there are now, and I had barely even heard of the internet. But in the years that have passed since, I have repeatedly congratulated myself on my foresight, because I have benefited a lot from this skill. From typing essays at college and at university, writing documentation for work right through to writing this blog, I can now type very fast and fairly accurately.

But now I've found that on gadgets with a touchscreen keypad it is impossible to touch type. When you touch type, you need to rest your fingers on the home keys, and you can't do this on a touchscreen because it will register the key press. Also the letters are often too small to hold your fingers over comfortably anyway. So it's back to typing with one or two fingers again. The reason that I have resisted the lure of a tablet style touchscreen device is because I find it so much easier to write using a keyboard. But I can see that in a few years time everything will be touchscreen and keyboards may well become obsolete, along with typewriters.

So is there any point in still learning to touch type?

Thursday 24 November 2011

Homemade embroidered felt numbers

I love crafting with felt, it's so easy to work with and you can buy felt in such lovely bright colours. I made these embroidered felt numbers partly to help Harry with number recognition, and partly because I thought they'd be fun to make! They were very quick to put together once I'd cut out the felt and I had fun coming up with different ways to decorate them.

Hand embroidered felt numbers toy for children

To make a template for the felt numbers I chose a font that I liked (Verdana) in Word and enlarged it on the screen. Then I just traced over the numbers onto scrap paper. The numbers are made from two pieces of felt the same colour cut to the shape of the number, one side is embellished and then they are sewn together. To embellish them I used a variety of sequins, beads and embroidery in contrasting colours. Because they are tactile you can run your fingers over them to trace the shape.

Hand embroidered felt numbers toy for children

You could also add magnets to the back so that they can go on the fridge or radiator, or you could back them with cardboard to make them sturdier. I'm hoping that they will be useful to teach Harry to recognise numbers, and for counting games - for example putting them in the correct order or gathering together groups of items to match the number.

Hand embroidered felt numbers toy for children

Wednesday 23 November 2011

Harry's first letter to Father Christmas

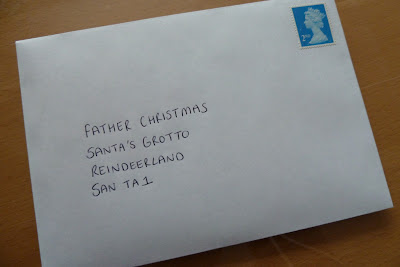
I remember writing to Father Christmas when I was little, and how magical it was to get a letter back. These days the procedure is the exactly the same.

Child's first letter to Father Christmas

Luckily Harry is still easily pleased. He has drawn what he would like from Father Christmas this year - a pink train. He has also managed an 'H' for Harry. I added in the crucial address details before we put it in the envelope!

Child's first letter to Father Christmas

I really hope that Father Christmas has the time to write back!

Tuesday 22 November 2011

Easy lemon drizzle cake

I hadn't made this cake before, in fact I had to go out and purchase a loaf tin to bake it in (with hindsight, a lemon juicer would also have been a useful purchase).I found the recipe on BBC Good Food, and I chose it because it didn't have too many ingredients and it looked quite easy to make. It is rather yummy, if I say so myself.


Lemon drizzle cake recipe


Ingredients:
  • 225g unsalted butter, softened
  • 225g caster sugar
  • 4 eggs
  • finely grated zest 1 lemon
  • 225g self-raising flour
Drizzle:
  • juice 11⁄2 lemon
  • 85g caster sugar
Method:

  1. Heat oven to 180C/fan 160C/gas 4. Beat together 225g softened unsalted butter and 225g caster sugar until pale and creamy, then add 4 eggs, one at a time, slowly mixing through. Sift in 225g flour, then add the finely grated zest of 1 lemon and mix until well combined. Line a loaf tin (8 x 21cm) with greaseproof paper, then spoon in the mixture and level the top with a spoon.
  2. Bake for 45-50 mins until a thin skewer inserted into the centre of the cake comes out clean. While the cake is cooling in its tin, mix together the juice of 1 1/2 lemons and 85g caster sugar to make the drizzle. Prick the warm cake all over with a skewer or fork, then pour over the drizzle - the juice will sink in and the sugar will form a lovely, crisp topping. Leave in the tin until completely cool, then remove and serve. Will keep in an airtight container for 3-4 days, or freeze for up to 1 month.
To avoid waste, I only used one lemon - the zest for the cake and the juice for the drizzle. To make up for less lemon juice in the drizzle I used just 50g sugar which made the cake plenty lemony enough for us.


Lemon drizzle cake recipe

Sunday 20 November 2011

Christmas busy bag activities for toddlers


Readers of this blog will know how much I like making busy bags! I've been putting together some busy bags with a Christmas theme. Some of them will come with us when we go on holiday before Christmas, and the others will be ready to pull out for a Christmas activity when we need something to fill a bit of time. Most of these activities also require glue, I use white PVA glue. Some of the pieces within the bag came from Christmas craft kits which I always keep an eye out for in the post-Christmas sales when they can be heavily reduced.

Christmas busy bag ideas for toddlers


Here are some of the Christmas busy bags that I've put together:

Pipe cleaner bracelets

Bead and pipe cleaner threading activity

This really simple activity has kept mine busy for ages. All you need are some pipe cleaners and some plastic beads, the "pony beads" with a large hole in the centre are ideal. Children can easily thread the beads onto the pipe cleaners and the fuzz holds them on firmly so they don't fall off and they don't get frustrated. When they have finished threading the bracelets can be bent around the wrist and worn.


Christmas collage

Christmas collage materials

Collect together a selection of Christmas themed background papers, some Christmas images cut from last year's Christmas cards and Christmas advertising leaflets and magazines, some pre-cut foam shapes and a tube of glitter for good measure. You could also add Christmas stickers, sequins, stars, scraps of coloured paper etc. Provide the child with a glue stick and let them get creating. You could use their finished projects to make Christmas cards.

Christmas tree decoration

Christmas tree decoration activity

I cut out some simple Christmas tree shapes from green card. Each decoration requires two shapes, one with a slit cut from the bottom up to the halfway point and the other cut with a slit from the top down to the halfway point. They can then be slotted together to make a tree that stands up by itself once decorated. I've included a selection of sequins and coloured stars and a tube of glitter glue to decorate and you will be left with some lovely child-made Christmas decorations.

Pom pom characters

Christmas pom pom craft

These craft bits and pieces were from a Christmas craft kit, but you could easily make your own if you have some pom poms and foam sheets. This kit makes a Father Christmas and a snowman. Pom poms can be quite difficult to stick together so you need to make sure that you use plenty of glue, and smaller children will need help with this.

To hold the contents, I use small resealable sandwich bags from Ikea. The individual bags can then be stored in a larger bag or shoebox.

You can find more of my Christmas crafts on my Seasonal Crafts page.

Saturday 19 November 2011

Ideas for filling a wooden advent calendar


Ideas for filling the boxes in a wooden Advent calendar


For an updated version of this post please visit Things to fill a wooden Advent calendar for lots more ideas!

I love the wooden Advent calendar that we bought a few years ago for Harry. I had wanted a wooden Advent calendar for a long time, but I wanted to wait until Harry was old enough to have a concept of Christmas, and so I decided that this was the year. After much deliberation, we chose a lovely Advent calendar, which comes from The Range. It wasn't too expensive, only £14.99, and so I'm hoping that it will last for a few years to come! So here are some ideas that I've put together for things to fill the little Advent calendar boxes with:

Homemade mini decorations - I made some mini tree decorations from felt. I'll spread them out, and when Harry opens one he can put it on the Christmas tree. They were really simple to make and all you need is few scraps of felt and some sequins or small beads.

Tiny felt Christmas decorations

Stickers - I found a sheet of Christmas stickers which I've cut up to put into the Advent calendar individually. Most supermarkets will sell sheets of Christmas stickers, and you probably want to look for fairly large individual stickers, or cut out several joined together.

Christmas stickers

Chocolate - I am expecting this to be the most popular gift! If you buy a net bag of small chocolates you can put a chocolate each day along with something else, or several chocolates each day. If you have larger boxes to fill, you might be able to fit some chocolate coins.

Christmas chocolate balls

Small toys - We had lots of non-Christmas related toys around the house which I can use. Some have come from crackers in previous years, some we just seem to accumulate. You can also have a look for toys which are sold as fillers for party bags. Here are a few of the things that I found:

Mini pencils or crayons, keyrings, marbles, a bouncy ball, small cars tiny cars, stickers, temporary tattoos, balloons, Christmas decorations, hair ties and bobbles, costume jewellery, coins, finger puppets, erasers, pencil toppers, sequins or metallic confetti, small toys from Christmas crackers or Kinder eggs, Christmas decorations, craft items (pop poms, foam stickers, googly eyes, pipecleaners, shredded coloured paper, felt shapes to stick together, ribbon, yarn, collage materials), fridge magnets, little animal or dinosaur models, plastic glow in the dark stars or planets, seeds.

Lego or Playmobil - When Harry is older, I will think about buying a larger Lego or Playmobil model and putting a few pieces in for each day so that he can build the model, a cheaper alternative to the Lego and Playmobil Advent calendars which you can buy.

Christmas craft materials - You could put all the craft materials that are needed to decorate something like a Christmas tree, which can then be added to each day.

Jigsaw - But a Christmas themed jigsaw, and put a few pieces in each day. This is best for older children that will have the patience to wait until they have received all the pieces!

Larger gifts - You can put clues inside the boxes to help children find a larger gift hidden somewhere in the house

Christmas activities - Write out a Christmas activity for each day, for example write Christmas cards, make decorations, buy the Christmas tree, watch the Christmas lights being turned on, late night shopping, visit Father Christmas, go to a Christmas Fair, ice the Christmas cake, write to Father Christmas, wrap presents, make biscuits, watch a pantomime - this would be a really good way to get into the festive spirit!

I'll be keeping an eye out throughout the year now for little things that can go in to the Advent calendar! If you have any more ideas, please feel free to add them into the comments!

If you feel like getting crafty you can also buy a plain Advent calendar to decorate yourself like I did here - Decorating a Hobbycraft wooden Advent calendar

Decorated wooden Advent calendar from Hobbycraft
Friday 18 November 2011

Birth Story - Mia

After going ten days overdue with Harry, I was fully expecting to be the same with Mia. I'd returned to work part time after finishing my maternity leave with Harry, and so I worked on the Friday, then it was a Bank Holiday weekend, and I was looking forward to a bit of a break. So I wasn't too impressed when in the early hours of the following Tuesday, a week before my due date, I started having contractions. I'd been having Braxton Hicks for a few weeks, but I recognised the contractions immediately. About 2.30am I told my husband that I was "feeling a bit uncomfortable" and came downstairs. I sat at the PC and loaded up a contractions timer. I could see that they were coming about every 6 minutes, but they were quite bearable. After a couple of hours I rang the labour ward to ask their advice, as I needed to make sure that my parents (a 30 minute drive away) were around to look after Harry. They dispensed the usual advice - take two paracetamol and get into the bath then call back in an hour or so. I was torn between not wanting to wake my parents and making sure that they were here in time.

When I rang the hospital back they said it would be a good idea to call my parents so I did at about 4.45am. My Dad answered the phone half asleep and seem a bit confused as to why I was ringing, but luckily my Mum realised what was going on! They came down straight away, and in the meantime Harry had woken up (he always woke at 5am). I wrote my birth plan while he was drinking his morning milk!

The contractions were getting more and more painful and closer together, so at about 7am my husband and I went to the hospital. I was disappointed to be examined and found to be only 2cm dilated, as I had thought that I was much further along. The midwife told me that the baby would probably be born that day, but I had a long way to go, so why not go for a walk into town and keep moving to speed things along. The contractions were so frequent that I could hardly walk, and I was in a huge amount of pain. I staggered across the car park to the car and sat down, and immediately they stopped. So I thought "right, I'm staying here then" but my husband wasn't having that and so we drove down the road to Waitrose and then he made me get out the car. I made it to the front of the store, stopping every minute or so in agony. I was hanging off railings, trolleys, shelf stacking trolleys, everything. The man at the customer service desk was giving me very funny looks. I wanted to get back to the hospital because I could hardly stand, so I rang up and they reluctantly said that I could come back in.
I was shown to a labour room (the same one Harry was born in!) and they kept me waiting for ages. I was in so much pain that I couldn't move. Then the midwife came back and started pulling out yoga mats and birthing balls. I asked for some pain relief and she very reluctantly set  up the gas and air for me, but told me not to take it as I had ages to go yet. As soon as she was out of the room I grabbed it. I was standing up against the bed (she had moved it to stop me lying down) and just rocking from side to side. The gas and air helped to dull it a bit and get the contractions in a bit of a rhythm, but I wasn't having much fun.

Then she came back and asked if I'd considered a water birth. I thought I might as well give it a go, and it was the best suggestion that she could have given. It took a while to fill the bath, and the minute I got into the lovely warm water I felt so so much better. I must have only had a few contractions in the water before I started feeling the sensation to push. I guess because it was my second time, the midwife told me to trust my instincts and do what felt right. So I pushed...and Mia was born in about three pushes at 11am! It took me completely by surprise, and she just fell out into the water! The midwife leaned in and pulled her out, and placed her on me.

With Harry I had the injection to release the placenta, but there wasn't the opportunity this time so I had to deliver it naturally. Unfortunately, this meant that I had to continue pushing when it was the last thing that I wanted to do, but I'm glad that I was able to do it this way. I was able to sit in the water for ages with Mia, and then when I came out I still felt quite clean and refreshed. We just sat on the bed together for ages, and she had a long feed.

Then we were moved to the ward. We were placed in a huge ward all by ourselves - me, my husband and Mia. It was very strange and quiet. I was even able to doze for a little while. I was desperate to avoid having to stay in overnight, but you have to stay in for six hours for observation and the paediatrician finished work at 5pm. We were just in time to get him round to visit and all the paperwork completed so that I could be discharged around 6pm.

We went home, and a couple of hours later I was sat on the sofa eating takeaway pizza with my parents with a new baby in the moses basket next to me. Very surreal!

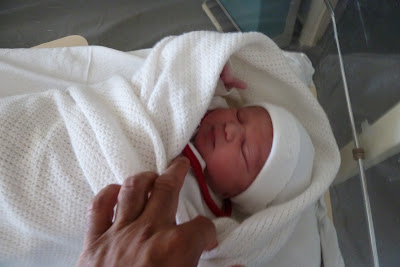
Newborn baby and birth story

You can read Harry's birth story here

Thursday 17 November 2011

Birth Story - Harry

I decided to share the birth stories for my two children. I've been very lucky with both my births, yes it did hurt (it really really hurt) but aside from a few small issues with Harry I didn't have any serious problems. Hopefully my stories (and in particular Mia's birth story) will be a bit of a reassurance.

I was ten days overdue with Harry, and after a failed sweep I was resigned to having an induction, which was booked for a couple of days later. So it was a bit of a surprise when I was woken up at 6am by my waters breaking. I made it to the toilet, but I could see that there was a bit of discolouration in the waters, so when I rang the labour ward they told me to come in for monitoring. I was fully expecting to be popped on the monitor for an hour or so and then sent away to labour at home, so my husband got himself ready for work, and I put my hospital bags in the car almost as an afterthought. Parking on the sidestreets by the hospital was free until 9am, so we parked there thinking that we'd be out in plenty of time.

I'd had a few contractions in the car, about every 15 minutes or so, but I didn't realise that they were actual contractions, I thought that they were just Braxton Hicks!

I was put on the monitor, and straight away I could see that the midwife was a bit concerned because Harry wasn't moving much. He never did first thing in the morning though, so I wasn't too worried, but then she started talking about c-sections which made me a little anxious. Also they had decided that I did have meconium in my waters, which could mean that he was in distress. Luckily they called in a paediatrician for a second opinion, and she said that I was fine to carry on. Unfortunately because of the meconium I did have to be strapped to the monitor all the way through, which wasn't ideal as I'd been hoping to labour in water, or at least be able to move around.

It wasn't until a midwife put a hospital bracelet onto me that I asked "Oh, so am I not going home then?" and she laughed and said "no, not until you've had the baby!". My husband went out to move the car, and was gone for ages. He came back having popped out to Waitrose to get himself some posh sandwiches and pasta salad for lunch. I was hungry too but not allowed to eat anything!

I was having quite frequent contractions by this point and they were getting more painful, so about 10.30am the midwife connected up the gas and air for me. This helped, only in as much as it just made me want to sleep between the contractions! It did make me feel a bit spaced out, so my memory is a bit hazy. I think that I progressed quite quickly, although it seemed to go on forever. By about 1pm, the pain was getting very intense and I didn't know how much longer I could go on. I tentatively suggested to the midwife that I might like an epidural and she said "Oh it would be such a shame when you've got so far". I was a bit cross at the time, but I think that I was actually in transition at that point and it was too late for one anyway.

I then discovered that if I bore down at each contraction the pain was a little lessened, and then I realised that I was automatically pushing. I'd had it drilled into me not to push until the midwife said, to avoid tearing, so I asked if I was allowed to push yet and she said "you can if you like". So I started pushing. My husband found himself roped in to support one of my legs and the midwife had the other and I pushed away for what seemed like ages. It would feel like the head was coming out, and then the contraction would finish and it was sucked back inside, so it felt as though I wasn't getting anywyere.

Harry was finally born at about 2.30pm. The midwife didn't tell us until after he was born that he would need to spend some time in the Special Care Baby Unit because of the meconium. But he was checked over, and we were able to spend some time cuddling him before he was taken away, which was good of them. He spend the night in the SCBU and I was on the ward, so it felt a bit surreal being on the ward on my own surrounded by screaming babies, and I was desperate to get home. Happily we were discharged the following morning, and he didn't suffer any ill-effects from the meconium. I had second degree tears so I was pretty uncomfortable, but it all healed up fine after a few weeks.

You can read the rest of the birth stories here.

Newborn baby and birth story 

Wednesday 16 November 2011

The weaning face

Starting to wean Mia onto solids brings back all the fun of trying to spoon sloppy puree into an unpredictable, mobile mouth. I know, I know, baby led weaning is the way to go, and we will do an approach based upon this when she's a bit older, but for the time being I like the security of spooning in the food, and the pureeing and freezing in little pots appeals to my organisational tendencies.

Harry always used to shove his fingers in his mouth at the same time as the spoon, but Mia seems to be a much tidier eater which is nice. But one thing that I had forgotten is the weaning face.

Not this one...

Baby being fed with a puree

...but the one that I find myself making as I move the spoon towards her mouth. Am I the only one that opens my mouth just as much as she does, in an unconscious effort to persuade her to copy me?

Tuesday 15 November 2011

Review: Hexagonal Wooden Sandpit from Big Game Hunters

Harry loves playing in the sand at the beach, but although we live by the sea, the beaches around here are not very sandy. So this hexagonal wooden sandpit from Big Game Hunters is perfect for the garden. 

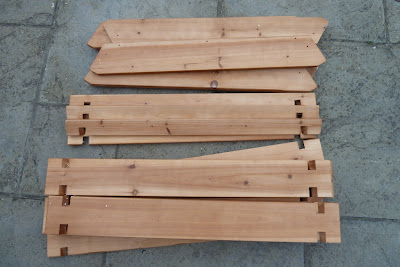
It arrived promptly by courier and was well packaged. The box was smaller and lighter than I was expecting, as the sandpit is built by slotting together small slats. If you were collecting it yourself you would have no problems fitting it into a small car.

Review - Hexagonal wooden sandpit from Big Game Hunters

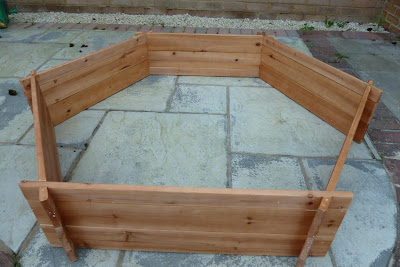
The pre-cut wooden pieces slotted together easily, and I was able to assemble it by myself without too much trouble. All you need is a screwdriver to screw on the top ledge. The instructions were easy to follow and also contain plenty of other information about caring for the sandpit. One tip for assembly - when preparing to screw on the top ledge, carefully place all the pieces in position before you begin. I did this and still had some trouble lining up the screw holes with the walls underneath. Also take some time as you slot the pieces together to make sure that you have the nicer sides facing outwards.

Hexagonal wooden sandpit

We may be moving house soon, and I was concerned as to how easy it would be to take the sandpit with us. It may not be easy to take the whole thing apart once screwed together, but the bottom slats can be removed, and the top hexagonal layer is quite light and sturdy. With two people it will be no more difficult to move than any of our other furniture! Even when fully assembled the sandpit is light enough to move to a different position in the garden without too much trouble, although it would be easier with two people to keep the loose lower slats in position.  

The sandpit is supplied with a geotextile underlay. This needs to be cut to size for the sandpit before the sand is put in. I cut it slightly larger than the base and positioned it so that a small amount overlapped up the insides. I'm perhaps stating the obvious but the sandpit is not supplied with sand, and it does hold a lot. I put in about 15kg, and this was only just enough to cover the underlay with a thin layer. Ideally I think that you would want at least 50kg of sand. You also need to make sure that you use proper playsand. Even with the underlay I suspect that sand will escape, but then that's the nature of sandpits!

Hexagonal wooden sandpit

The walls of the sandpit are not too high, so little ones can get in and out easily. It is nice and wide in diameter, and the hexagonal shape means that there is plenty of room for several children to play inside. The walls are also strong enough to bear their weight. I probably wouldn't give Harry water to play with inside to avoid too much mess, although the underlay looks as though it would be waterproof. It can also be placed on grass.

Hexagonal wooden sandpit

The circular protective cover closes snugly over the sandpit by means of a drawstring. Water will pool on the top when it rains. The instructions say that you can place an item inside which is higher than the walls of the sandpit to prevent this, otherwise you will need to remove the water to prevent it sagging down and being a potential safety hazard for small children.


Hexagonal wooden sandpit

I can't comment yet as to how the wooden sandpit will stand up to the outdoors in the long term, although the instructions suggest that a suitable wood treatment should be used yearly. I will probably remove the sand and store the sandpit in the garage throughout the winter just to be safe.

I am very impressed with this sandpit, and I think that it's really good value. It's a good size and appears very sturdy. I hope that we will be able to use it for many years.

We were sent the sandpit for the purpose of this review

Monday 14 November 2011

Sleep Deprivation Fridge Cake recipe

I call this recipe 'Sleep Deprivation 'Fridge Cake' because I first made it in the throes of sleep deprivation, a state which lasted for many years. It's for when you really need some energy to get you through the afternoon, and it is easy and quick to make around the demands of your insomniac baby and/or toddler. It does really need a couple of hours to set solid in the fridge, but that is not essential, you can just eat it with a spoon as soon as you've mixed it up!

Simple fridge cake recipe

In a large bowl:

Tip in 225g or so of digestive biscuits and bash them up into quite small pieces with the end of a rolling pin
Mix in a 100g bag of Maltesers

In a saucepan melt together:

Approx. 250g of your favourite chocolate (although cheap stuff works just as well). Or you could try a few Mars bars which sounds rather tasty
100g butter
2 tbsps caster sugar
2 tbsps golden syrup
2 tbsps cocoa powder

If you like, there is room to add in various other ingredients - nuts, dried fruit, mini marshmallows, more chocolate pieces...

Mix it all up together, press firmly into a suitably lined cake tin to a depth of about 2cm, and leave in the fridge for a couple of hours to set fully.

Simple fridge cake recipe

Can you say sugar rush?

Keep a close eye on it, as it has a habit of disappearing while it cools. If sharing small amounts with a toddler, place toddler securely in high chair and apply a bib, keeping plenty of baby wipes handy.

Sunday 13 November 2011

Shoreham Bonfire and Fireworks 2011

This year for the first time we went to the Shoreham Bonfire Society celebrations. We arrived early to watch the parade, only to discover that it was just people walking down the road, so we had a bit of a wait for the fireworks. This necessitated a dark beach feed, illuminated only by camera flashes, and hoping that there was no literal flashing going on in anyones snaps! But when the fireworks started they were very good and worth waiting for. There was an impressive bonfire on the seafront too. Our lesson learned for next year - arrive just before the fireworks start!

Shoreham Bonfire and Fireworks celebration 2011

A friend recently told me that her son had just seen his first fireworks, at Harry's age. It made me think how many times we have dragged little ones out to watch fireworks - he has seen at least four professional displays in the last couple of weeks alone, and Mia has seen two. By his first birthday he had seen several displays, and when I was pregnant I felt his first proper kicks watching fireworks.

I hope that people don't think that we are irresponsible taking a small baby out at night. She is well wrapped up, and not cold, but we do realise that she is getting the least benefit out of all of us. Having said that, although she slept through her first display, she was watching these fireworks and she wasn't scared or upset. Perhaps dragging them out at night though might be part of the reason that we have poor sleepers. Friends have told me that they don't want to upset their childrens' (brilliant) sleeping routines by taking them out after bedtime!

Saturday 12 November 2011

Knocking down baby group

Probably the most exciting thing that has happened this week was the knocking down of baby group.

Well over a year ago, a huge new Tesco opened just down the road from where we live. They replaced a much smaller store, but on the land they wanted for some of the carpark was an old Community Centre where we used to go to baby and toddler group. So they came to some arrangement whereby they would build a new Community Centre at the far end of their plot of land, and then they could knock down the old one. They've finally finished the new building, and the diggers have flattened the old one this week.

This destruction has been fascinating for Harry, and even more so because it was a building that he knew and had been inside. Presumably for safety, but rather disappointingly, Tesco erected large hoardings around the site, so there was only a very narrow crack through which you could view proceedings. Even so, I think that Harry would have happily spent all day there.

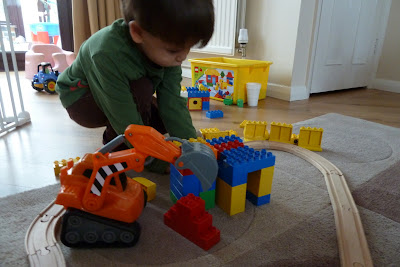
This afternoon I found him recreating the scene with his Duplo. I did give him a little bit of help, note the safety barrier (with a Harry brick looking through), and the new centre visible in the background as he transfers over the toys before knocking down the old one.

Child playing with Lego and digger

Friday 11 November 2011

Keeping the peace with a toddler

One thing that I have learned about toddlers is how much everything has to be just right. And if you do something as a one off (possibly to avoid a tantrum), you then end up doing it every time (or else you end up with a tantrum greater than the one that you were originally trying to prevent).

Here are some of the things that I now find myself doing:

  • Cutting the morning toast into eight small triangles, which need to be positioned in the middle of the plate with small pieces of cheese arranged around the edges.

  • Cutting the lunchtime sandwich into a circle, thus creating what we call a "Button Moon" sandwich. Harry makes the holes in it himself with his finger. Additionally, a small piece of cheese must be provided before the sandwich is served, "for my mouth".

  • Tempting him to sit in the pushchair with a small tub of Cheerios.

  • Letting him wear socks to bed, no matter how warm the bedroom is.

  • When food is prepared in the kitchen, Harry must carry it to his booster seat himself and strap himself in. If I carry it for him by mistake it must be returned to the kitchen and carried in again by himself.

  • The bedtime routine must be followed exactly or else we need to go back to the beginning and start again. The routine takes the form of bath (a traumatic event), play on Daddy's tablet, book, knee cuddle, possibly another book, knee cuddle, tuck up in bed, milk, another knee cuddle and bed. Any deviation results in screaming, and there is always the very likely possibility of being called back for further knee cuddles.

  • Letting him wash his hands after the toilet by filling the entire sink with water, only for him to dabble his hands in it briefly before pulling out the plug. Sometimes another sinkful is required to ensure the task is completed to his satisfaction.

What do you find yourself doing to keep little ones happy?

Thursday 10 November 2011

Toddler busy bag activity - threading

I love putting together toddler busy bags. Threading is another activity that can easily be put together from items found around the house. Toddler busy bags are a great way to entertain toddlers for a short period of time.

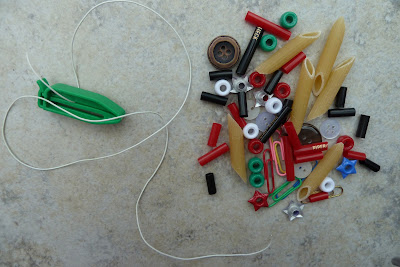
Threading busy bag for toddlers

For this bag, all you need is something to thread with, and things to thread on to it. When looking for something to thread on to, try to find something that is a bit stiffer than just string, perhaps coated wire which is easy to post through holes. Pipe cleaners also work really well, as the fuzzy surface stops things slipping off. I've used a freezer bag clip at the bottom of the thread to stop things falling off.

Toddler busy bag activity - threading

Some ideas for things to thread - beads, paperclips, buttons, cut up pieces of drinking straw, penne pasta, eyelets, washers, cotton reels. This activity can also be adapted to suit the age and ability of your toddler. As your todder's hand/eye co-ordination improves you can thread objects with smaller and smaller holes. You can include more beads in the busy bag so that the child will have a finished necklace or bracelet which they can wear.

Toddler busy bag activity - threading

You might also like my other busy bags for toddlers:

Make a monster kit busy bag
Pasta and pots busy bag
Christmas busy bag

Wednesday 9 November 2011

More gingerbread men and Button Moon

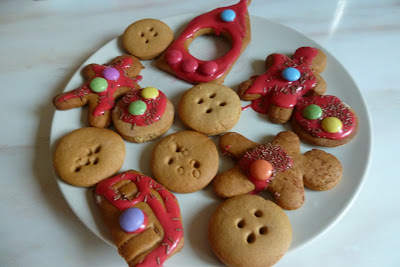
So I've still been too lazy to make gingerbread dough from scratch. But we were in Sainsbury's at the weekend and spotted this ready made dough. We've had the cookie dough from there before and it was very nice, so we thought we'd give it a go.

As long as it was taken out of the fridge to warm up it was pretty easy to roll out, and also very smooth. When I make biscuits I always end up with bits stuck to the rolling pin, but it didn't happen with this dough. It was very firm though, so quite difficult to mould other than rolling. We decided to make Button Moon themed gingerbread. We cut out lots of circles and used a drinking straw to make the holes in the middle for Button Moon.

Gingerbread men and Button Moon shapes

Below is one of the trays ready to go into the oven. The pack says that it makes 8 gingerbread men, obviously this is dependent upon the size of your cutter but I would think that it would make a few more than that. Perhaps they expect people that are too lazy to make the dough from scratch to also be too lazy to re-roll the leftovers from around the edges to make more biscuits! We made a spaceship and Mr Spoon's house, as well as Mr Spoon, Mrs Spoon, Tina Teaspoon and a few extra moons.

Gingerbread men and Button Moon shapes

Harry was a lot more interested in the smarties than decorating the biscuits, but I think that we made a pretty good effort, this is just half of them! And they tasted nice too.

Gingerbread men and Button Moon shapes

Just realised that this sounds like a big advert for the dough. They didn't pay me, honestly!

Monday 7 November 2011

Preparing for Christmas crafting

As he approaches 3, for the first time this year Harry is anticipating Christmas (even if much of what he knows about it has been gleaned from Peppa Pig). It's an exciting time of year for little ones, and so I want to make the most of it with him. I started collecting Christmas crafting things in the sales last year and have picked up a few bits this year too. I also purchased a fantastic wooden advent calendar, which I've been after for a while, and I'll be putting together some ideas for little treats to put inside.

So now I'm going through all the things that I've collected and putting together some kits to make up some Christmas crafty things (look out Grandparents!). We're also off to Center Parcs in December for the third Christmas running, and rather than pay a fortune for him to do the Christmas crafts there I'm going to get some activities ready that he can do in our villa to help keep him in the festive mood. Last year I printed out lots of Christmas colouring sheets and took blu-tack to stick them up around the walls.

I like to buy craft packs that contain lots of themed bits that you can either use to put together the suggested items or to come up with something yourself. These are usually around in the sales after Christmas in supermarkets.

I've also had some luck with Ikea in the post-Christmas sales - you can often pick up plain ornaments for, quite literally, pennies which you can then decorate yourself. I'm still thinking about what to do with these shiny baubles, I'm wondering about sticking coloured tissue paper on to them and adding paint or glitter glue.

Preparing for Christmas crafting

Every year after Christmas I diligently cut out the pictures on my Christmas cards with zig zag scissors. I use them to make gift tags for the next year, but have far more than I'll ever buy presents, so I'm sure we can come up with a way of using them.

Preparing for Christmas crafting

Below is just a small selection of my Christmas themed craft bits. I've got lots of ideas! The only thing that I'm never sure how to use are those pom poms, we've collected quite a few. They are always difficult to get to stick to anything. I've got some lollipop sticks and googly eyes, so maybe snowman puppets or plant sticks.

Preparing for Christmas crafting

Whatever we make I'm sure there will be lots of glitter involved. It's not Christmas crafting without glitter!