Showing posts with label crafting. Show all posts

Friday, 6 December 2024

Christmas themed bullet journal and journalling supplies

This post contains Amazon affiliate links

I regularly write in both my bullet journal and my everyday journal, and one of the things that makes it enjoyable for me is decorating and accessorising the pages to match the season. With Christmas well on the way, I thought I'd share some journalling supplies which are perfect for brightening up a journal now that the days are feeling gloomy!

Christmas journalling by the window
Photo credit Alisa Anton via Unsplash

I get through a lot of stickers in my journalling! I use them as accents in the corners of pages, to decorate a themed journal page, and sometimes as image journal prompts.

Sometimes I like to use a large Christmas sticker (affiliate link) for some emphasis, or else I also like to use smaller Christmas stickers (affiliate link) as tiny accents or to create a border around the page.


Christmas stickers for festive journalling

Another way that I like to decorate my pages is with washi tape. I have quite a collection now since I first bought washi tape back in 2013! I love this colourful Christmas washi tape (affiliate link), or else this simpler vintage Christmas themed washi tape (affiliate link).

Pile of Christmas themed washi tape

Finally another addition to Christmas journalling supplies is a set of Christmas paper punches (affiliate link). You can use them for either the punched pieces themselves or to add interest to the edge of a page by cutting away a line of outlines. You could also look for a larger paper punch like this paper punch Christmas tree (affiliate link) which could be used to decorate a festive journal page.

Christmas small festive paper punches

Try working on entries with some cheerful coloured gel pens (affiliate link) or some glittery highlighters (affiliate link) and bring some festive cheer to your journal pages this season!

Tuesday, 11 June 2024

Craft ideas for a teen girls sleepover or craft afternoon

This post contains Amazon affiliate links

My daughter has hosted several sleepovers over the last few years, and I always like to have an activity or two that will keep the girls busy and away from their screens for a little while. My requirements for a sleepover craft - a project that can be completed ready to take home, something that doesn't require too much supervision or cleaning up, not too expensive or too many materials needed, and a finished product that will be a nice reminder of the sleepover and their friends.

Of course these craft ideas are perfect for groups of boys as well, I'm just writing about my own experiences! These are all crafts and activities that have been tried and tested with great results.

Mini diamond painting kits or stickers

I love all the different diamond painting kits that you can buy, and a small project is perfect for a sleepover. We've had many different kits over the years, and the sticker kits are particularly good because they are inexpensive, really quick to complete and come in all sorts of designs. I would choose something like this Diamond Painting Sticker Set (affiliate link) because there's a wide range of designs and everyone can complete several. We've used them to decorate notebooks and storage boxes.

Diamond painted sticker decorating a notebook

Pottery painting

Hobbycraft sells a great range of pottery painting kits, and they are often on special offer during the school holidays - there's usually a big display near the entrance and sometimes they are as cheap as £2.50 each. They come with a few paints but I usually get out our own acrylic paints for a wider range of colours, you can buy some great value sets of acrylic paints from The Works Save up a few old margarine tub lids for paint mixing, and gather paintbrushes in different sizes for large and small areas. Just make sure that everyone is wearing older clothes, or provide aprons!

Bracelet making

There is some adult supervision required with this one to avoid bead spillage disaster! Hobbycraft is a great place to buy beads as they have a pick and mix selection so that you can pick out some special beads that are themed to the girls' interests. Teenagers at the moment love making beads to wear and swap at concerts, and they like to include words so some letter beads are a great type of bead to include. Clay beads (affiliate link) are also really popular and come in a huge range of colours.

When it comes to putting a bracelet together I like to keep it really simple. I buy some clear stretch elastic thread (affiliate link) and cut a length that fits easily around the wrist with some extra at each end. I use a bulldog clip on one end to stop the beads slipping off, and then the girls thread on the beads that they want. When it's long enough to go around the wrist, tie it really tightly with a triple knot, then secure with a big blob of superglue before snipping the ends. You can read how I made some bracelets for myself here - simple stretch beaded bracelets.

Simple stretch beaded bracelets

Bath bomb making

This is a fun one for younger children, with some adult supervision! You can keep things easy and buy a bath bomb making kit like this one (affiliate link) or else there are lots of recipes online for making your own. The only drawback to this is that you do need to have some moulds to use, and some of the ingredients might not be ones that you have in the cupboard.

Shrink plastic keychains

We've been playing with shrink plastic for years, it's a lot of fun! We recently used shrink plastic to make some cute keyrings. You just need to buy a set of the shrink plastic sheets (affiliate link) and draw on your designs. We printed out some Sanrio characters that could be traced over and then coloured - follow the instructions on the packet to check how much the image will reduce in size and what type of pens or pencils to use. If you are making keyrings, the most important part is to punch a hole in the design before you put it in the oven! Then when it has shrunk and cooled you can attach a keychain or coloured ball chain (affiliate link) so that it can be attached to a school bag or notebook.

Decorated letter shapes for room decorations

A wooden initial letter is a great keepsake and looks great on the wall. Hobbycraft sell some pretty ornate wooden letters which are easy to paint or colour using marker pens. You can also buy fun wooden fillable letters which can be decorated with fake flowers and pom poms or choose simple mache letters which can be covered with decopatch paper and glue.

Decopatch letter decoration

Friday, 10 November 2023

Christmas diamond painting kits inspiration

This post contains Amazon affiliate links

I love diamond painting, I find it a relaxing and mindful craft and I enjoy admiring my finished pieces, like my Starry Night diamond painting which always gets a comment from visitors. Diamond painting is a brilliant craft for Christmas, it's a fun way to get in the festive mood in the run up to Christmas and produces some lovely sparkly Christmas decorations. A larger piece is also something that you can work on over the festive period ready for display next year.

I've hunted out some different Christmas diamond painting kits, both traditional and a some that are a  bit different, for some festive diamond painting inspiration.

Smaller kits for beginners or groups

A set of small diamond painting kits (affiliate link) is a great way to get started with the craft. They work really well for a Christmas crafting party as they are easy to divide up, quick to complete, and everyone gets to go home with at least one finished project. If you are working as a group it's a good idea to buy some extra pens, wax and trays so that everyone can craft at the same time. As well as being turned into ornaments, they can also be used to decorate Christmas cards or you can also make diamond painted Christmas gift tags (affiliate link).  
Large full drill Christmas diamond painting kits

These large diamond painting pieces (affiliate link) can be complicated and take a long time to complete, but they are very satisfying once finished as the entire piece is filled with the sparking diamonds. You need to be very organised when it comes to sorting out the different coloured pieces, I recommend a storage container with small, labelled compartments that you can decant the bags of drills into. It's also best to work on the piece in small sections so that you don't expose any more of sticky background than necessary to avoid it drying out.

Partial drill Christmas diamond painting kits

Partial drill kits are kits with a coloured background that are embellished by the diamond dots. They are often quicker and easier to complete and don't use such a large selection of colours. The background may be sparkly or shaped for extra interest, and allows for finer detail when printed rather than composed with the diamond drills. This partial drill Christmas diamond painting kit (affiliate link) has a painted background with diamond dots for extra sparkles.

Something a bit different

There are also some diamond painting kits that let you make something a bit different than the usual flat piece. For example this Santa diamond painting nightlight (affiliate link) which would make a brilliant Christmas decorations! There are also kits for diamond painting Christmas wreaths and other hanging decorations.

I hope that I've given you some inspiration for your Christmas crafting!

Friday, 8 September 2023

Organising my Hama beads

I haven't posted any Hama bead crafts for a while have I? That's not because I haven't wanted to craft with my Hama beads, but because I was getting a bit overwhelmed. My love for Hama beads hasn't gone unnoticed among friends and family, and as their children outgrew the beads I became the happy recipient of many large boxes of unsorted beads! In addition to my own supplies, I found that I had a cupboard full, and I couldn't even think about where to start.

Over the summer my niece visited for the day and she enjoyed using some beads which I pulled out for her. So I decided to start by sorting out a box of basic colours for her along with some boards so that she could do some Hama bead crafting at home. I had five massive boxes of unsorted beads, and so this prompted me to finally get down to it and work on sorting out the beads into their individual colours. 

This was a huge job, and it took me several weeks. Unfortunately I forgot to take a photo of what I began with! I tipped out handfuls onto a large tray and patiently picked through the beads, sorting them out into a variety of plastic cups, beakers and empty food packaging. Anyone around at the time was encouraged to help me out!

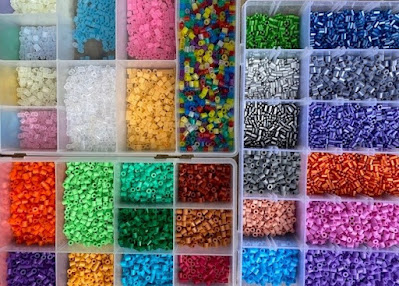
Hama beads sorted by colour in storage containers

I didn't really find any easy way to sort the beads apart from trying to do it during daylight to more easily see subtle colour variations, and making sure I had enough containers for all the different colours. It was actually very relaxing!

I already had some of my Hama beads sorted into plastic storage boxes but the colour selections were haphazard and most sections were too small to fit all the beads I wanted. I also had way more colours than sections. So I emptied out the different boxes and also purchased a new box for the extras. It wasn't enough to hold all my beads but I didn't want to spend too much money so I used sturdy sandwich bags for the more popular colours and tiny plastic bags when I only had a few beads of a particular colour.

It's really satisfying now to see all my beads clearly laid out. I know what colours I have and how many of each colour, so I can plan my craft projects. In particular I have plenty of transparent beads, neon beads, skin tones and red and white beads, so expect to see those cropping up in future blog posts!

Having such a big sort out has really re-ignited by love for this craft, and I'm really looking forward to crafting with Hama beads again!

And if you want to see my Hama bead storage goals have a look at this - Ultimate Hama bead storage - I'd love to splash out on some of these tiny boxes for my Hama beads, I'd just need so many of them!

Wednesday, 8 February 2023

My favourite Valentine's Day themed crafts

Over the years I've shared lots of Valentine's Day crafts on the blog, and I thought I'd share a little roundup of some of my favourites! Just click the link for tutorials and more instructions.

A simple colourful felt heart garland - a great way to use up scraps of coloured felt, and it's really quick and easy to put together using a sewing machine.

Simple felt heart garland tutorial

Some tiny mini Hama bead hearts - mini Hama beads are perfect for delicate embellishments and these mini Hama bead hearts can be used on cards or Valentine's Day decorations or turned into magnets or pin badges.

Mini Hama bead heart embellishments

A multi-coloured mini Hama bead heart picture - again using mini Hama beads in a variety of colours, this detailed heart design makes a lovely wall hanging or coaster.

Mini Hama bead heart picture

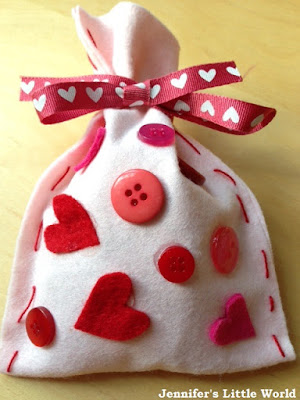
A simple felt Valentine's Day gift bag - these mini felt bags are perfect for gifting some Valentine's Day treats.

Felt Valentine's Day gift bag tutorial

A Valentine's Day Hama bead heart hanging decoration - one of my first Hama bead crafts! I really enjoyed coming up with different designs for the hearts and it makes a lovely Valentine's Day decoration.

Hama bead heart hanging decoration

A simple Valentine's Day craft for toddlers, painted toilet roll tube gift boxes - back to the very early days of my blog, but this craft is still one of my favourites! I had a lovely time making these toilet roll tube gift boxes with my toddlers.

Painted toilet roll tube Valentine's Day gift boxes

If you are looking for more simple Valentine's Day crafts then you might enjoy these Hama bead crafts for Valentine's Day

Wednesday, 28 December 2022

Update on my ten craft projects to complete by the end of the year

At the beginning of September I set myself a crafting challenge - a list of ten craft projects to complete by the end of the year.

With the end of the year firmly in sight, I thought I'd do a little update!

Felt Autumn leaves - I was really pleased with my embroidered felt Autumn leaves. I displayed them in a small bowl by the fireplace and they looked really pretty. Next year I might string them up into some bunting for a bit of a change.

Embroidered felt Autumn leaves displayed in a bowl

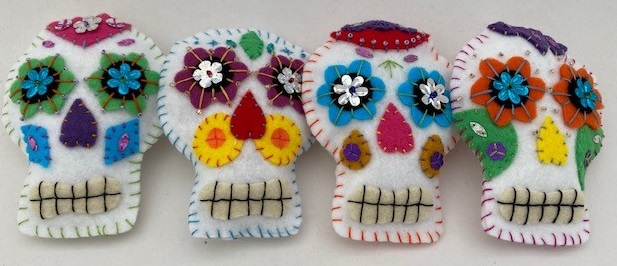
Felt sugar skulls - My embroidered felt sugar skulls were another great way to work through my felt stash. I loved making these, and coming up with all the different colour combinations for the felt and embellishments. Next year I'm planning to make some more, perhaps using different colours of felt for the skulls.

Embroidered felt sugar skulls

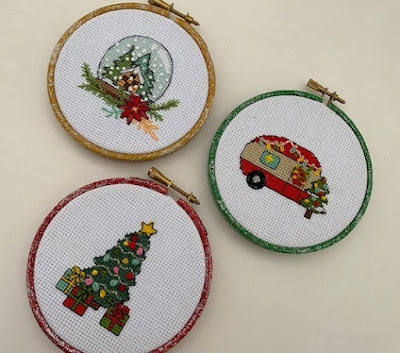
Cross stitch Christmas hanging - This project idea was always a bit vague, and it changed somewhat in the making! I had three mini Christmas cross stitch kits that I wanted to finish and find some way to display. I ended up framing each one in a mini Christmas embroidery hoop that I painted and added glitter. 

Mini cross stitch Christmas embroidery hoops

Three Christmas wooden shapes to decorate - I had bought a blank wooden sign, a sleigh and a gingerbread house from The Works.

My first craft was a Christmas wooden sign which is now proudly hanging in the hallway to welcome guests. I was very pleased with my attempt at brush lettering!

Christmas painted wooden sign craft

Then I decorated the wooden sleigh with red paint and embellished with metallic pen. I made a little sack from some festive hessian fabric and ribbon and wrapped up some pretend presents. I was originally going to make the wooden house into a gingerbread house but I changed my mind and made it into a sort of Scandi inspired house instead with red and dark yellow.

Painted wooden Christmas decorations from The Works

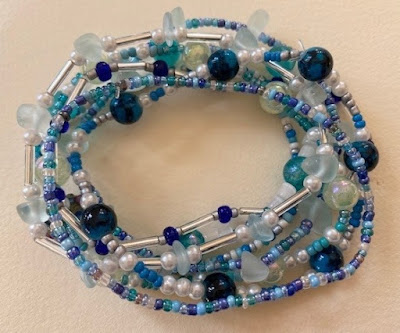
Stretch beaded bracelets - This was a new craft for me, and so I was delighted with my ocean themed stretch beaded bracelets. They were really easy to make and I love wearing them. I'm definitely going to be making some more bracelets using different colour schemes.

Ocean themed stretch beaded bracelets

A sea themed fabric project - This was another project idea that was quite vague as I had some lovely fabric but didn't know what to do with it. I decided to make an ocean themed fabric tote bag and I was so pleased with the result that I went on to make several more to give as gifts. 

Ocean themed fabric gift bag

A Christmas mini cross stitch designs craft - I wanted to do some sort of craft using my free mini Christmas cross stitch motifs and so I decided to make some cross stitch gift tags. They were really quick and simple to make and a great way to use up some odds and ends of embroidery thread.

Mini cross stitch Christmas gift tags craft

Finally, there is one craft on the list that I didn't get to, and that was the Wooden READ sign, a wooden sign spelling out the word 'read' which I wanted to display on my bookshelf. Not for lack of time or lack of ideas, I just decided that for the time being I quite like how it looks in its natural state! I may come back to this in the future but for now I'm happy with the way it is.

I found this way of listing out my craft projects really motivated me to get on with them. Next year I want to make an effort to work through some of my crafting stash, and making a list of the things that I want to complete is definitely going to be a big help.

Monday, 5 December 2022

Hama bead Christmas crafts for adults

This is an older post, you can find an updated list of Hama bead Christmas crafts here!

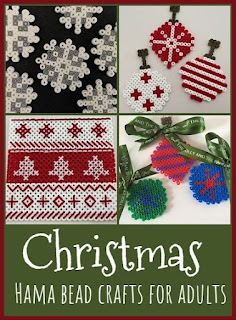
Christmas Hama bead crafts for adults

Hama beads might be marketed as a children's craft but I love crafting with them too! I've made lots of Hama bead projects over the years and so today I thought I'd bring together some of my favourite Hama bead crafts with a festive theme that make great crafts for adults as well as children. Click on the link in the title for a full tutorial along with tips and tricks for working with Hama beads.

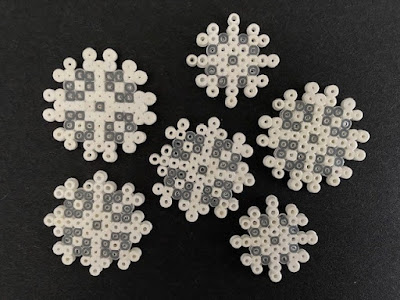
Mini Hama bead snowflakes

I used mini Hama beads to make these tiny snowflake decorations, they measure less than 2cm in diameter and make lovely embellishments for cards or other craft projects. I used my own Hama bead snowflake designs which also work well for the larger beads. 

Mini Hama bead snowflake embellishments


Mini Hama bead Christmas embellishments

I used the mini Hama beads again to make these tiny Christmas embellishments, again each one measures less than 2cm across. They are easy to make using just a square pegboard. For the designs I used my free mini Christmas themed pixel art designs.

Mini Hama bead Christmas designs


Scandi inspired Hama bead baubles

I love red and white Scandi style themed decor at Christmas and these baubles look beautiful hung on the tree with some ribbon around the top. I have designed several different Scandi themed Hama bead craft projects.

Scandi inspired Hama bead Christmas bauble ornaments


Hama bead Christmas wreath ornaments

These simple Christmas wreath ornaments are made using a circular pegboard. You can use coloured thread to make hanging decorations or you can also attach a magnet to the back. For these ornaments I used a small picture from an old Christmas card but you can also personalise them with a photograph of a child or pet.

Simple Hama bead Christmas wreath ornaments

Hama bead and ribbon bauble ornaments


These Hama bead Christmas baubles are similar to the Scandi themed baubles above but using a wider range of colours. The Christmas ribbon really makes them stand out.

Hama bead and ribbon Christmas bauble ornaments

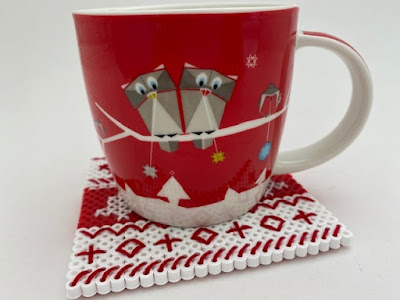
Scandi style Hama bead Christmas mat

This Christmas Hama bead mat is made on the square pegboard using simple stripes then the holes are used for cross stitch designs on top. I love combining two of my favourite crafts!

Scandi style Hama bead Christmas mat

If you are new to crafting with Hama beads then you might find this post useful - Ironing tips for Hama beads.

If you enjoyed these Hama bead projects then you might also like this post - Ten Hama bead projects for adults - which contains lots of Hama bead crafts that adults will enjoy working on as well as children.

Happy festive crafting!

Wednesday, 23 November 2022

Mini Christmas cross stitch gift tags craft

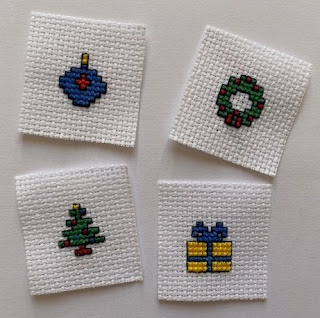
Last year I shared some free mini Christmas cross stitch designs which can be used for all sorts of pixel crafts. I've written about lots of different ways that you can use mini Christmas cross stitch motifs in your crafts, and today I thought I'd share the latest one that I've been working on! These mini Christmas cross stitch gift tags with a glittery frame are really quick and simple to make and add a sweet personal touch to Christmas gifts.

You can find the cross stitch designs here - free mini Christmas cross stitch patterns.

I chose four of my favourite designs to turn into Christmas gift tags. They are really quick to stitch up, and are a great way to use up scraps of fabric and thread from your stash. When stitched on 14 count Aida fabric each design measures about 2cm square. Make sure to leave a border around the stitching to allow for a frame, I used a piece of fabric that was 5cm square. 

Mini Christmas cross stitch motifs

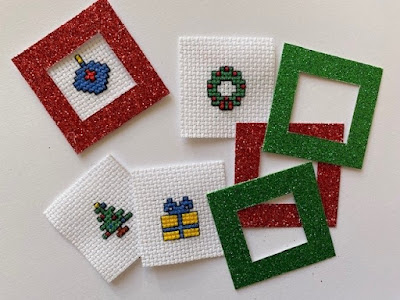
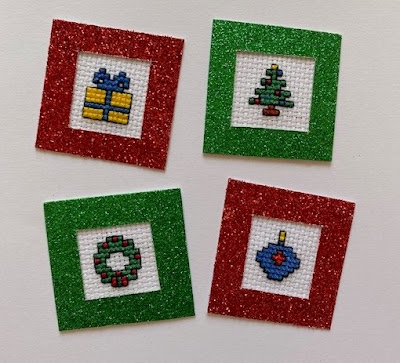
To make the frames I used some glittery card. I cut out a frame that measured 5cm square with a 1cm border. I trimmed my cross stitch pieces slightly, then used some tape to stick them to the back of the frame, making sure that the design remained central.

Tutorial for Christmas cross stitch gift tags

To back the gift tags I used white card so that the recipient's name can be easily seen. I used double sided tape to stick the cards to a backing piece of white cardboard.

How to make cross stitch gift tags

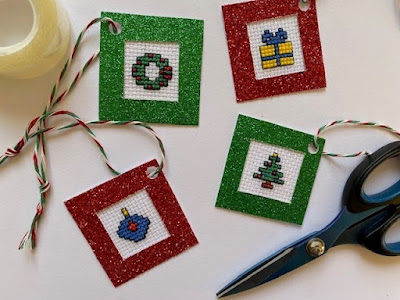
Then I used a single hole punch to make a hole in the corner of each gift card, and I threaded through some festive string to attach to a present or gift bag.

Mini Christmas cross stitch gift tags

I'm really pleased with how they turned out, and I think that they look really sweet!

Christmas cross stitch gift tags free tutorial and pattern

Monday, 14 November 2022

Snowflake cross stitch embroidery hoop design - free pattern

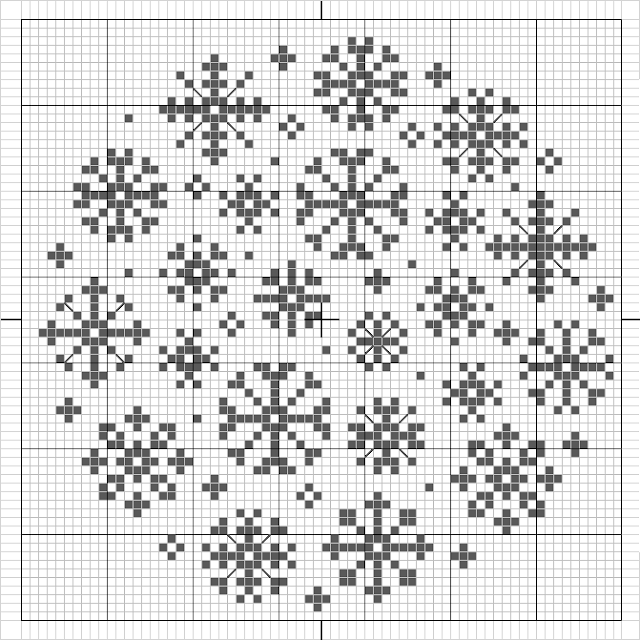
I recently shared my simple snowflake cross stitch designs, and today I'm sharing a larger free snowflake cross stitch design. This circular design fits perfectly into a 6" embroidery hoop for display, and it makes a lovely festive decoration for your home this Christmas.

I stitched this design using white embroidery thread on navy blue 14 count Aida fabric. The design measures 67 x 67 stitches. Because the pattern uses just the one colour it is very quick and easy to stitch. I think that it would also look great on fabric in a different colour - perhaps green or red - or if stitched with metallic threads. 

Click here to download the pattern below as a .pdf - Snowflake Embroidery Hoop Pattern

Snowflake embroidery hoop free pattern

This was a really satisfying make as it stitched up so quickly, especially because no colour changes are needed and there are no fancy stitches or backstitch! The only thing to watch is if you are using dark thread on white Aida, because if you carry the thread across the back then it might show through.

I used a plain wooden embroidery hoop for my design, but to make it a little more festive I used a few coats of silver acrylic paint to cover it which worked really well. A gold or white frame would also look good - there are so many different colour combinations that you could come up with.

Happy crafting!

Embroidery hoop design with snowflakes circular

Thursday, 23 June 2022

Working through my fabric stash

Recently I wrote about my fabric stash, and I've also shared some of the projects that I have been working on. I thought I'd do a little round up of some of the things that I've made so far!

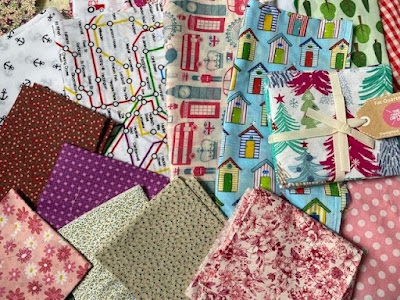
My fabric stash

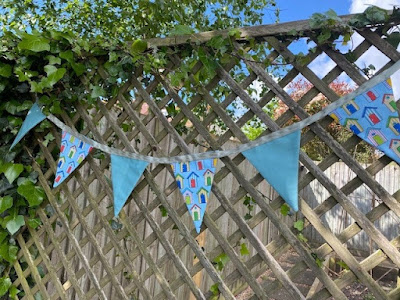
The garden bunting was my first project. It hangs at the entrance to my vegetable patch and I love seeing it when I go in to do the watering. I know that it won't last forever but I'm hoping it will make it through a few seasons.
 
Beach hut bunting for the garden

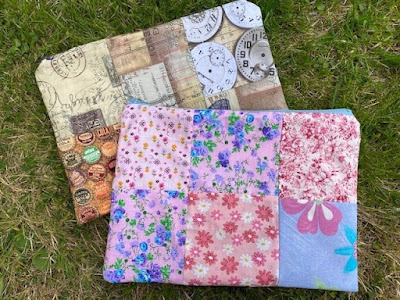
These were my first large zipped pouches and I'm very pleased with them. They make great project bags, and use up scraps of fabric which I really like to look at. The flowery one is for Mia, she uses it to take her iPad and notebooks round with her if we are going visiting. I am using the other one for my current long term cross stitch project.

Patchwork fabric large zipped pouches

I've already shared these next projects - the first is a small fabric storage bin. I'd like to make more of these although I will need to buy some more interfacing. Interfacing isn't too expensive, but I want to work with what I have already first! These are a pretty way to store things, and I might also use some of my less loved fabric to make storage bins for inside drawers.

Small fabric storage bin

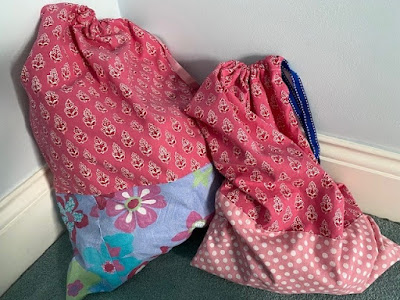
Secondly, these laundry bags were a great way to use some of my larger pieces of fabric. They look a bit mismatched but they are very practical, I've been using the smaller one to store the dirty clothes for my weekly white wash instead of having a heap inside the wardrobe. They are very sturdy and will be great for travelling as they can be washed when we get home.

Large fabric laundry bags for travel

Then I made a third patchwork zipped pouch which you can see in the picture below. I'm using to store my current craft project. It's made using smaller strips of fabric, I sewed a selection of long strips together to make each side, then cut each piece in half and swapped them over (I think it's called strip piecing if that description doesn't make sense!). It makes it look more complicated than it really is!

Two large zipped fabric pouches

I really love my beach hut fabric and I wanted to use it for something for the home, so I decided to attempt a fabric bowl. I used this tutorial Charmed Fabric Bowl and it's very simple, basically you just cut out a circle of outer fabric, interfacing and lining fabric, sew them together then gather the edges to pull it up into a bowl shape. You finish the bowl by sewing around a long strip of fabric to hide the gathers at the top. I didn't manage to get the neatest finish on this bowl, but it looks fine from most angles!

Simple fabric bowl attempt

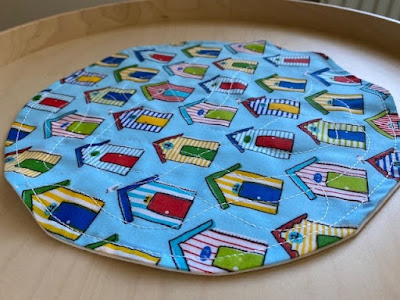
While making the bowl I really liked how the fabric looked when it was sewn together in a circle before it was gathered up. So I decided to make a small circular mat for my round table. There's no interfacing in this one, it's just two circles of fabric sewn together. But then I decided to try stitching some random loops across the top to practice using the sewing machine for curves. I was really pleased with how well it worked!

Small round fabric placemat with beach hut fabric

I'm rather impressed with how well I've managed with these projects. I've learned some new techniques - how to use a zipper foot, sewing curves, simple patchworking. I've also become a lot more confident with using my sewing machine, for example how to thread the machine and how to wind bobbins.

I still have an unopened Christmas print fat quarter bundle which I bought with a voucher last year. I have a few ideas but I'm a bit nervous because I really like the fabric! I'm wondering about a patchwork table runner or place mats, or perhaps some way of incorporating a display for the gorgeous Christmas cross stitch kits that I need to get on and finish. 

I also now have a bag of fabric scraps which need using up, so I can see some more patchwork projects in my future!

Monday, 30 May 2022

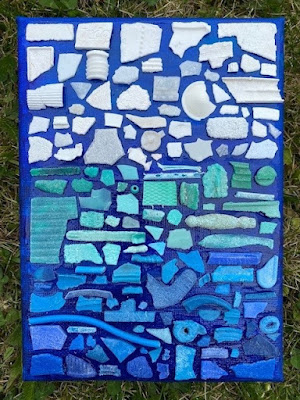
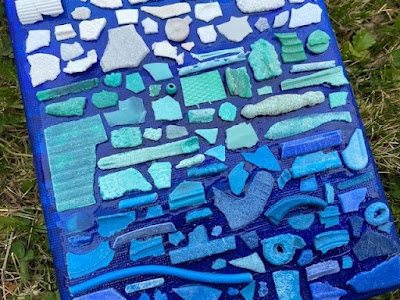
A collage using plastic from the beach

A couple of weeks ago I wrote a post about the plastic that we collected from the beach in Mauritius. I brought back a bag full of pieces of plastic, most of them measuring less than 1cm across. There were a few different colours, but the majority of them were blue, green and white, so I decided to use some of them to make a collage which is the same colours as the sea by which they were found.

Marine and beach plastic collage in blue and green

For the background I used a small canvas 5" x 7" (currently three for £5 in The Works). I painted it with acrylic paints in a variety of different blues, slightly darker at the bottom and lighter at the top. Then when it was dry I stuck down the plastic pieces.

Beach art plastic collage close up

I wasn't sure of the best way to glue them, so I just painted a thick layer of PVA glue onto the canvas and placed them down, having planned out parts of the arrangement on a spare canvas beforehand. I began by placing the larger pieces then filled in with the smaller ones, using tweezers. I had quite a few long thin pieces which I arranged horizontally. I tried to mix up the different shades and textures and include the most interestingly shaped pieces.

Making art using marine plastic collected from the beach

I was inspired to do this by various plastic artworks that I've seen online, particularly on Instagram. I'm planning to share some of my favourite accounts to follow soon. It's just a shame that this artwork has to exist at all. I've become much more conscious of rubbish on the beach lately. Luckily our local beaches aren't too bad, but I can usually find a few pieces to put in the bin when I'm by the sea. Hopefully this collage will remind me to be more conscious of the plastic that I'm using and throwing away.

Friday, 22 April 2022

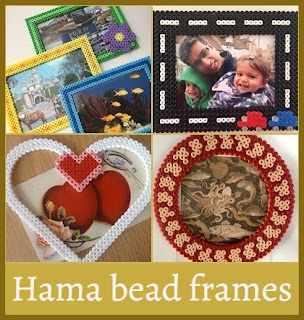
Making frames for pictures using Hama beads

Hama bead frames designs and patterns
 
Over the years on my blog I've shared many Hama bead crafts and projects, and some of my favourites are the Hama bead frames. I really like Hama bead projects with a practical purpose and I have lots of frames on display with my favourite photographs and postcards. Here are some of my favourites, click on the link for a full tutorial:

Hama bead heart frames

These heart frames are made using the large Hama bead heart pegboard which is a really versatile pegboard.

Hama bead heart frames for Valentine's Day crafts


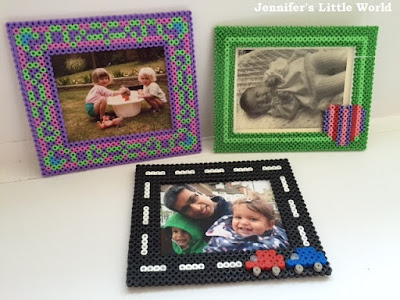
Hama bead photo frames

These simple frames are made using a square pegboard. For a larger frame can link official Hama bead pegboards together using slots at sides so you can make them as large as you like, or until your bead stash runs out! My favourite is the car themed frame with tiny cars which stick to the front of the frame.

Hama bead frames for photographs


Hama bead summer themed frame designs

These frames have a summer theme, with bright colours and one with an extra flower embellishment.

Hama bead photograph frames


Hama bead Roman mosaic border ideas

We made these Roman frames when we were having a Roman themed day. This one uses the large circular pegboard and you can also see some designs using the square pegboard.

Hama bead Roman mosaic inspired frames

Hama bead Easter egg frames


Finally I used the large Easter egg pegboard to make these Easter themed frames. We stuck coloured tissue paper to the back to use them as seasonal suncatchers in the window.

Hama bead Easter egg frames for suncatchers


Happy Hama bead crafting!